The Ultimate Creamy & Cheesy Chili Cheese Dip Recipe for Game Day
If you’re searching for the perfect warm, rich, and utterly irresistible appetizer, this **chili cheese dip** is your absolute answer. Imagine a luscious, super creamy base made from perfectly softened cream cheese, tangy sour cream, and smooth mayonnaise. This decadent foundation is then generously layered with your favorite canned chili, and finally, crowned with a generous blend of shredded cheddar and mozzarella cheese, promising a beautifully melty and gooey finish that will have everyone reaching for more.

This isn’t just *a* chili cheese dip; it’s hands down the **best chili cheese dip** for game day, a festive holiday gathering, or any casual get-together where delicious food is a must. Its rich flavor and creamy texture make it an instant crowd-pleaser. For an extra special touch, consider topping it with fresh cilantro, thinly sliced green onions, or even some pickled jalapeños before serving. It pairs wonderfully with classic tortilla chips, sturdy corn chips, or even a selection of your favorite crackers. Best of all, this incredible dip requires only a few minutes of hands-on prep before it’s ready to bake to bubbly perfection in your oven, leaving you more time to enjoy your guests and the game!
If you’re a true fan of creamy, cheesy dips, you absolutely must add my pepperoni pizza dip or my irresistibly savory jalapeño popper dip to your must-try list next. They share the same crowd-pleasing qualities and easy preparation!
Recipe Highlights: Why You’ll Love This Chili Cheese Dip
- Effortlessly Easy Chili Cheese Dip: This recipe truly lives up to its “easy” title. With just a handful of staple ingredients and a quick 20-25 minutes in the oven, you’ll have a show-stopping appetizer ready. It’s perfect for busy hosts who want big flavor without the fuss.
- The Ultimate Game Day Appetizer: Whether it’s the Super Bowl, a playoff game, or just a casual weekend gathering with friends, this creamy and cheesy chili dip is guaranteed to be a hit. Its warm, comforting nature and rich flavors make it the ideal companion for cheering on your favorite team. Don’t forget to bookmark this recipe – your future self on Super Bowl Sunday will definitely thank you!
- Incredibly Creamy and Perfectly Cheesy: The secret to this dip’s phenomenal texture lies in the base. The winning combination of softened cream cheese, sour cream, and mayonnaise creates an incredibly smooth, scoopable, and rich foundation. When baked, the generous layer of shredded cheddar and mozzarella melts into a gooey, stretchy blanket, ensuring every chip comes out perfectly loaded with deliciousness, without breaking.
- Customizable to Your Taste: This recipe offers fantastic flexibility. You can easily adjust the spice level, choose your favorite type of chili (with or without beans), and experiment with different cheese blends to make it uniquely yours.
- Quick Prep Time: With only 10 minutes of preparation needed, you can quickly assemble this dip and get it into the oven, allowing you to focus on other party preparations or simply relax before your guests arrive.
[feast_advanced_jump_to]
Essential Ingredients for Your Cream Cheese Chili Cheese Dip
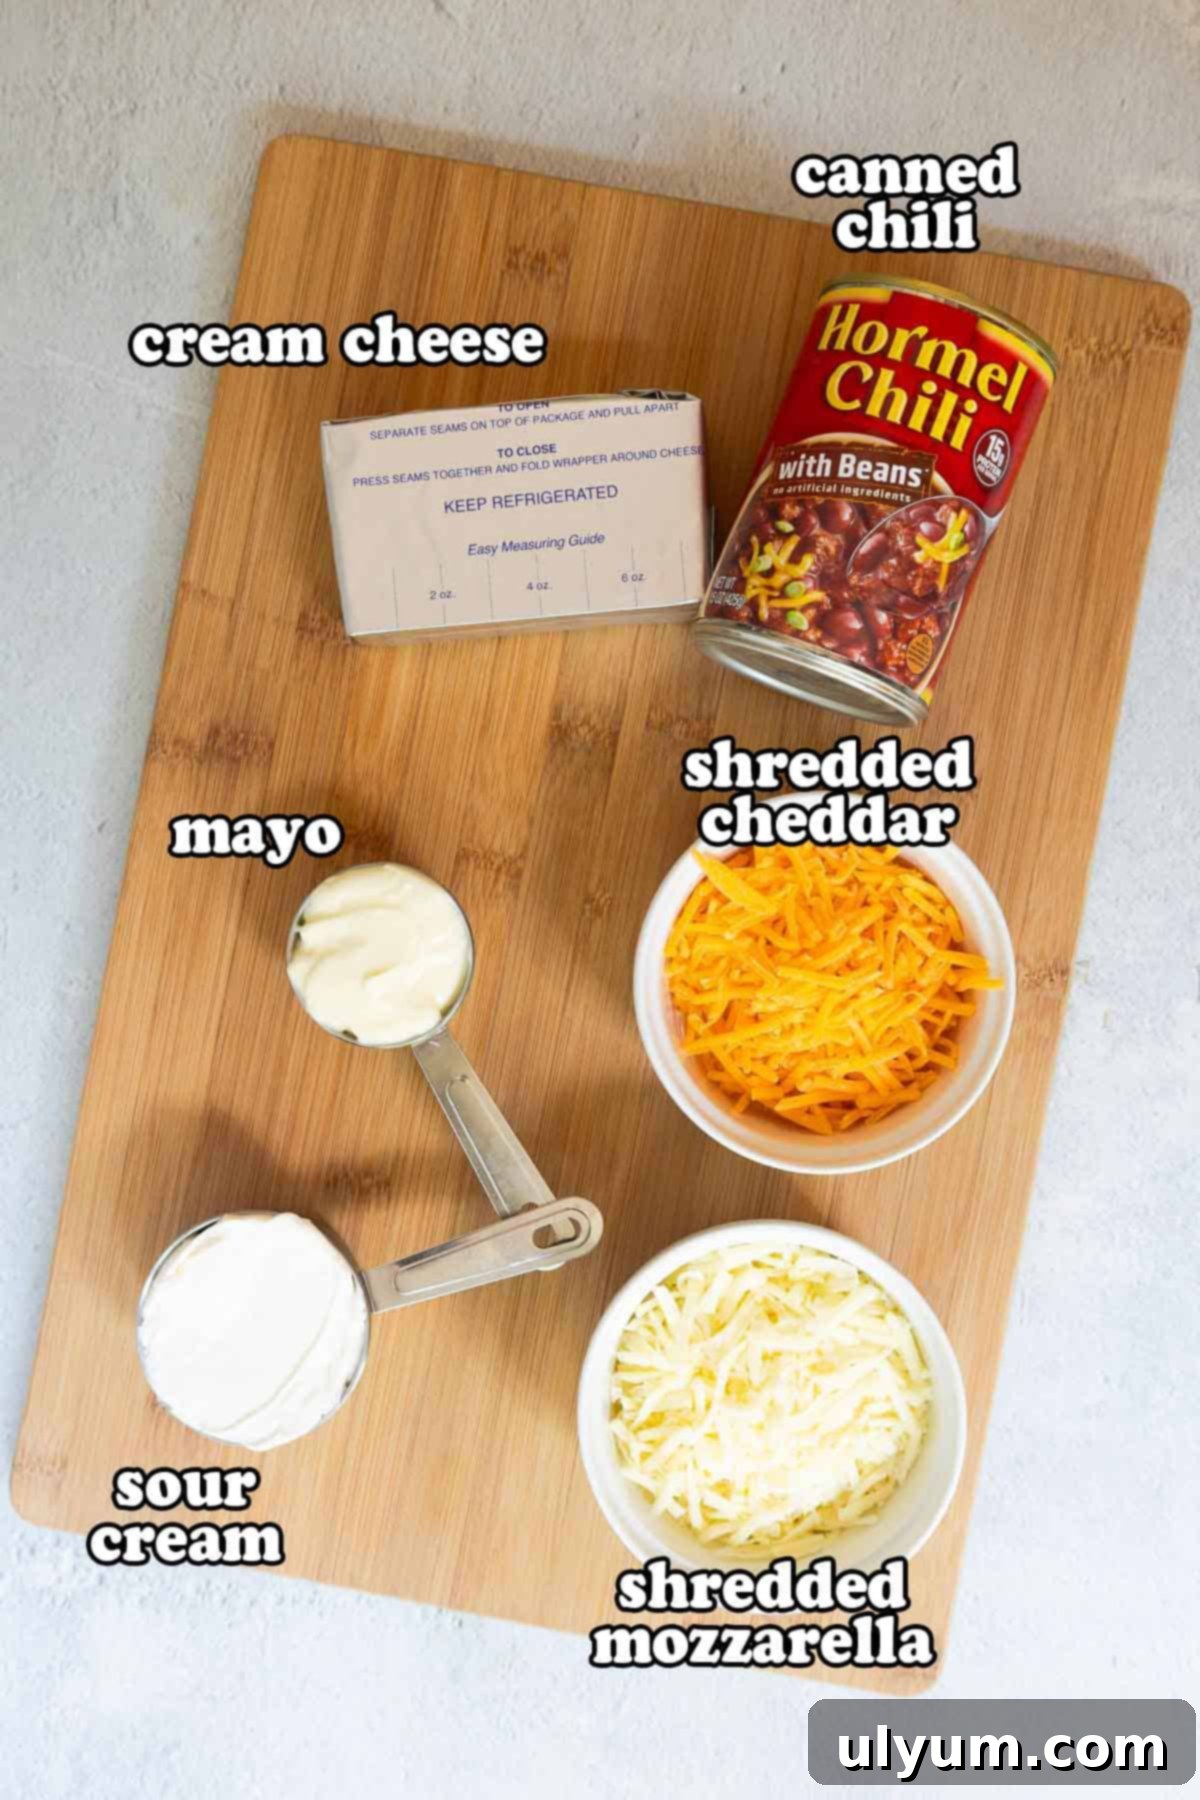
Gathering your ingredients is the first step to creating this unforgettable dip. Here’s a closer look at what you’ll need and why each component is vital:
- Cream Cheese: A single 8-ounce block of full-fat cream cheese is essential for that rich, creamy base. Make sure it’s softened to room temperature before you start. This makes it incredibly easy to mix with the other ingredients, ensuring a smooth, lump-free consistency that spreads evenly in your baking dish.
- Sour Cream: Adding half a cup of sour cream introduces a delightful tang to the dip, balancing the richness of the cream cheese and mayonnaise. It also helps to lighten the overall consistency, making the dip perfectly scoopable and preventing your chips from breaking.
- Mayonnaise: A quarter cup of mayonnaise contributes significantly to the silky-smooth texture and adds another layer of richness to the creamy base. It helps everything blend beautifully, resulting in a cohesive and satisfying dip.
- Canned Chili: One 15-ounce can of your favorite chili is the star of the show! Feel free to choose any brand you love, such as Hormel chili or Wendy’s. You have the flexibility to use chili with or without beans, depending on your preference. Just ensure it’s a robust flavor that will stand up to the creamy cheese.
- Shredded Cheese Blend: A delightful mix of half a cup of shredded cheddar cheese and half a cup of shredded mozzarella cheese creates the perfect cheesy topping. Cheddar brings a sharp, savory flavor, while mozzarella offers that incredible, stretchy, melty pull everyone loves. This blend ensures the dip is not only delicious but also visually appealing when served hot and bubbly.
For precise measurements and detailed nutritional information, please refer to the complete recipe card below.
Easy Step-by-Step Instructions
Get ready to create a truly delicious appetizer with these simple steps. Preheat your oven to 350°F (175°C) to ensure it’s hot and ready when your dip is assembled.
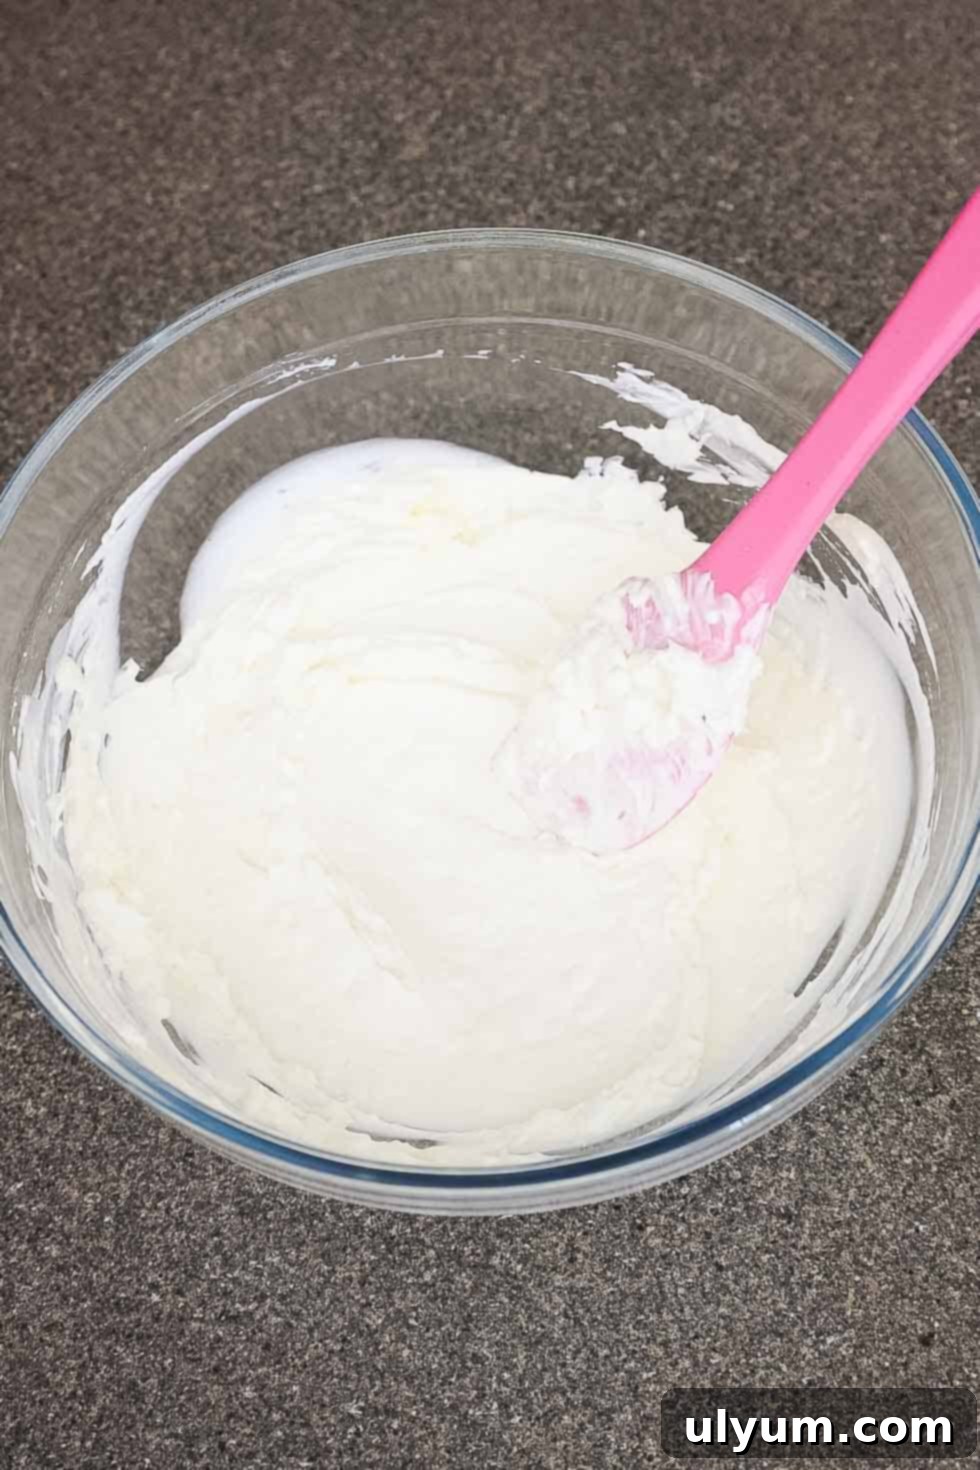
Step 1: Prepare the Creamy Base. In a medium-sized mixing bowl, combine the softened cream cheese, sour cream, and mayonnaise. Stir these ingredients together thoroughly until they are well combined. Don’t worry if there are a few small lumps of cream cheese – they will melt into a perfectly smooth consistency in the oven. This creamy mixture forms the delicious, rich foundation of your dip.
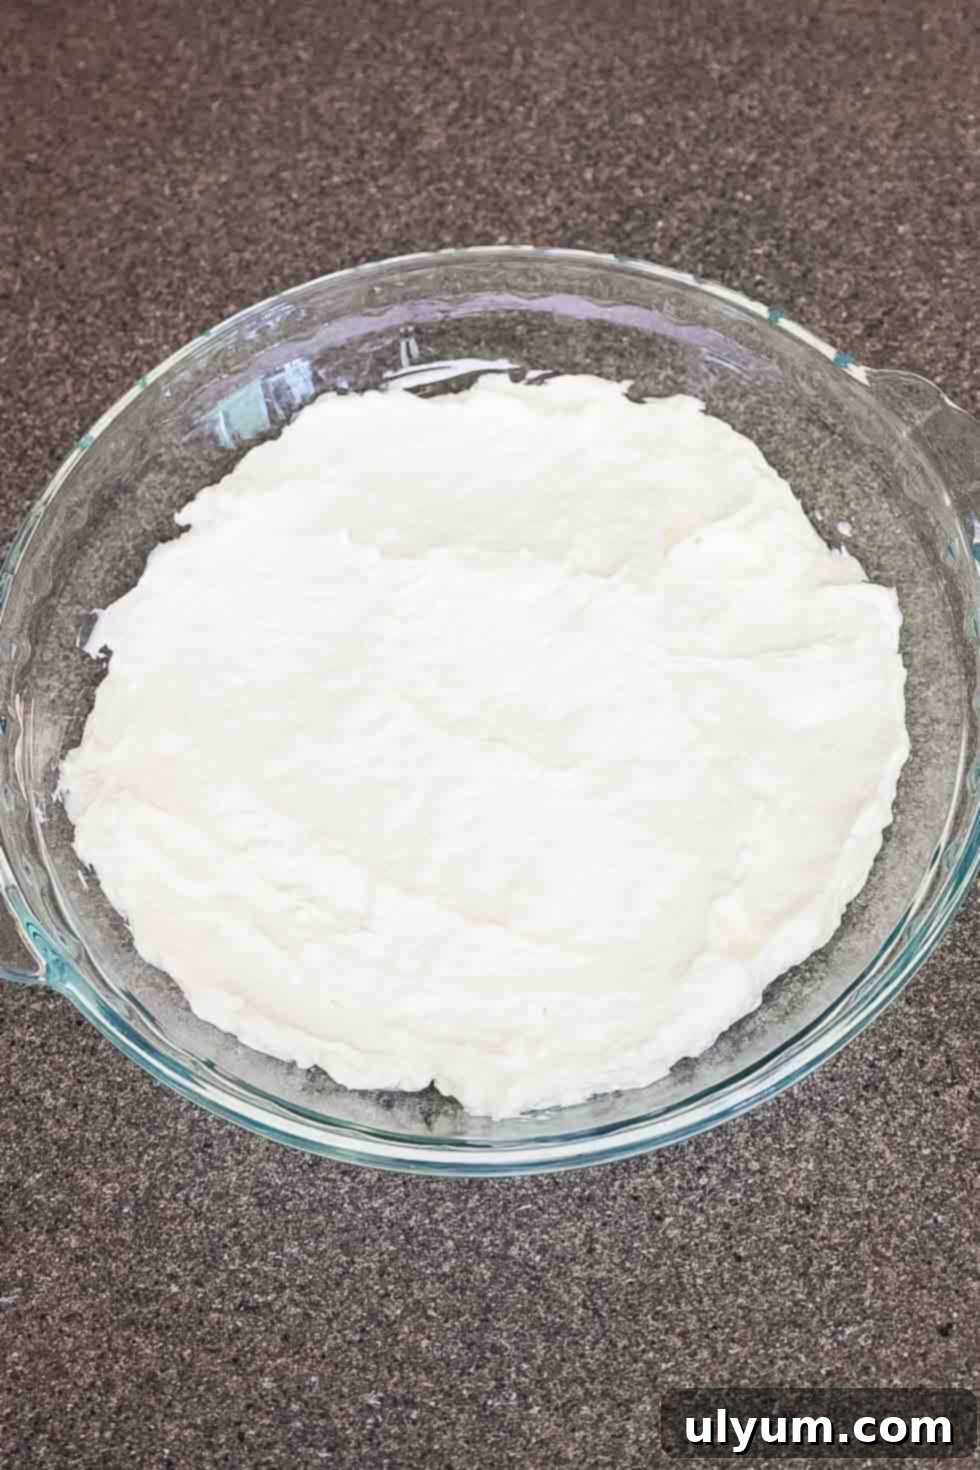
Step 2: Spread the Base. Once your creamy base is mixed, spread it evenly into the bottom of your chosen baking dish. An 8×8-inch square baking dish or a 9-inch pie dish works perfectly for this recipe, providing enough surface area for all the delicious layers to shine. A uniform layer ensures even heating and a consistent bite.
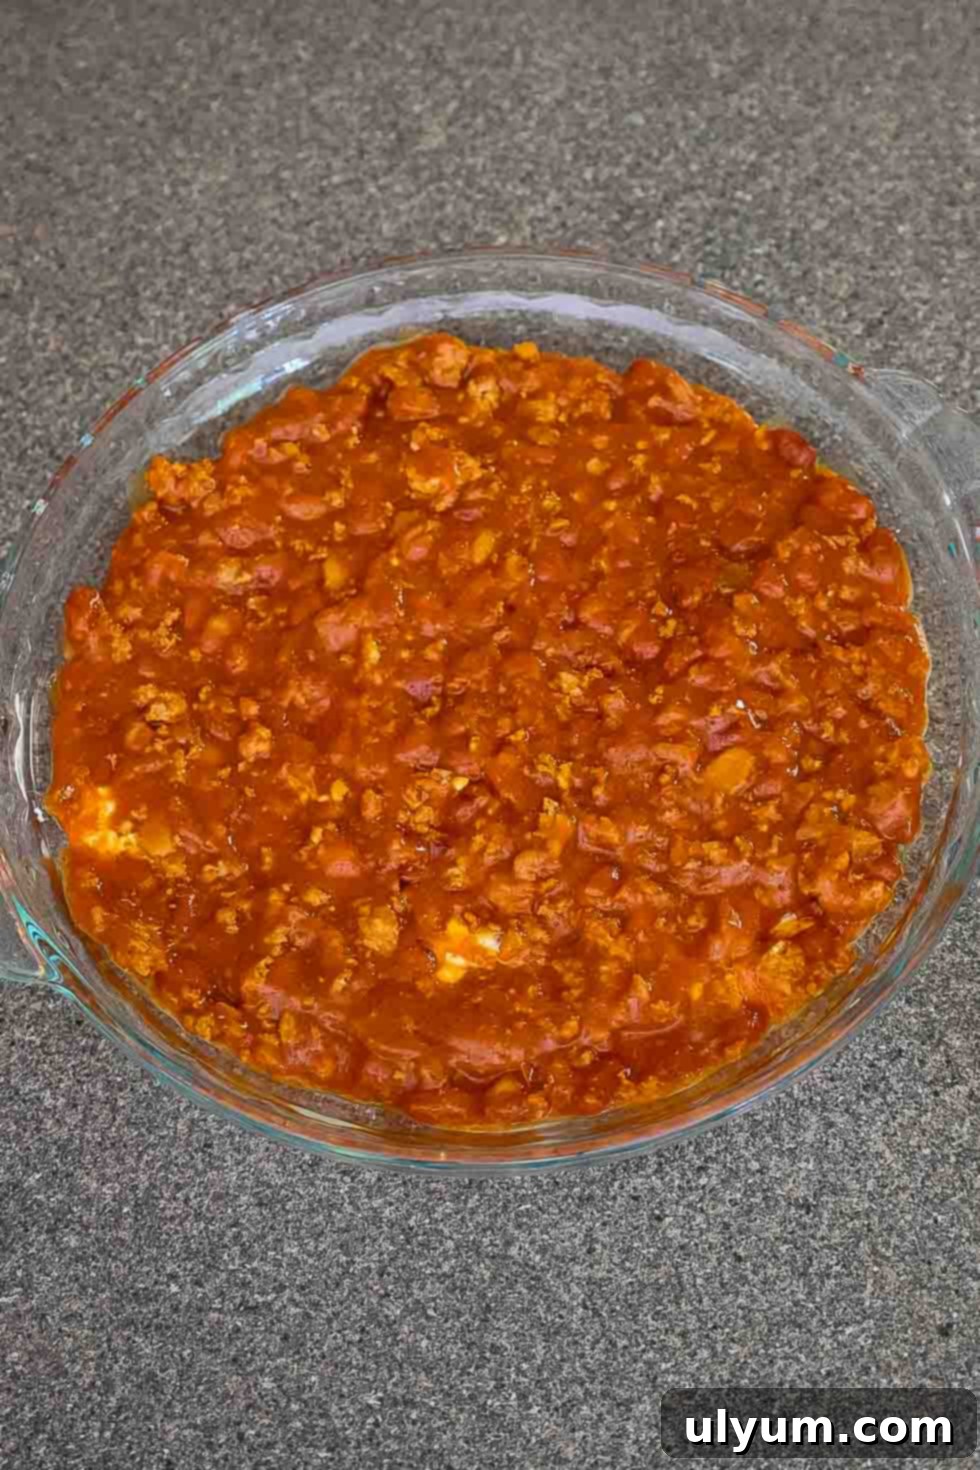
Step 3: Add the Chili Layer. Carefully pour the entire can of chili over the cream cheese mixture. Spread it out gently to create an even layer that covers the creamy base from edge to edge. This ensures every scoop gets a perfect balance of chili and creaminess.
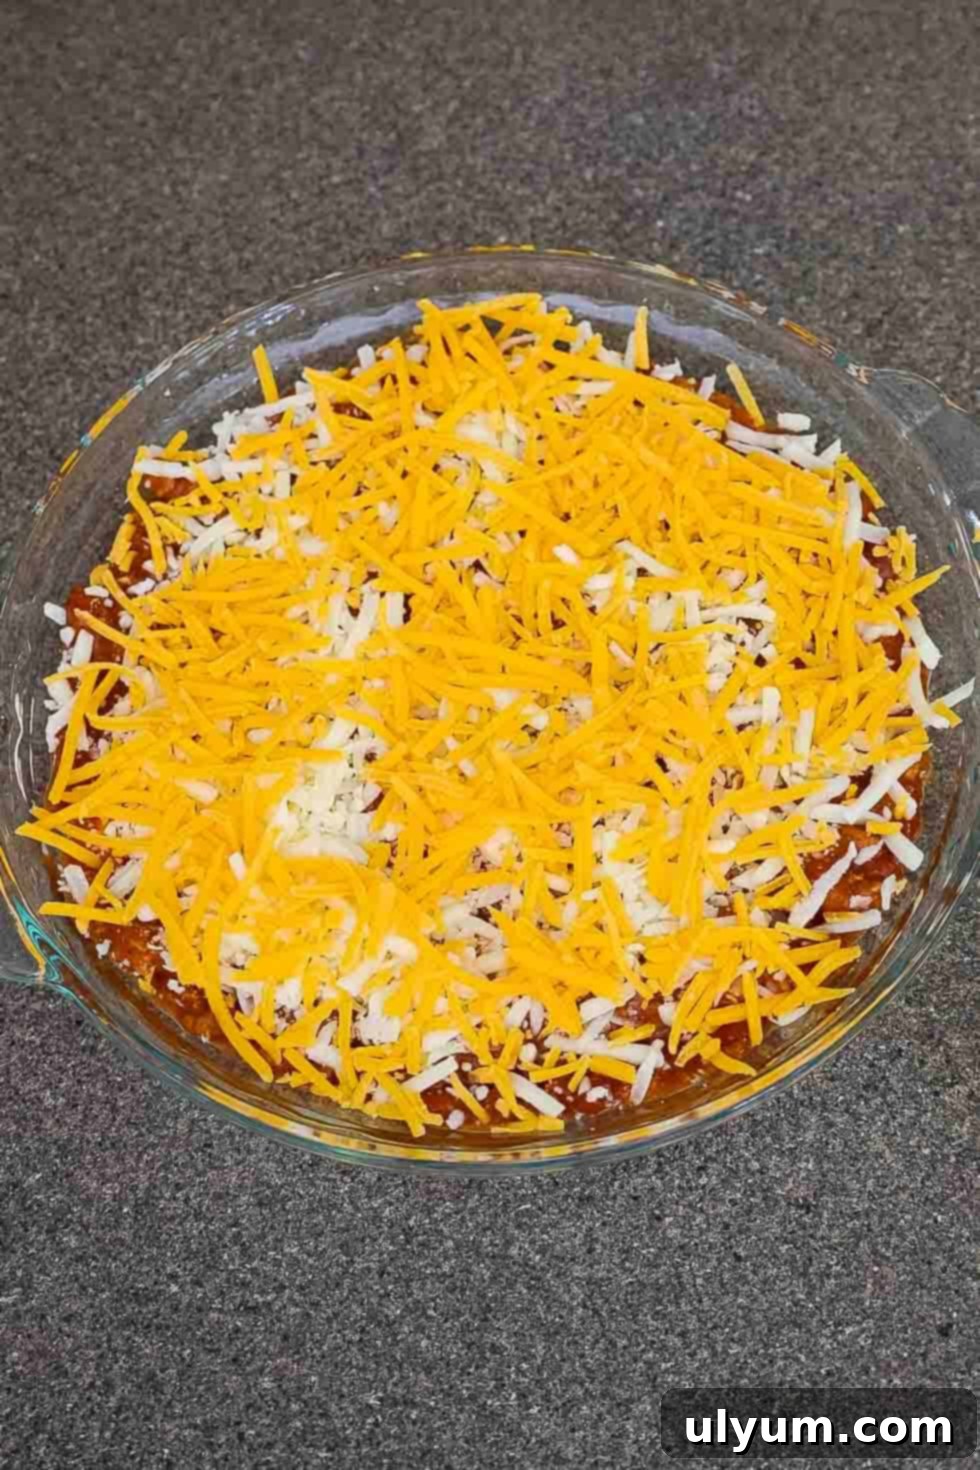
Step 4: Top with Cheese. Generously sprinkle the shredded cheddar and mozzarella cheese blend over the entire surface of the chili layer. Make sure to cover it completely for maximum meltiness and flavor. This cheese topping will bubble and turn golden brown, forming a delicious crust.

Step 5: Bake to Perfection. Place the baking dish in your preheated oven and bake for 20–25 minutes. You’ll know it’s ready when the dip is hot and bubbly around the edges, and the cheese on top is beautifully melted and lightly golden. Keep an eye on it to prevent over-browning.

Step 6: Cool and Serve. Once baked, remove the dip from the oven and allow it to cool for at least 5 minutes. This cooling time is crucial as it helps the dip set slightly, making it easier to scoop and preventing burns. Serve this heavenly warm dip with a variety of dippers: classic tortilla chips, hearty corn chips, your favorite crackers, or slices of a crusty baguette are all excellent choices. Enjoy your ultimate chili cheese dip!
Creative Substitutions for Your Chili Cheese Dip
This chili cheese dip recipe is wonderfully flexible, allowing you to tailor it to your dietary needs or simply experiment with different flavor profiles. Here are some smart substitutions:
- Canned Chili Alternatives: While a standard canned chili is convenient, feel free to use your absolute favorite chili. This could be a batch of leftover homemade chili, which often offers deeper flavors, or a vegetarian chili for a meat-free option. If using homemade chili, approximately 1¾ cups will replace a standard 15-ounce can. You can also experiment with different chili varieties, such as a smoky chipotle chili or a spicier blend, to change the dip’s character.
- Dairy Swaps for the Creamy Base: For a lighter base, plain Greek yogurt can be an excellent alternative for sour cream, adding a similar tang and creaminess with fewer calories. If you don’t have mayonnaise on hand, you can certainly swap it for an equal amount of sour cream, though this might slightly alter the richness. For a super simple, 3-ingredient chili cheese dip (like the classic version), you can omit both sour cream and mayo entirely, using only cream cheese, chili, and cheddar (or a mixed cheese blend without mozzarella for less “pull”).
- Shredded Cheese Variations: Don’t limit yourself to just cheddar and mozzarella! This dip is fantastic with almost any melty cheese. Consider using pepper jack cheese for a spicy kick, Monterey Jack for a milder, creamier melt, a pre-made Mexican cheese blend for a robust flavor profile, or even a smoked gouda for a unique smoky twist. The key is to use a cheese that melts well and complements the chili.
Recommended Equipment for a Perfect Dip
Making this chili cheese dip is straightforward and doesn’t require a lot of fancy equipment. Here’s what I recommend to ensure the best results:
- Baking Dish: A sturdy 8×8-inch square baking dish or a 9-inch glass pie plate works perfectly for this recipe. These sizes ensure the dip bakes evenly and gets that desirable bubbly, golden crust on top. A cast iron skillet is another excellent option for rustic presentation and even heating.
- Mixing Bowl: You’ll need a medium mixing bowl for combining the cream cheese base ingredients. A glass or ceramic bowl is ideal, as it won’t react with the ingredients and is easy to clean.
- Mixing Utensil: A durable silicone spatula is great for mixing the creamy base ingredients and then spreading them evenly into the baking dish. Its flexible edge ensures you get every last bit of deliciousness. You could also use a hand mixer for the creamy layer if you prefer an absolutely lump-free, super smooth consistency, but rest assured, the lumps from hand-mixing will melt down beautifully in the oven either way.
- Cheese Grater (Optional but Recommended): While pre-shredded cheese is convenient, a box grater will allow you to shred your own cheese. This often results in a smoother, better melt, as freshly shredded cheese lacks the anti-caking agents found in pre-packaged varieties.
Behind the Recipe: My Journey to the Perfect Chili Cheese Dip
My love affair with chili cheese dip started way back in middle school, thanks to my cousins. They introduced me to the classic, minimalist 3-ingredient version: simply cream cheese, canned chili, and a layer of shredded cheddar. It was undeniably delicious in its simplicity – a true cornerstone of easy, satisfying party food.
Over the years, as my cooking skills evolved and my taste for creamy textures grew, I started to experiment. While the classic version is fantastic, I noticed it could sometimes be a bit stiff, leading to unfortunate broken chips when dipping. That’s when I introduced the dynamic duo of mayonnaise and sour cream to the cream cheese base. This addition was a game-changer! It not only enhances the richness and tang but, more importantly, makes the dip incredibly smooth and wonderfully scoopable. No more tragic chip casualties – just perfectly loaded scoops every single time.
My top tip, gleaned from years of making countless batches of this dip, remains the same: **use freshly shredded cheese.** While pre-shredded cheese is a super convenient time-saver (and it absolutely works!), taking a few extra moments to shred your own cheddar and mozzarella will yield a noticeably smoother, more even melt. The anti-caking agents in pre-shredded varieties can sometimes make the cheese slightly grainy, whereas fresh cheese melts into a gloriously gooey, unified layer. Either way you choose, you’re in for a treat, so go ahead and enjoy this elevated classic!

Serving Suggestions: What to Dip in Your Chili Cheese Dip
This hot and gooey chili cheese dip is incredibly versatile and pairs well with a variety of dippers and toppings. Get creative and customize your serving experience!
Best Dippers:
- Tortilla Chips: The classic choice! Scoop-shaped tortilla chips are especially good for capturing all the cheesy, chili goodness.
- Fritos or Corn Chips: These add a salty, crunchy texture that complements the creamy dip perfectly.
- Crackers: Hearty, sturdy crackers like Ritz or Wheat Thins are great for a slightly different crunch.
- Sliced Baguette or Crusty Bread: For a more substantial dipper, warm slices of French baguette or other crusty bread are fantastic.
- Vegetable Sticks: For a lighter option, offer carrot sticks, celery sticks, bell pepper strips, or cucumber slices.
- Pita Bread/Chips: Warm pita bread, cut into triangles, or crunchy pita chips offer a Mediterranean twist.
Optional Toppings for Extra Flavor:
- Fresh Herbs: Chopped cilantro or sliced green onions add a burst of freshness and color.
- Sour Cream or Greek Yogurt: A dollop on top can add extra creaminess and a cooling contrast.
- Salsa or Pico de Gallo: For a fresh, vibrant kick.
- Pickled Jalapeños: If you love a bit of heat, these are a must!
- Black Olives: Sliced black olives add a savory, briny note.
- Avocado or Guacamole: Creamy avocado adds another layer of richness.
Expert Tips for the Best Chili Cheese Dip
Achieving the perfect chili cheese dip is simple with a few insider tricks:
- Softened Cream Cheese is Key: Don’t skip this step! Allowing your cream cheese to come to room temperature makes it much easier to mix into a smooth base with the sour cream and mayonnaise. Cold cream cheese will result in a lumpy mixture that’s harder to spread.
- Shred Your Own Cheese for Optimal Melt: As mentioned in “Behind the Recipe,” freshly shredded cheese melts more smoothly and evenly than pre-shredded varieties, which often contain anti-caking agents. While pre-shredded still works, fresh will give you that glorious, gooey pull.
- Choose Your Chili Wisely: The flavor of your chili will largely define the taste of the dip. Pick a canned chili that you genuinely enjoy. If using homemade, ensure it’s not too watery; a thicker chili works best to prevent the dip from becoming soupy. You can drain excess liquid from canned chili if it seems very thin.
- Don’t Overbake: Bake until the dip is hot, bubbly, and the cheese is melted and lightly golden. Overbaking can cause the cheese to become oily and the dip to dry out around the edges.
- Resting Time is Important: While it’s tempting to dive right in, allowing the dip to cool for 5-10 minutes after baking helps it set up slightly. This makes it easier to scoop without making a mess and prevents burnt tongues!
Delicious Variations to Try
This recipe is a fantastic starting point, but don’t hesitate to get creative and customize your chili cheese dip:
- Spice It Up: For those who love heat, stir in a pinch of red pepper flakes into the cream cheese mixture, or add a few dashes of your favorite hot sauce. Topping with sliced fresh or pickled jalapeños also adds a wonderful spicy kick.
- Add More Meat: If your canned chili is bean-only or you just want more protein, brown about ½ lb of ground beef or sausage and mix it into your chili before layering. Drain any excess fat first. This creates an even heartier dip.
- Smoky Flavor Boost: Incorporate ½ teaspoon of smoked paprika or a dash of liquid smoke into the cream cheese base for a deeper, smoky undertone that pairs beautifully with the chili.
- Vegetarian Delight: Easily make this dip vegetarian by using your favorite canned or homemade vegetarian chili. Ensure all other ingredients (like the cheese) are also vegetarian-friendly if needed.
- Loaded Chili Cheese Dip: After baking, add your favorite chili toppings directly to the dip! Think crushed Fritos, extra diced onions, or even a drizzle of barbecue sauce.
Make Ahead & Storage Tips
This chili cheese dip is fantastic for meal prep and leftovers, making it even more convenient!
- Make Ahead: You can assemble the entire dip, up to the point of baking, up to a day in advance. Cover the baking dish tightly with plastic wrap and refrigerate. When you’re ready to serve, remove it from the fridge 30 minutes before baking to allow it to come closer to room temperature, then bake as directed. You might need to add an extra 5-10 minutes to the baking time if it’s going into the oven cold.
- Storage: Any leftover chili cheese dip should be stored in an airtight container in the refrigerator. It will stay fresh and delicious for up to 4 days.
- Reheating: To reheat, simply place individual servings in the microwave and heat in 30-second intervals, stirring in between, until heated through and the cheese is melty again. For larger portions, reheat in an oven-safe dish at 300°F (150°C) for 15-20 minutes, or until bubbly and hot. You can cover it loosely with foil to prevent the cheese from drying out.
Did you make this recipe? I’d love to hear what you think! Please take a moment to leave a rating and review—it helps me create high-quality recipes and lets others know what to expect from this delicious chili cheese dip.

Frequently Asked Questions (FAQ) About Chili Cheese Dip
Absolutely! This dip is an excellent make-ahead appetizer. You can assemble the entire dip (all layers) up to a day in advance. Simply cover it tightly with plastic wrap and refrigerate until you’re ready to bake and serve. This makes party planning so much easier!
An 8×8-inch square baking dish or a standard 9-inch pie dish works perfectly for this recipe. You could also use a small cast iron skillet for a rustic presentation and excellent heat retention. The key is a dish that allows for even spreading of the layers and provides enough surface area for the cheese to melt beautifully.
While you can use low-fat cream cheese or sour cream, be aware that it might slightly affect the overall richness and creamy texture of the dip. Full-fat dairy products tend to melt more smoothly and provide a more decadent mouthfeel. If using low-fat, the dip will still be delicious, just potentially a bit less rich.
The addition of sour cream and mayonnaise in this recipe specifically helps create a smoother, more scoopable base, reducing chip breakage. Also, ensure your cream cheese is well-softened before mixing. Choose sturdy, scoop-shaped tortilla chips for best results, and allow the dip to cool for 5-10 minutes after baking so it sets slightly.
📖 Recipe

Pin Recipe
Save RecipeSaved!
Email
Print
Cream Cheese Chili Cheese Dip
Equipment
-
Pie plate (9-inch)
-
Medium mixing bowl
-
Silicone spatula
Ingredients
- 8 ounces cream cheese softened
- ½ cup sour cream
- ¼ cup mayo
- 1 15 oz. can chili with or without beans
- ½ cup shredded mozzarella
- ½ cup shredded cheddar cheese
Instructions
-
Preheat oven to 350°F (175°C).
-
In a medium bowl, mix together the softened cream cheese, sour cream, and mayo until combined. It can have some small lumps.
-
Spread the mixture evenly into the bottom of a baking dish (an 8×8 or similar size works well).
-
Pour the chili evenly over the cream cheese in an even layer.
-
Sprinkle shredded cheese over the top.
-
Bake for 20–25 minutes, or until the dip is hot and bubbly.
-
Allow to cool for at least 5 minutes. Serve with tortilla chips, corn chips, crackers, or sliced baguette.
Video
Notes
Nutrition
