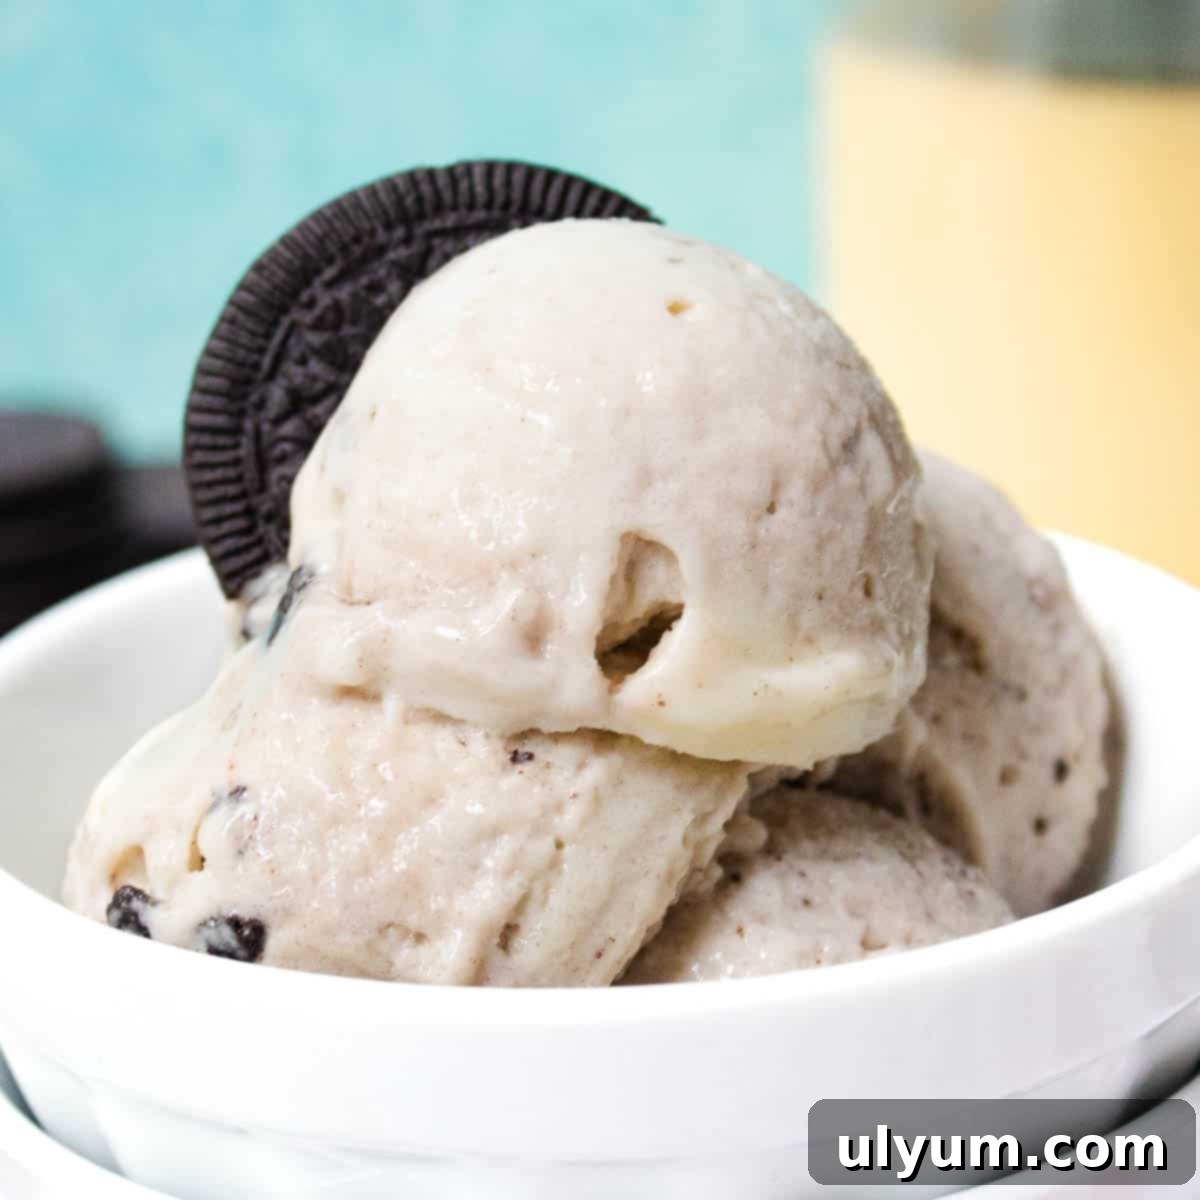
Ninja Creami Oreo Protein Ice Cream Recipe: Indulge in a Guilt-Free, High-Protein Treat
Craving a delightful dessert that satisfies your sweet tooth without derailing your health goals? Look no further than this incredible Ninja Creami Oreo Protein Ice Cream recipe! Crafted specifically for your Ninja Creami ice cream maker, this recipe transforms simple ingredients like a Fairlife Core Power shake, stevia, sugar-free instant pudding mix, and a few crushed Oreo Thins into a luscious, high-protein frozen treat. It’s the perfect solution for anyone seeking a healthier alternative to traditional ice cream, offering significantly fewer calories, less fat, and fewer carbohydrates while boasting an impressive protein punch.
Imagine indulging in a whole pint of rich, creamy vanilla ice cream swirled with iconic Oreo cookie pieces, all while knowing you’re fueling your body with quality protein. This homemade delight is designed to be both satisfying and macro-friendly. The magic truly happens when you start with a smooth vanilla base and utilize the Ninja Creami’s innovative mix-in function to evenly distribute those delightful Oreo Thins cookies throughout. While the ice cream mixture requires a minimum of 12 hours to freeze solid before processing, the anticipation and the incredible results make it absolutely worth the wait.
At the heart of this recipe is the Fairlife Core Power protein shake, renowned for its superior nutritional profile. These shakes are crafted from ultra-filtered milk, making them lactose-free and gluten-free, and delivering a substantial amount of high-quality protein. When paired with a sugar-free instant vanilla pudding mix, you achieve that classic vanilla flavor and, crucially, the perfect creamy texture that mimics traditional ice cream. The best part? You can truly enjoy the entire pint of this high-protein Oreo ice cream without any guilt!
This recipe for Ninja Creami Oreo protein ice cream not only tastes amazing but also fits perfectly into a balanced diet. Whether you’re a fitness enthusiast looking for a high-protein snack, or simply someone who loves dessert but wants a healthier option, this homemade treat delivers on all fronts. Get ready to experience the joy of creamy, delicious ice cream that actively supports your wellness goals.
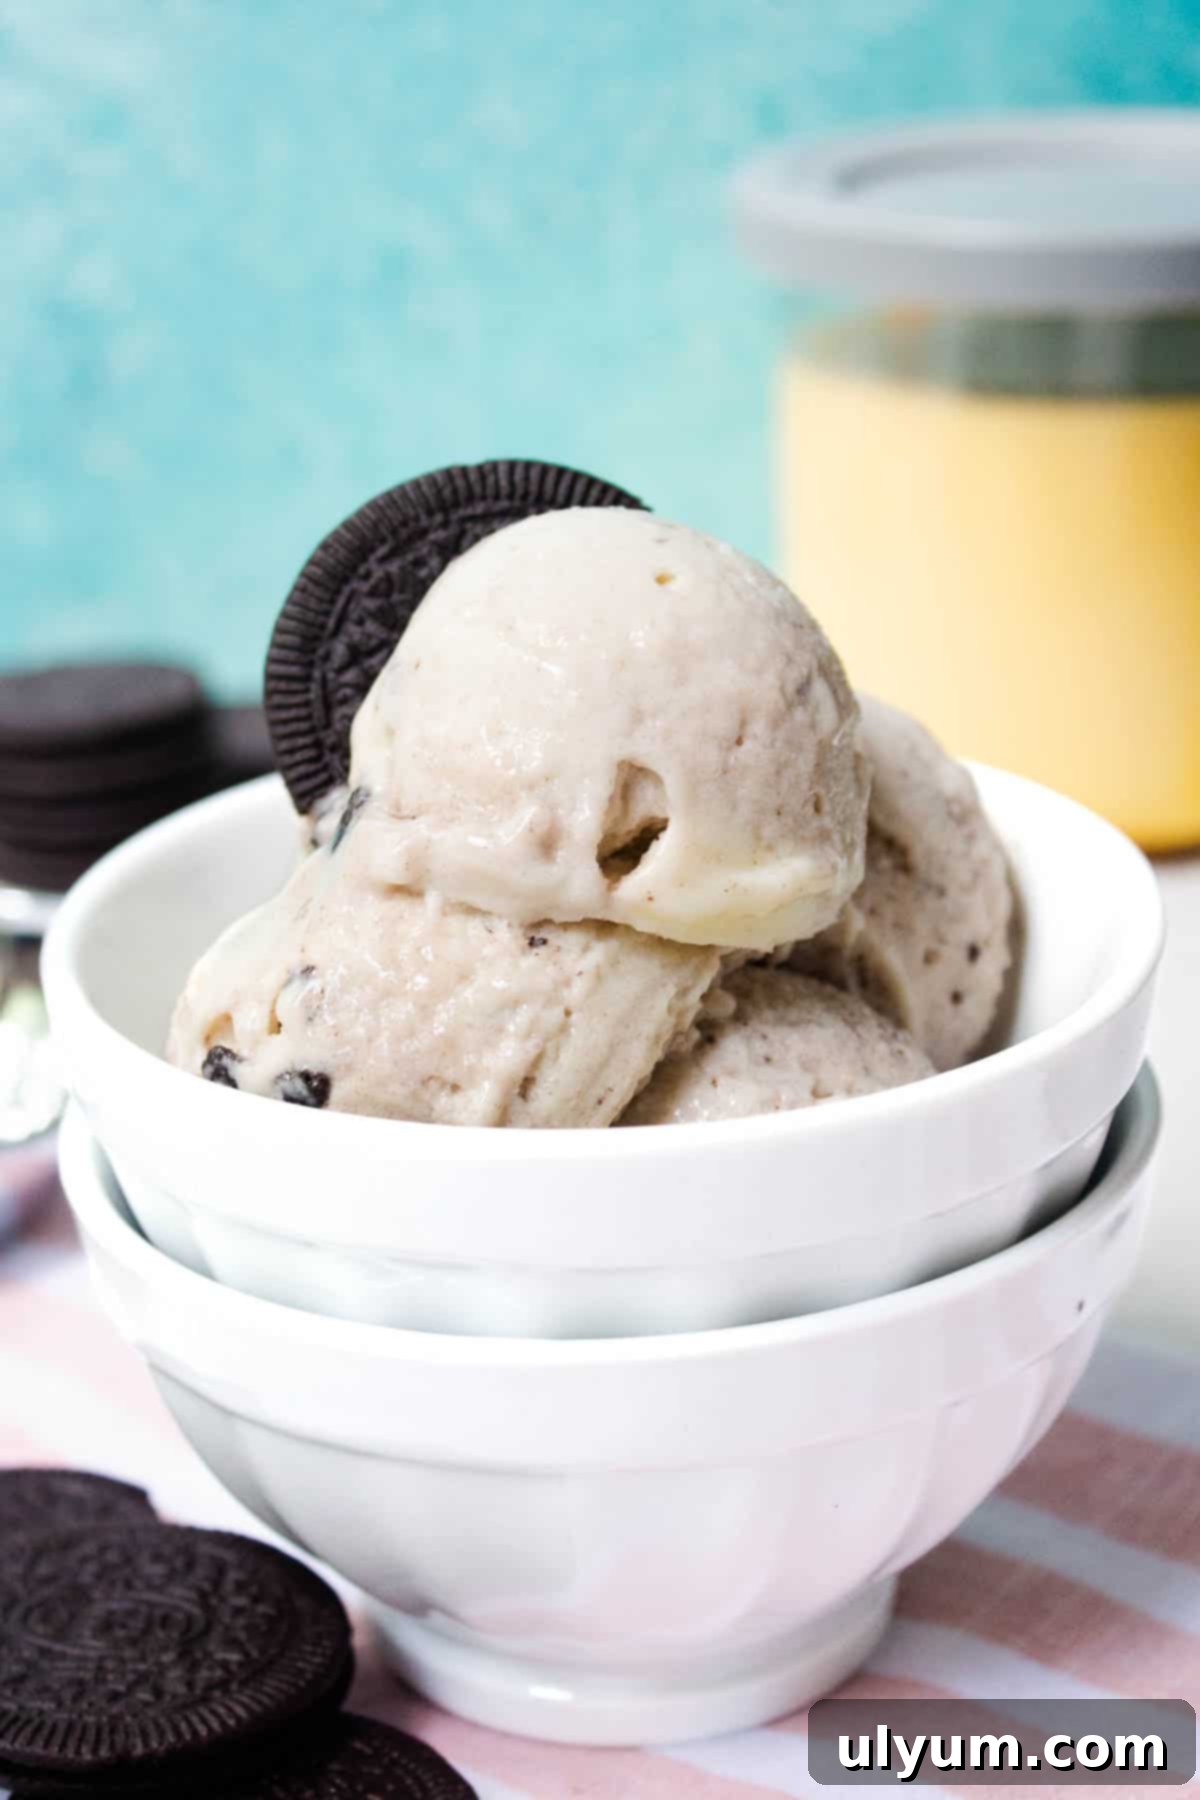
Why You’ll Love This High-Protein Oreo Ice Cream Recipe
This Ninja Creami Oreo protein ice cream isn’t just a treat; it’s a game-changer for your dessert routine. Here are just a few reasons why it’s quickly becoming a favorite:
- Minimal Ingredients: You only need 4 simple ingredients to create this delicious, healthy dessert. This means less time shopping and more time enjoying your homemade protein treat!
- Packed with Protein: Each entire pint delivers an impressive 27 grams of protein, making it an ideal post-workout snack or a satisfying, protein-rich dessert that supports muscle recovery and keeps you feeling full and satiated.
- Effortlessly Easy: This versatile vanilla ice cream base is incredibly simple to prepare, making it perfect for beginners and seasoned Creami users alike. While we’re adding Oreos, you can customize this base with virtually any mix-ins you desire – the possibilities are endless!
- Guilt-Free Indulgence: Enjoy a generous portion of ice cream without the high calorie, fat, or sugar content typically found in store-bought or traditional homemade alternatives. It’s a dessert you can genuinely feel good about, fitting seamlessly into various dietary plans.
- Unbeatable Flavor & Texture: Despite being a “lite” version, the carefully selected combination of ingredients ensures a rich vanilla flavor that perfectly complements the Oreo pieces. The texture is wonderfully creamy and scoopable, truly rivaling traditional ice cream, offering a delightful soft-serve experience right from your freezer.
This post contains affiliate links. As an Amazon Associate, I earn from qualifying purchases.
The Simple Ingredients for Your Ninja Creami Oreo Protein Ice Cream
Creating this delicious, high-protein ice cream requires just a few key ingredients, each playing a vital role in achieving the perfect flavor and consistency. Let’s break down what you’ll need and why these ingredients are chosen for optimal results in your Ninja Creami:
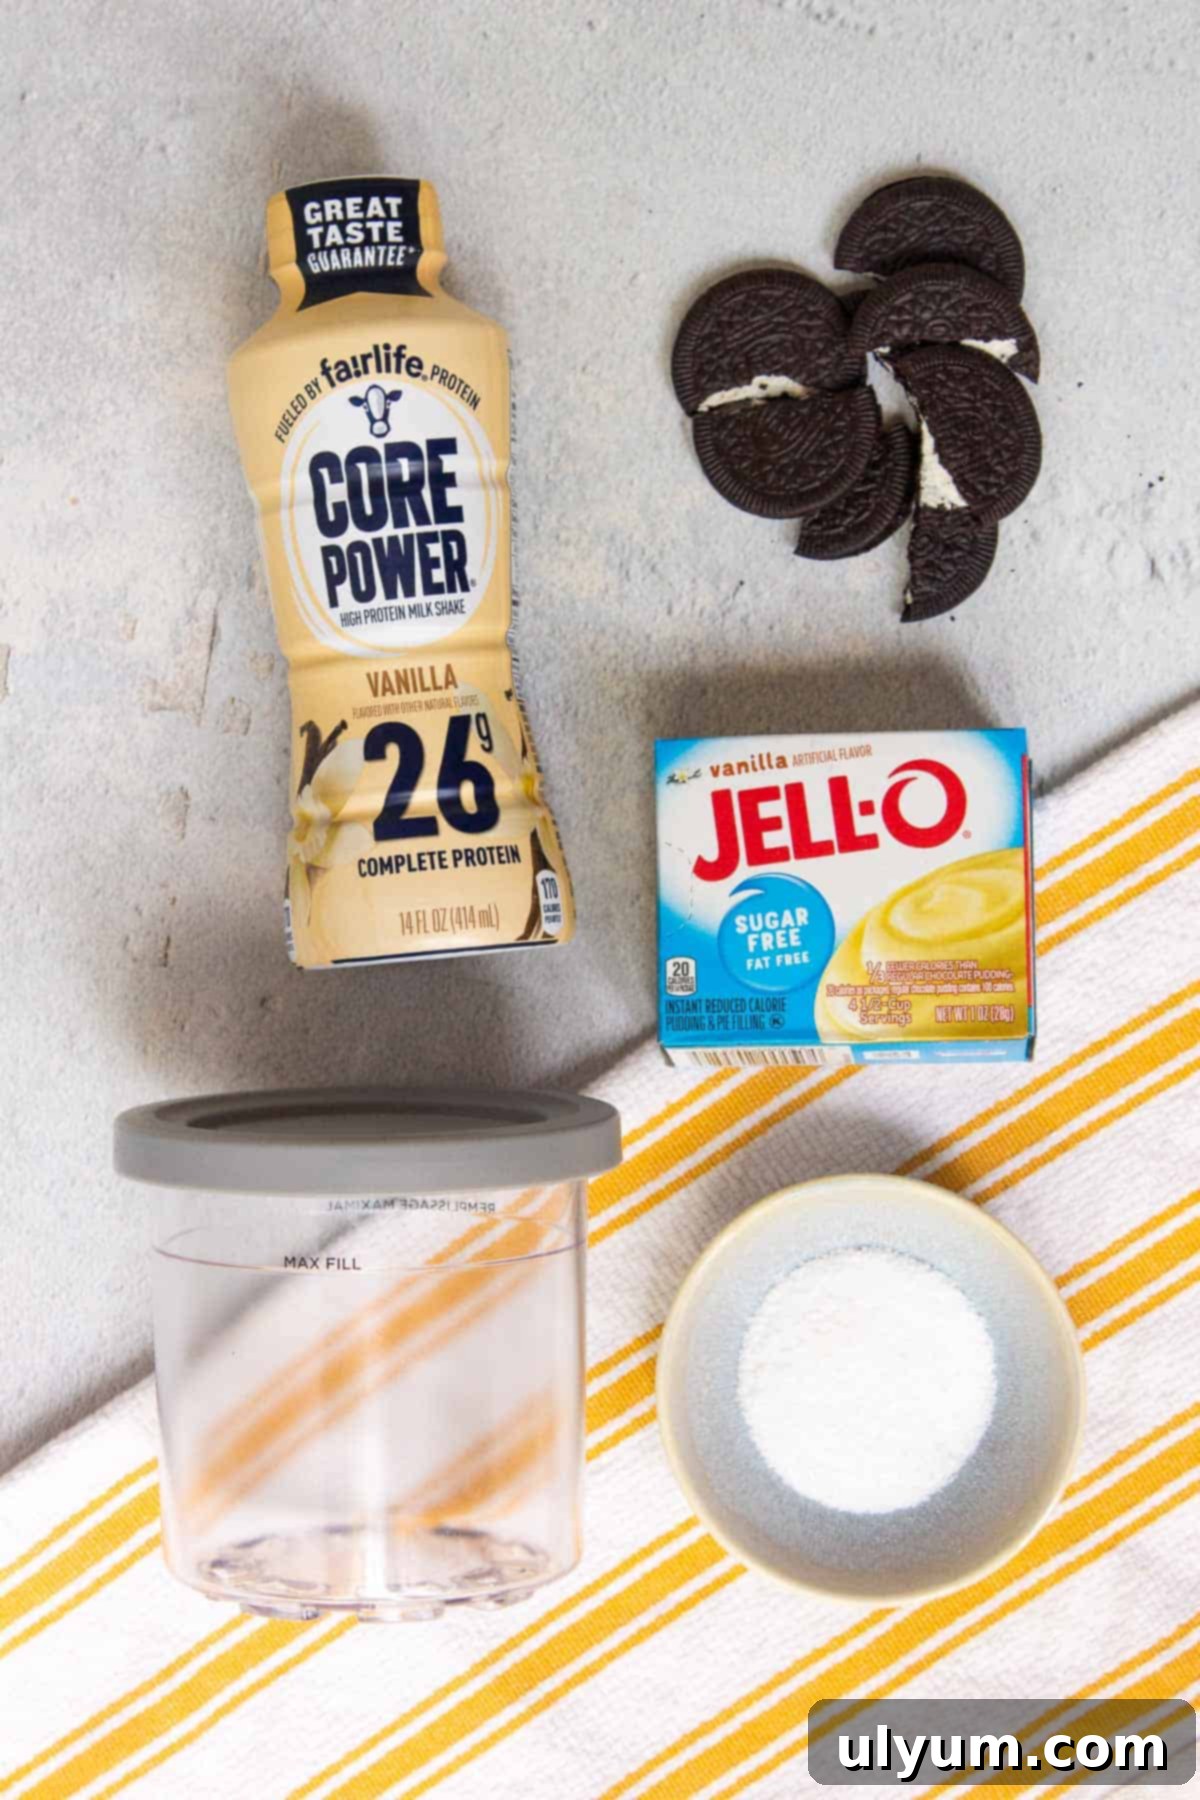
- Fairlife Core Power Vanilla Protein Shake: This is the cornerstone of our high-protein ice cream base. For this recipe, specifically look for the larger 14-ounce Core Power shakes (often found in the refrigerated section near other protein drinks), rather than the smaller 11.5-ounce Nutrition Plan shakes. Fairlife milk is uniquely ultra-filtered, a process that removes most of the lactose and natural sugars while concentrating the protein. This results in a lactose-free, gluten-free, and fat-free protein shake that provides a rich, creamy base for your ice cream. It contributes significantly to the recipe’s high protein content and smooth texture without adding unnecessary fat or sugar, making it an ideal choice for a healthy frozen treat.
- Stevia: As a zero-calorie sweetener blend, stevia allows you to achieve the perfect level of sweetness without any added sugar. Stevia is a natural alternative to sugar, derived from the stevia plant, making this dessert even more diet-friendly and suitable for those monitoring their blood sugar or carbohydrate intake. You can adjust the amount to precisely match your personal preference for sweetness, ensuring a perfectly balanced flavor profile.
- Sugar-Free Instant Pudding Mix (Vanilla or French Vanilla): This ingredient is a true secret weapon in many Ninja Creami recipes, especially for those aiming for a creamy, lower-fat dessert. It doesn’t just enhance the vanilla flavor; it acts as a binder and stabilizer. The starches in the pudding mix help absorb excess moisture and prevent large ice crystals from forming, giving the ice cream an incredibly creamy, scoopable consistency that closely mimics traditional soft-serve. This is absolutely essential for achieving that delightful, non-icy texture.
- Oreo Thins: These slim chocolate sandwich cookies provide the classic, beloved Oreo flavor and a satisfying, delicate crunch that makes this recipe truly special. Their thinner profile means they break down nicely within the ice cream during the mix-in cycle, distributing flavor and texture throughout without overwhelming the creamy base. You’ll want to break them roughly in half before adding them to ensure uniform distribution and satisfying bite-sized pieces in every scoop.
For exact quantities for both standard and deluxe pint sizes, please refer to the detailed recipe card below.
Step-by-Step Instructions for Your Homemade Oreo Protein Ice Cream
Making this high-protein Oreo ice cream with your Ninja Creami is a simple and rewarding process. Following these detailed steps will ensure you achieve the creamiest, most delicious results possible. Get ready to create a dessert that tastes indulgent yet perfectly aligns with your healthy lifestyle!
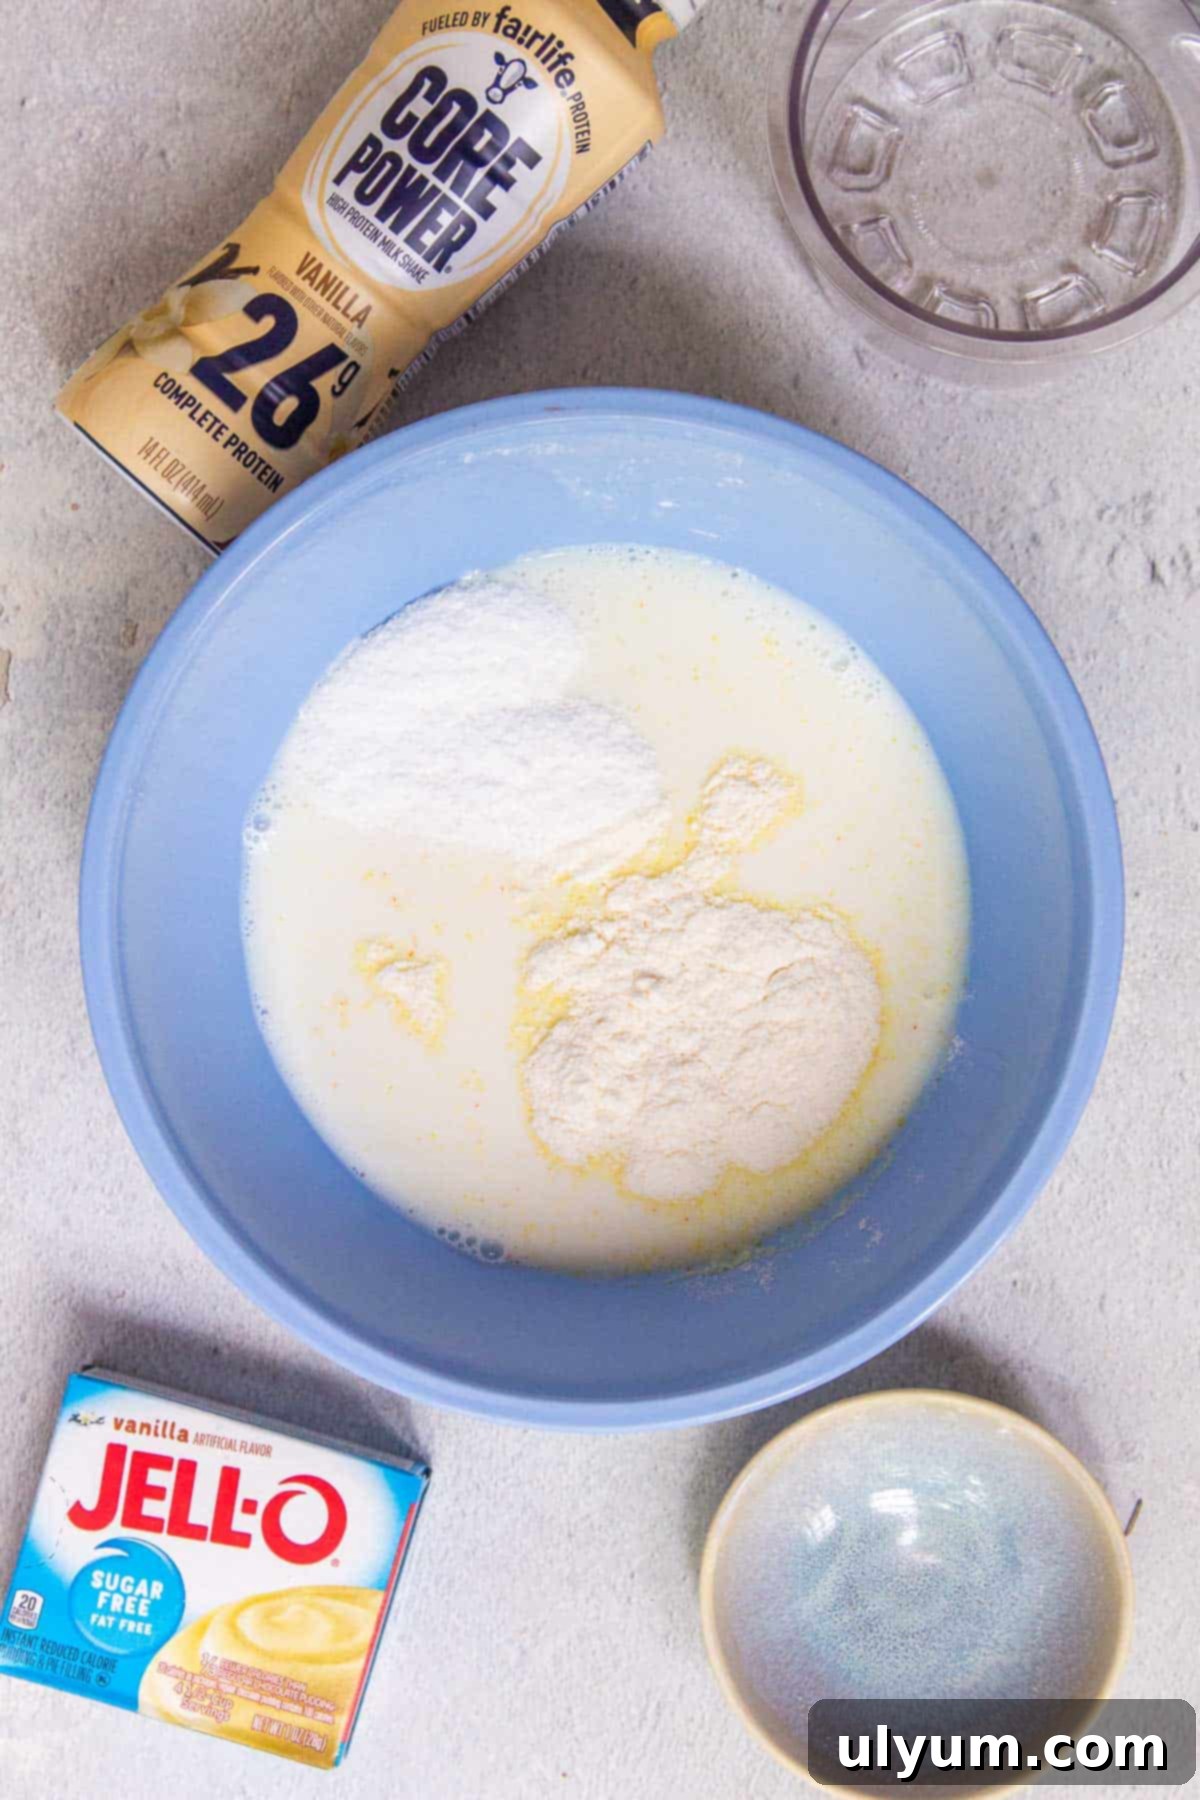
1. Prepare the Base Mixture: In a large mixing bowl, pour in the Fairlife Core Power protein shake. Add the stevia and the sugar-free instant pudding mix. Using a whisk, vigorously blend these ingredients together. Continue whisking until the stevia is fully dissolved and you don’t see any significant dry lumps from the pudding mix. While the pudding mix won’t entirely disappear into a perfectly clear liquid, aim for a smooth, consistent mixture. This crucial step ensures an even distribution of flavor and texture enhancers throughout your ice cream base.
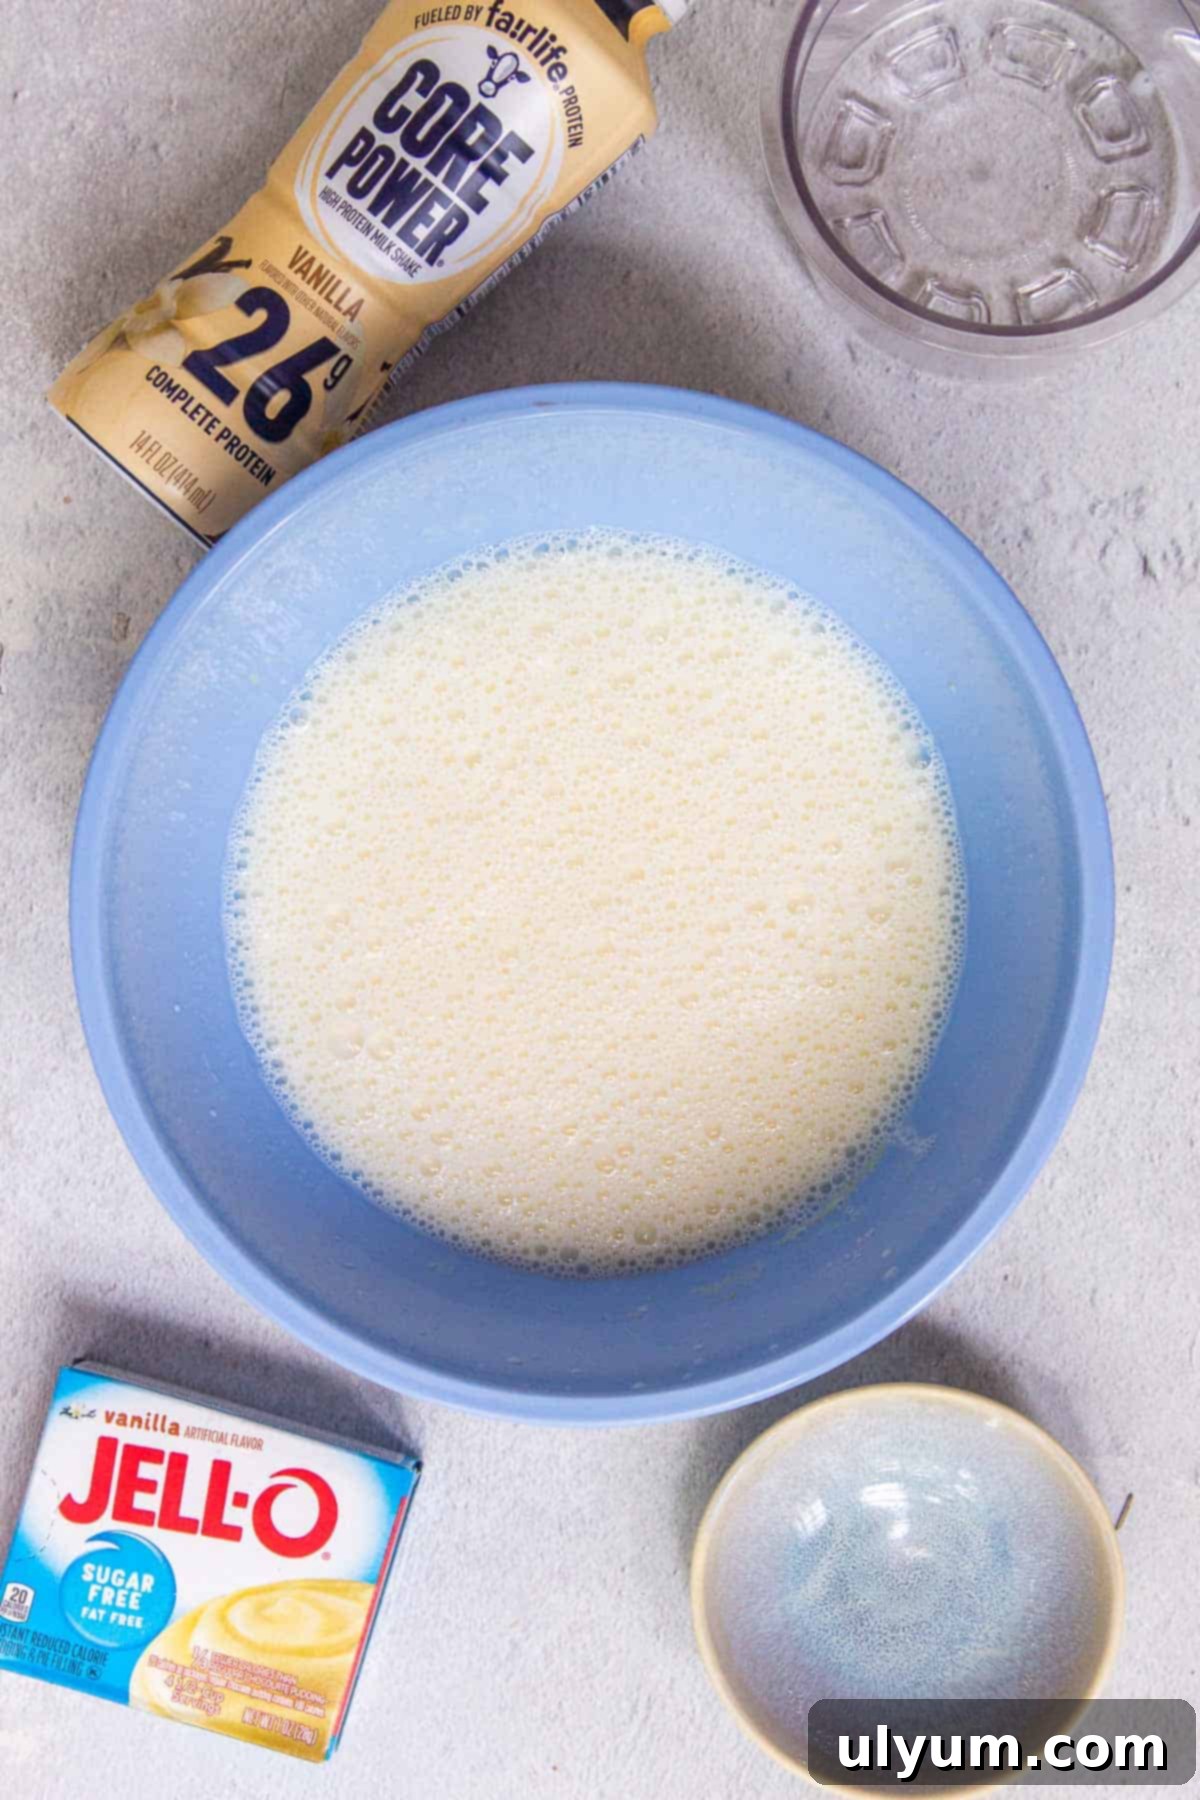
2. Allow Bubbles to Settle: After whisking, it’s beneficial to let the mixture rest for approximately 1 minute. This short pause allows any air bubbles that were created during the whisking process to rise and settle. Reducing air in the mixture can help prevent an overly icy texture in your final processed ice cream. Once the surface is relatively calm and smooth, you’re ready to proceed to the next step.
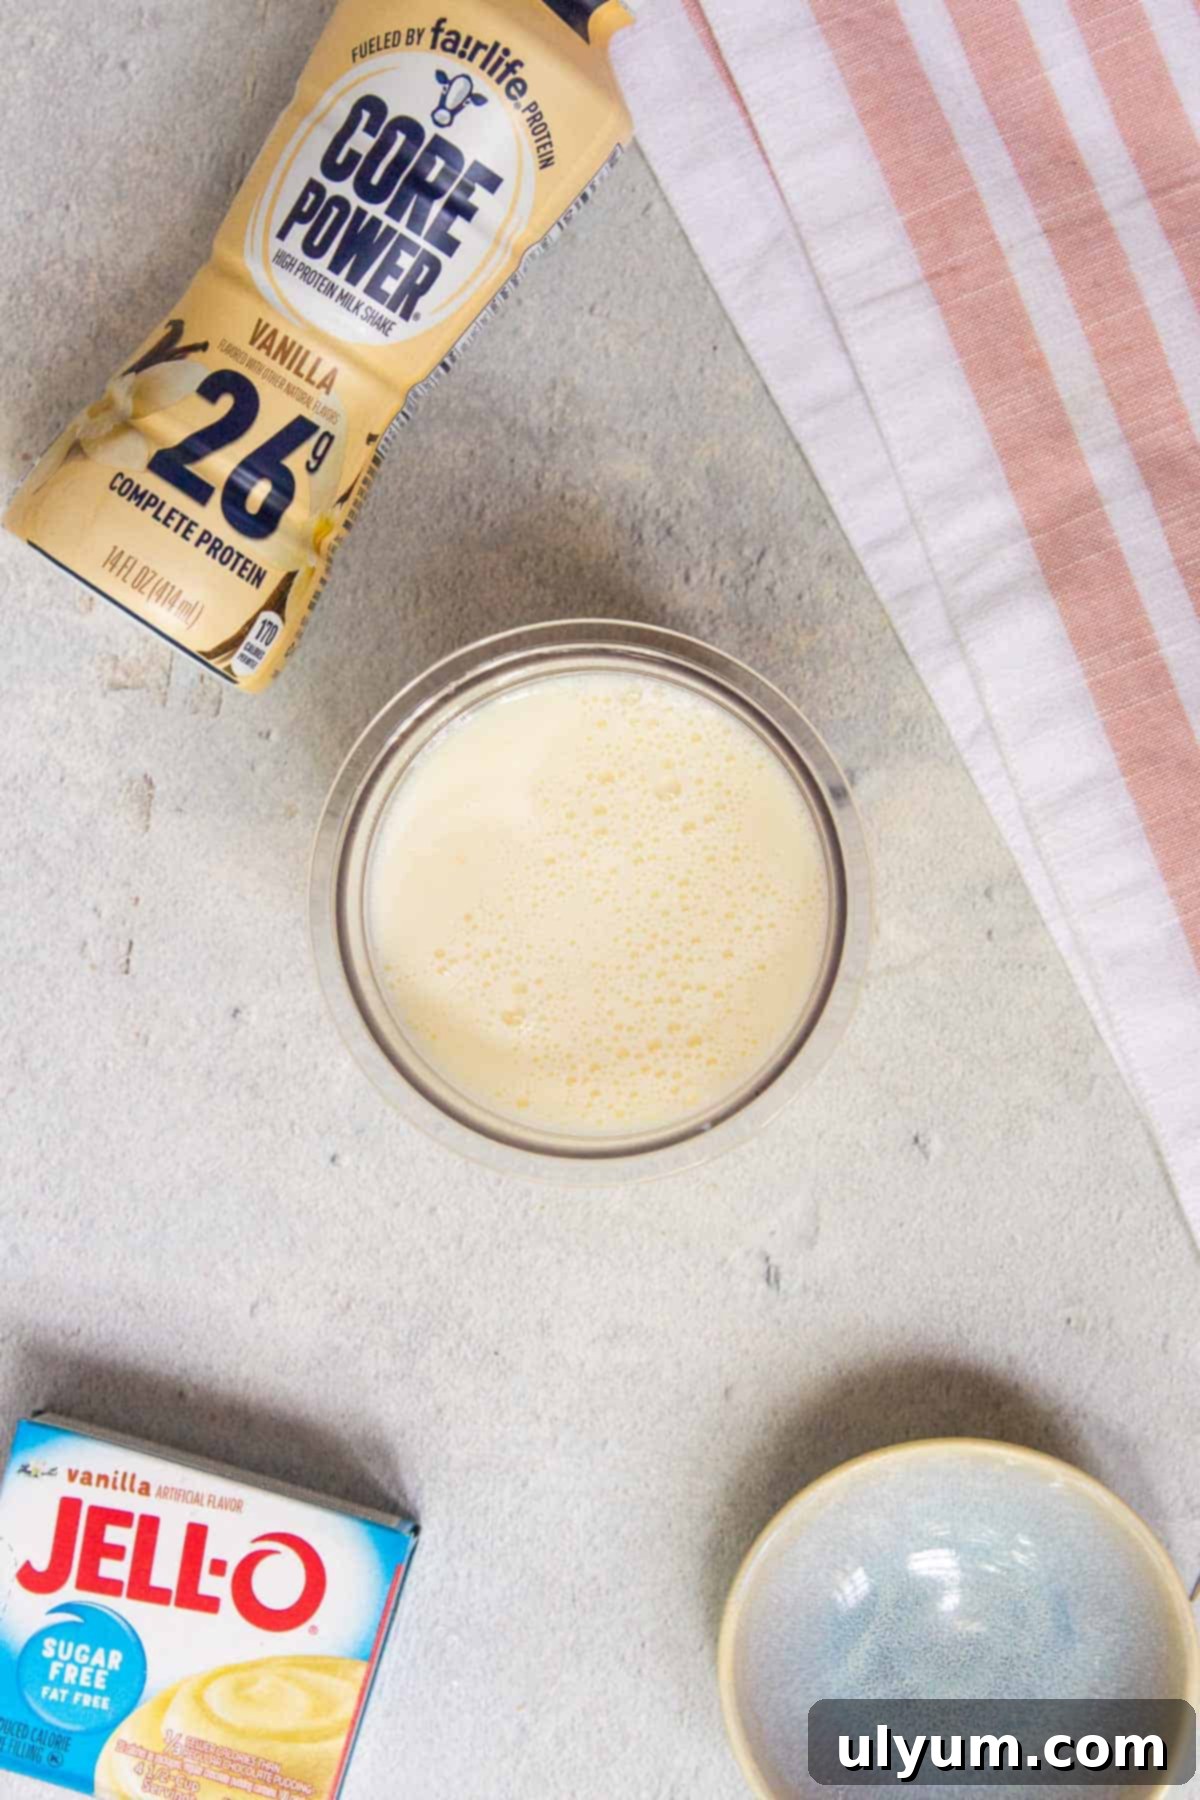
3. Freeze the Pint: Carefully pour the prepared mixture into a clean Ninja Creami pint container, ensuring you do not exceed the max fill line. Secure the pint with its lid and place it in your freezer on a completely level surface. It is absolutely crucial for the pint to freeze entirely solid and evenly, so allow a minimum of 12 hours for freezing. For optimal results, especially with “lite” recipes that contain less fat and sugar, a full 24 hours of freezing is often recommended to ensure maximum hardness, which in turn helps the Creami achieve the smoothest, creamiest texture during processing. This patience is key to a perfect outcome!
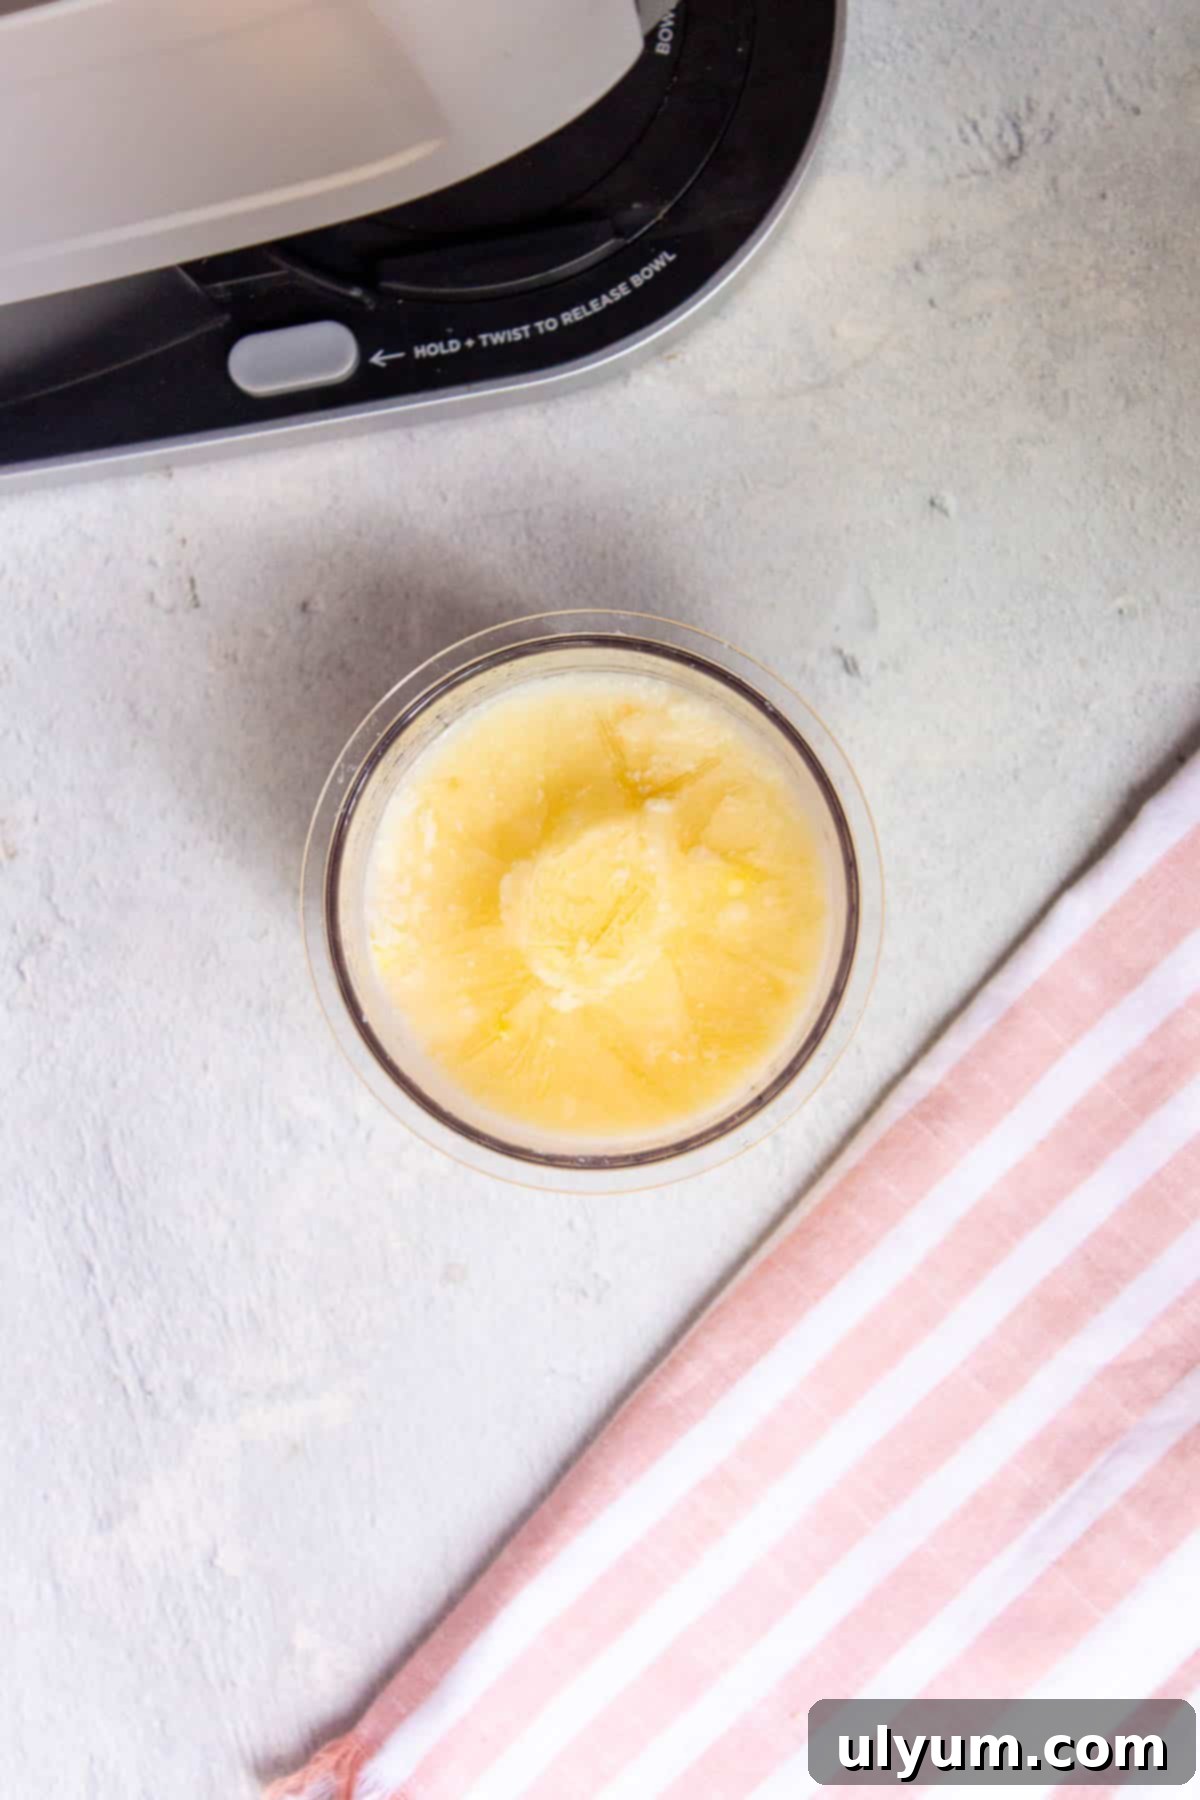
4. Prepare for Processing: Once the pint is thoroughly frozen into a solid block, remove it from the freezer and carefully take off the lid. It should be completely firm and unyielding to the touch. Now, place this opened pint into the larger outer bowl of your Ninja Creami machine. Attach the Creamerizer Paddle securely to the underside of the lid, then lock the entire lid assembly onto the outer bowl. Precision in assembling these components is crucial for proper functioning and to prevent any potential damage to your unit during operation.
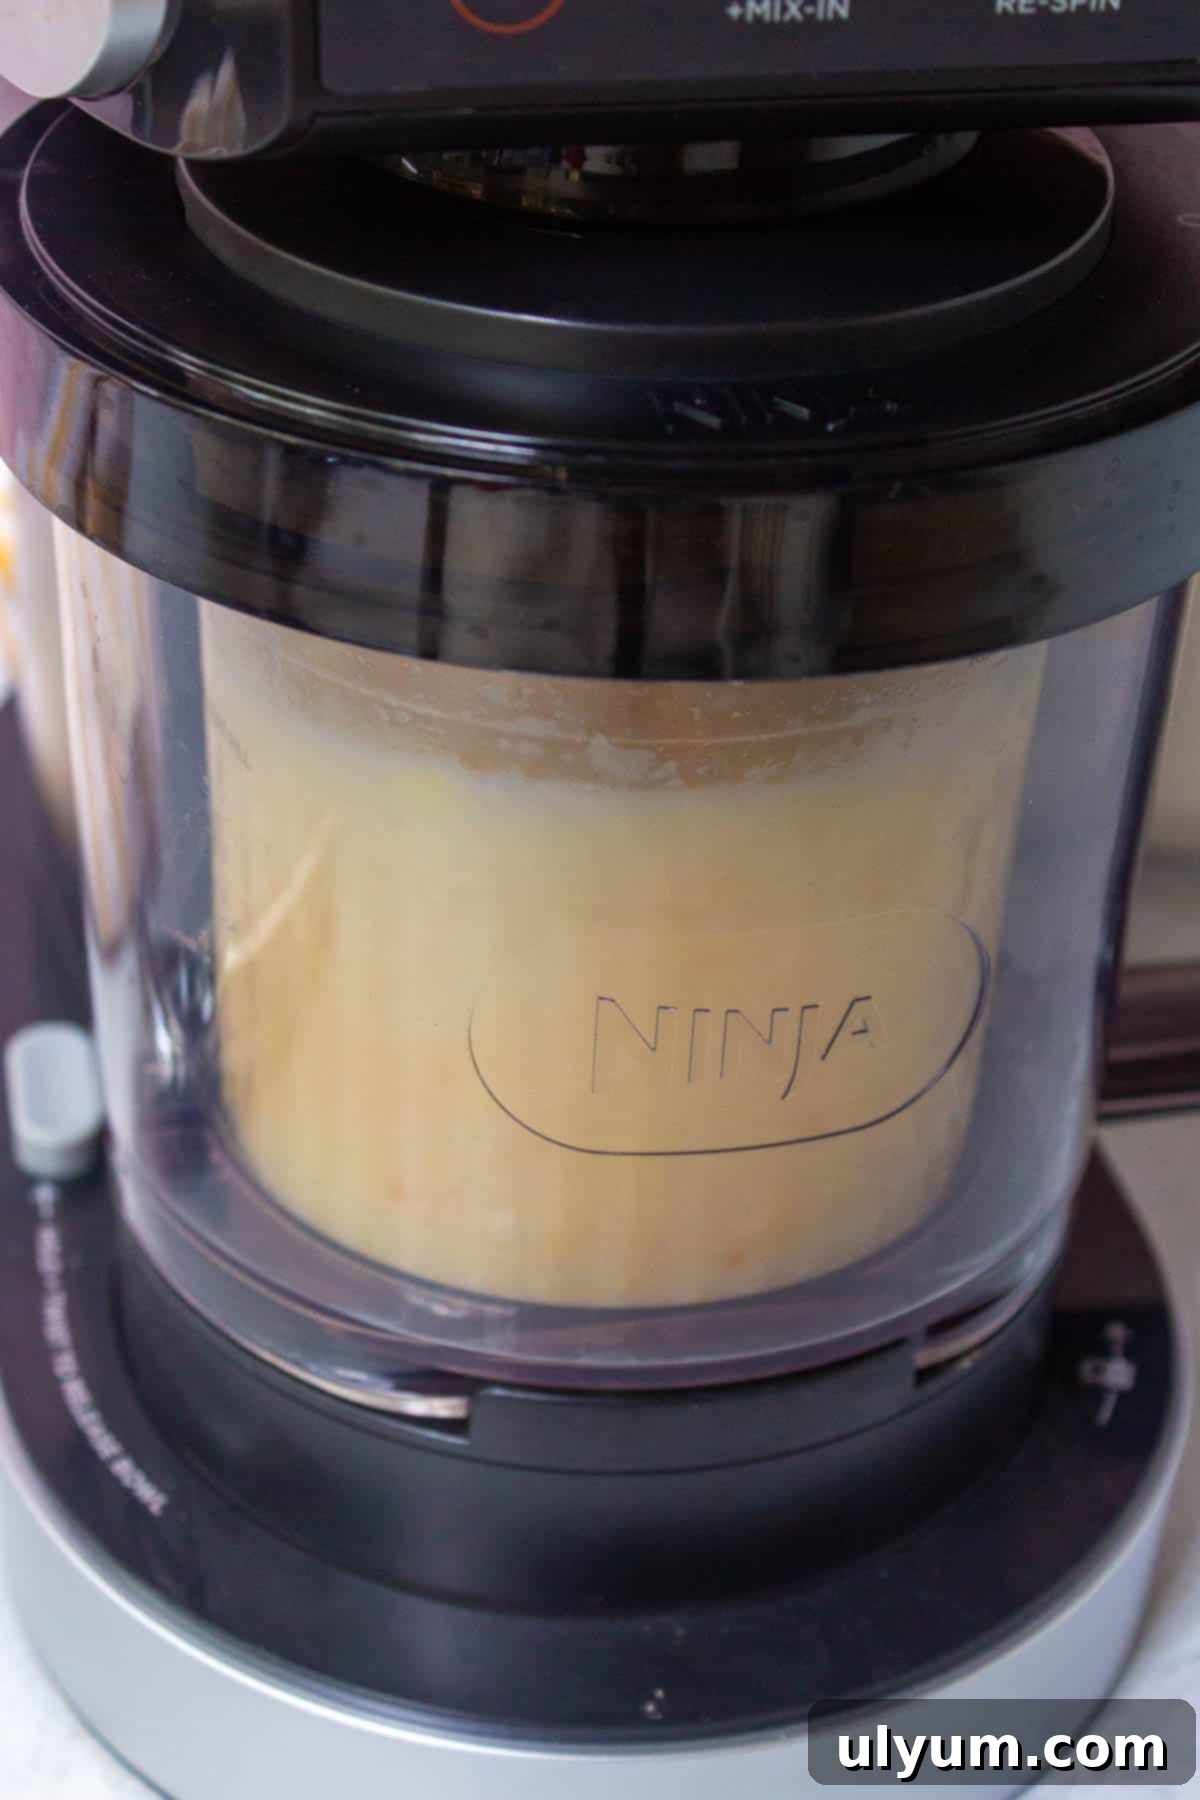
5. Process the Base: Carefully slide the assembled outer bowl into the Ninja Creami machine’s motor base. Gently twist the bowl to the right until you hear a click, indicating it’s securely locked into place. Now, select the “Lite Ice Cream” button on your Ninja Creami. This specific program is designed to optimize the spinning process for lower-fat and lower-sugar recipes like ours, working to achieve a smooth, creamy texture from a typically harder frozen base. Allow the machine to complete its cycle, transforming your solid block into a delightful, soft-serve-like consistency.
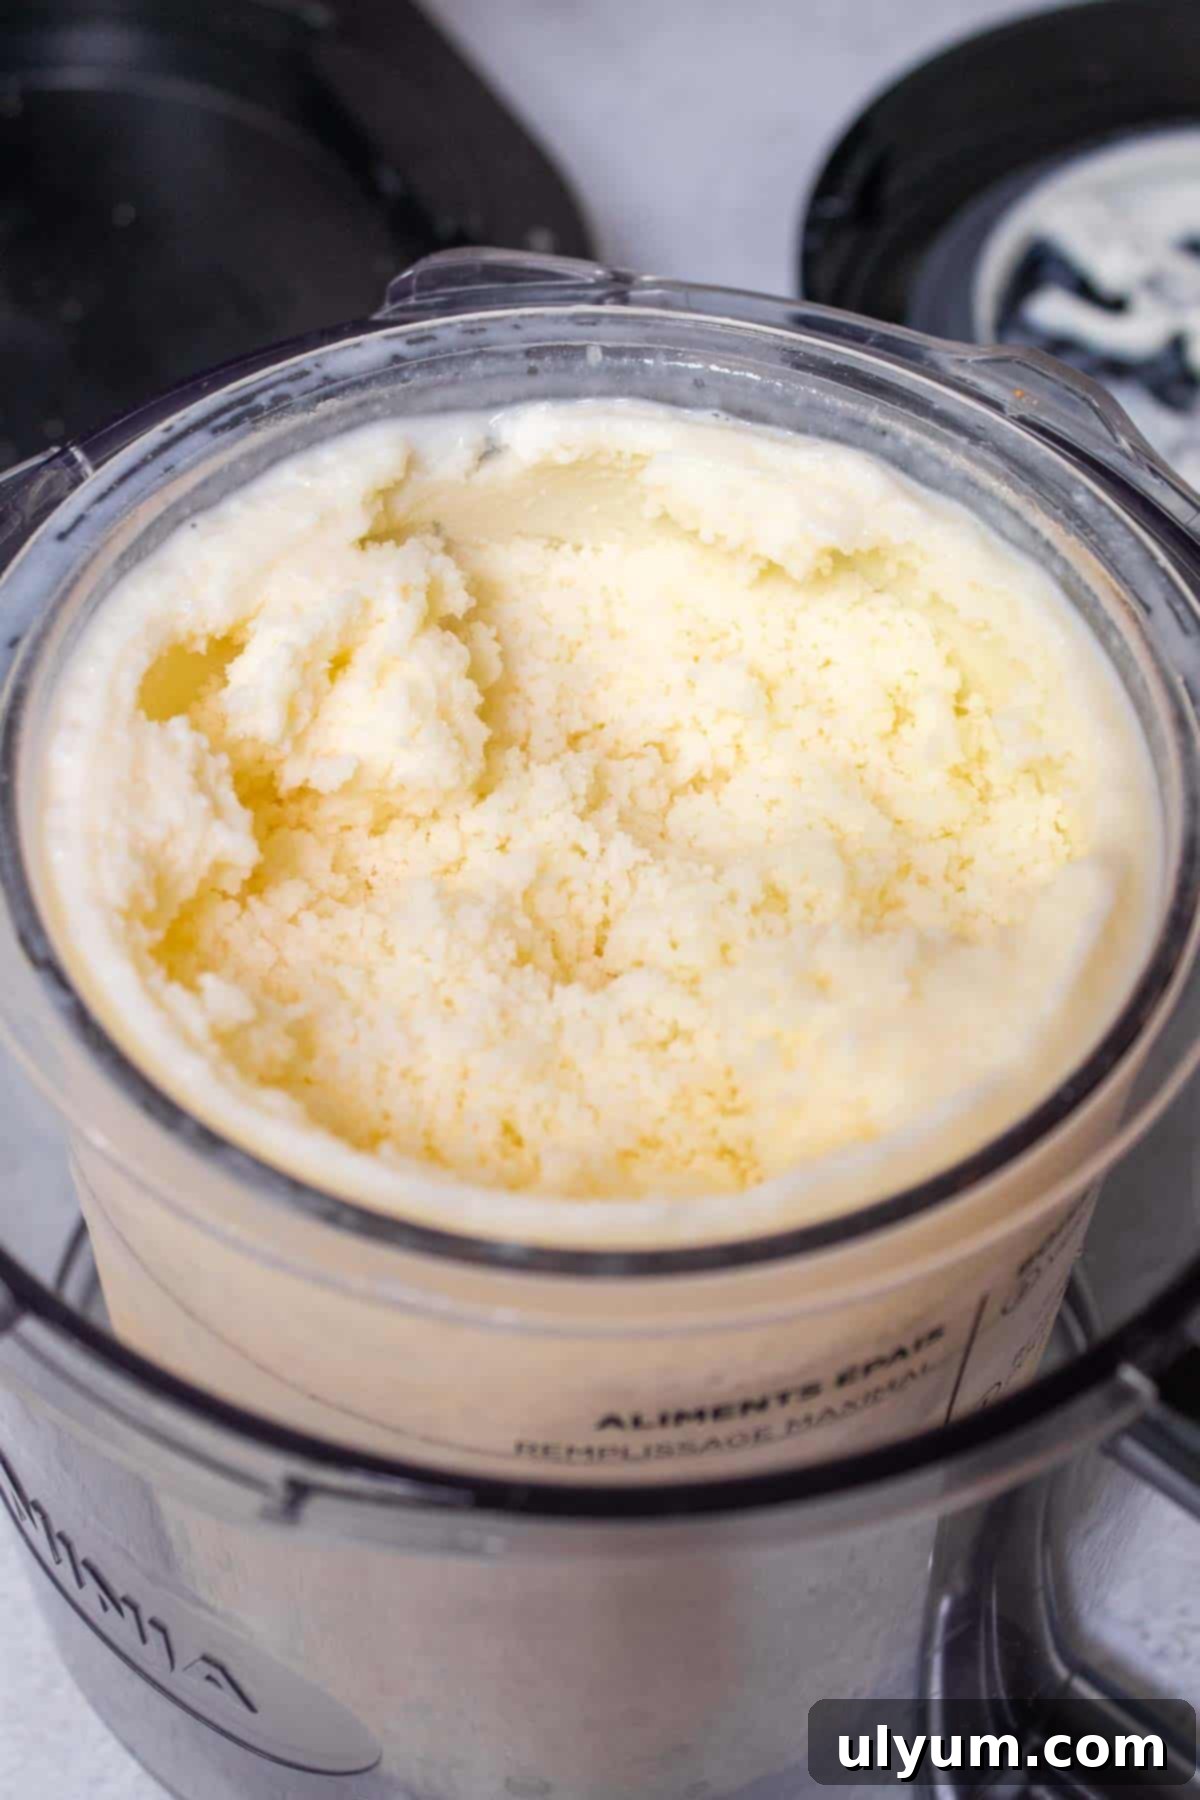
6. Check Consistency and Re-spin (if needed): Once the “Lite Ice Cream” program is complete, unlock and carefully remove the bowl assembly from the ice cream maker, then remove the lid. Don’t be alarmed if the ice cream initially appears crumbly, powdery, or slightly icy. This is a very common occurrence with low-fat, low-sugar recipes in the Ninja Creami. If it’s not perfectly creamy to your liking, simply re-insert the pint, re-attach the lid and paddle, and select the “Re-spin” function. You might need to re-spin once or even twice to achieve that ideal creamy, smooth, and dreamy consistency. The Ninja Creami excels at this transformation, so be patient!
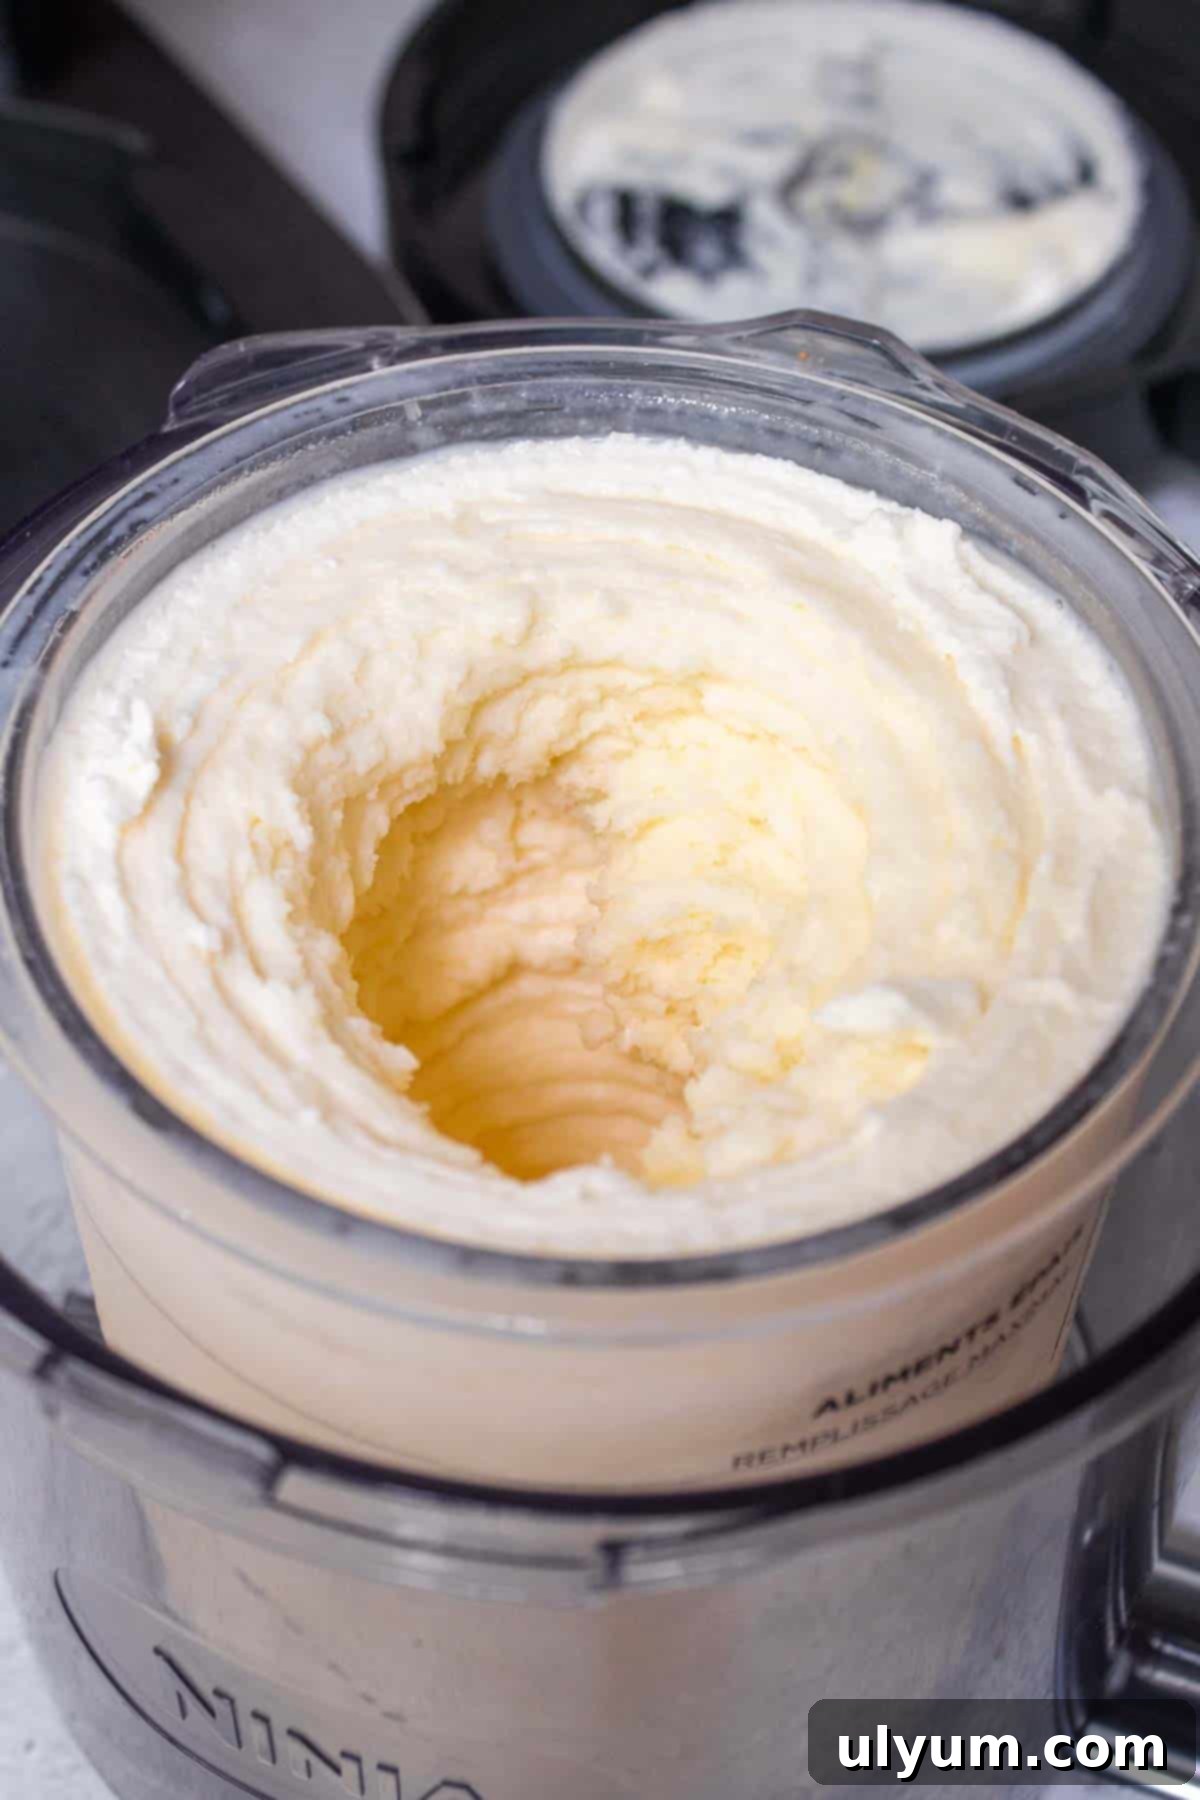
7. Prepare for Mix-Ins: Once your vanilla protein ice cream base has achieved a beautifully smooth and creamy texture after re-spinning, it’s time to add the irresistible Oreo crunch! Using a spoon or a silicone spatula, carefully create a small tunnel in the very center of the ice cream. This tunnel should extend all the way down to the bottom of the pint. This central channel is where you will place your Oreo Thins, ensuring they get optimally distributed throughout the entire pint during the next processing step.
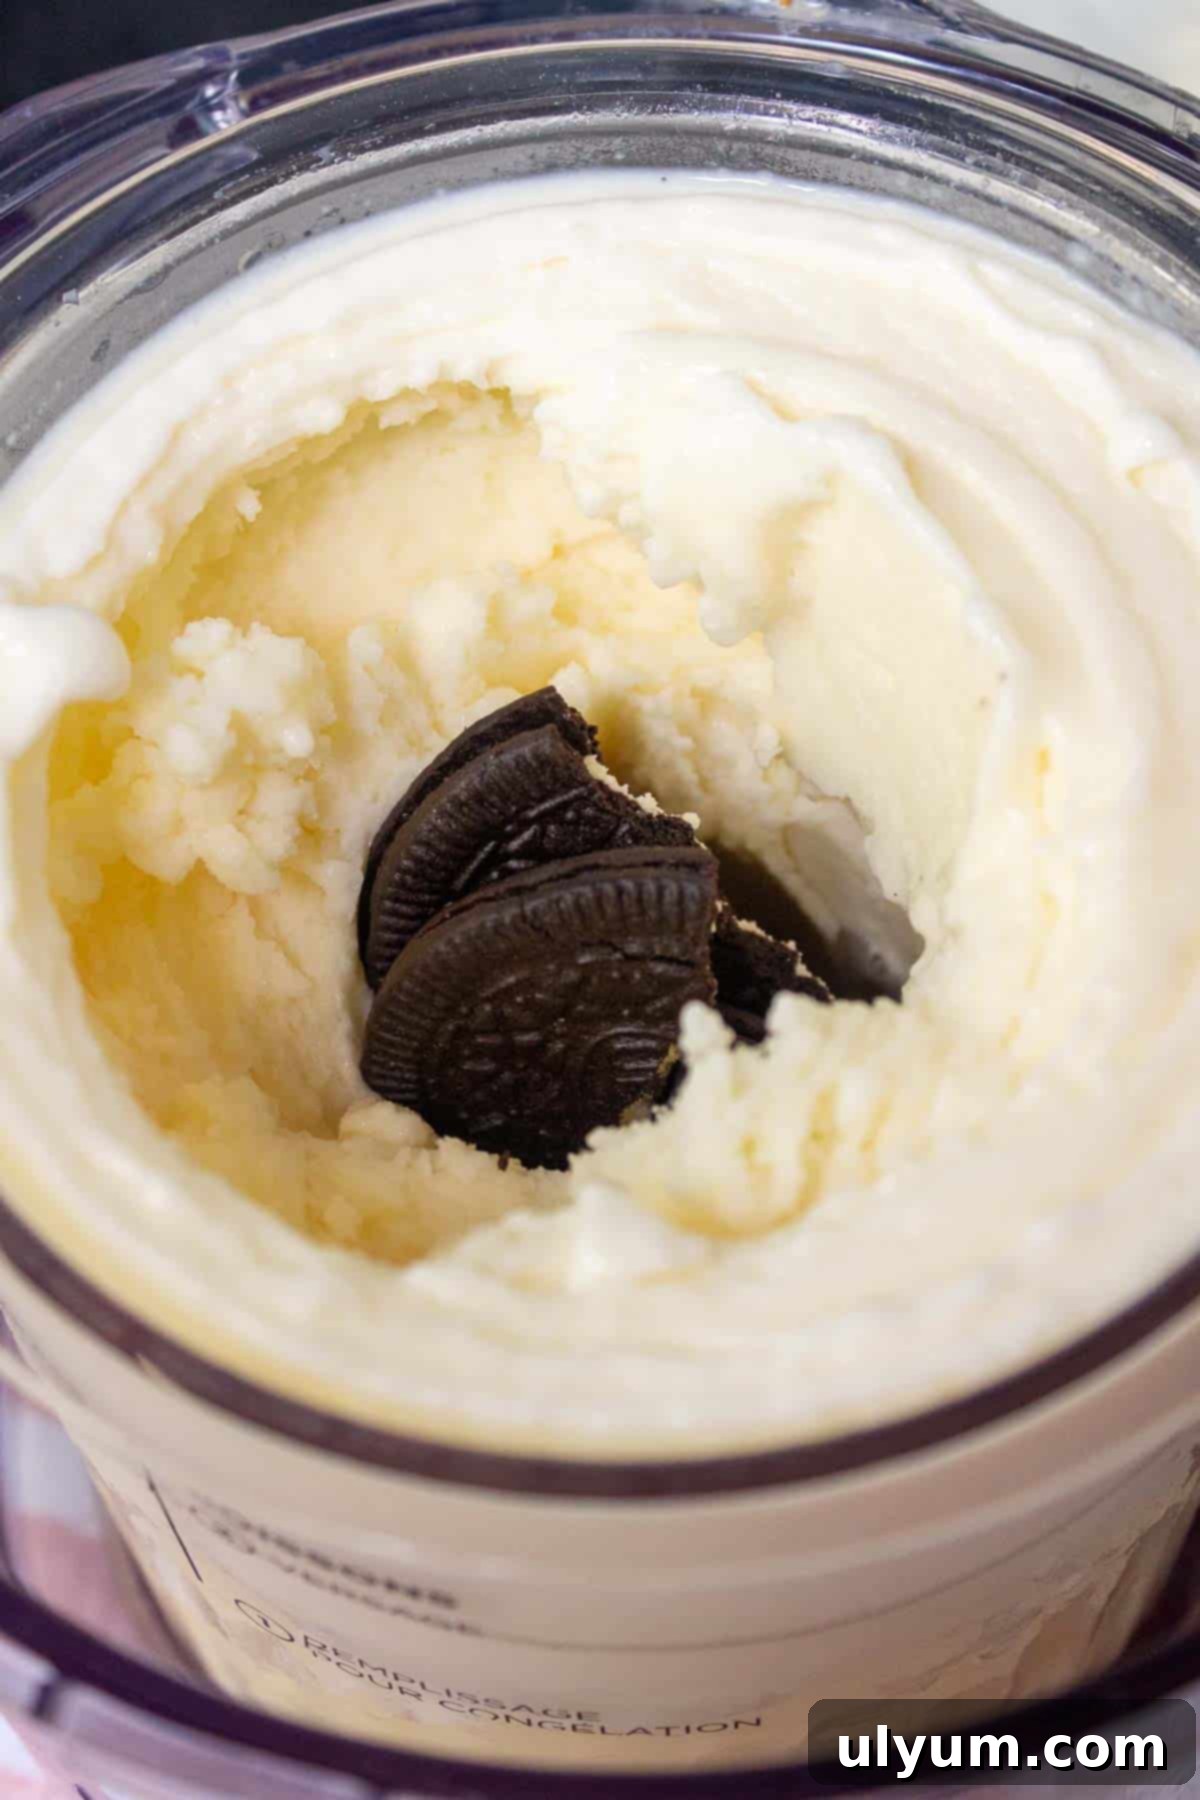
8. Add Mix-Ins and Final Process: Gently place the broken Oreo Thins into the tunnel you created in the ice cream. Once the mix-ins are in place, reassemble the outer bowl onto the Ninja Creami machine, ensuring the paddle is properly attached to the lid and the lid is securely locked onto the bowl. Then, select the “Mix-In” program on your machine. This dedicated cycle is specifically designed to incorporate solid additions like cookies without over-processing the ice cream base, ensuring delightful chunks of Oreo are perfectly distributed and integrated into every creamy bite. After this final process, your homemade high-protein Oreo ice cream is ready!
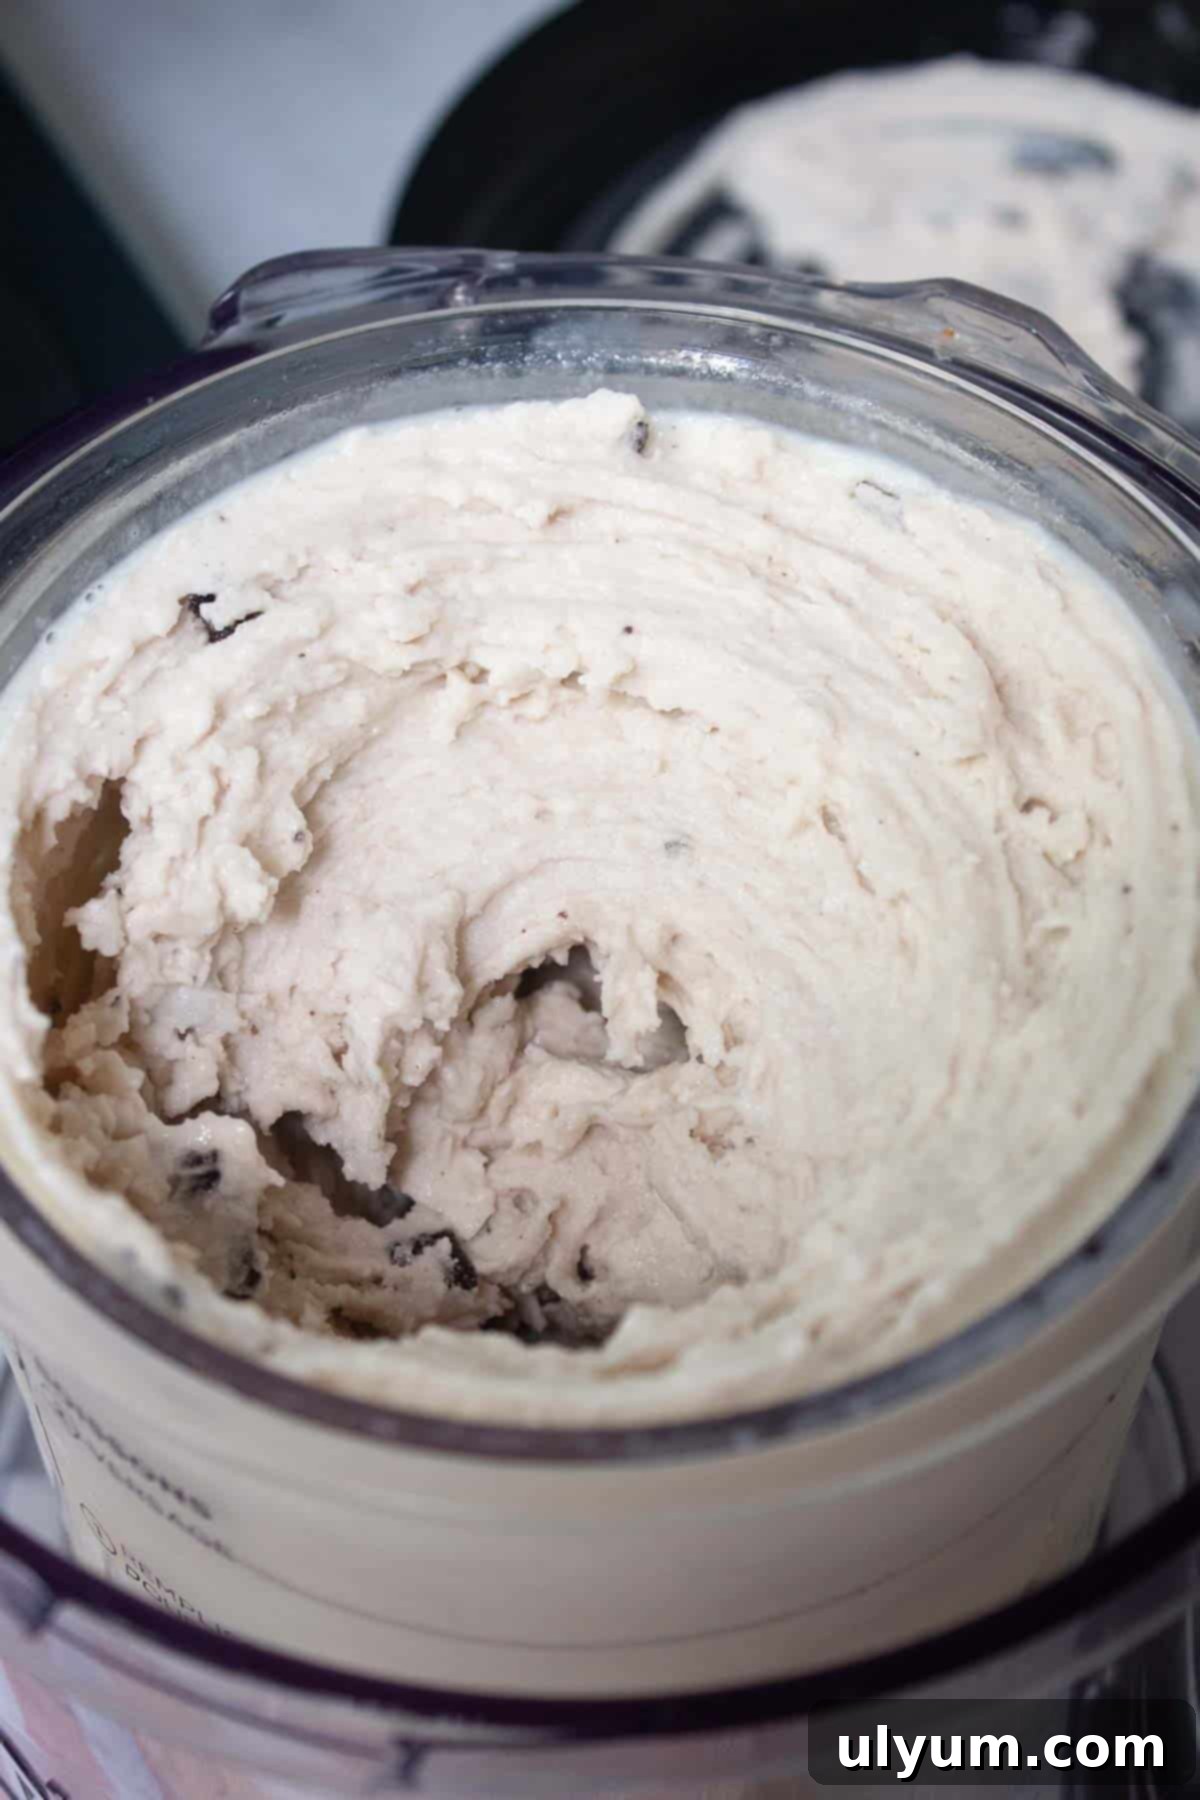
9. Serve and Enjoy: Your freshly made Ninja Creami Oreo Protein Ice Cream is now perfectly prepared and ready to be savored! Serve it immediately to experience its wonderfully creamy, soft-serve-like consistency, which is at its peak right after processing. While you can get some excellent soft scoops right away, keep in mind that this high-protein, low-fat ice cream will naturally soften more quickly compared to a full-fat, traditional ice cream. For the firmest scoops, you can return it to the freezer for an additional 10-15 minutes after processing, but for the best soft-serve experience, enjoy it promptly!
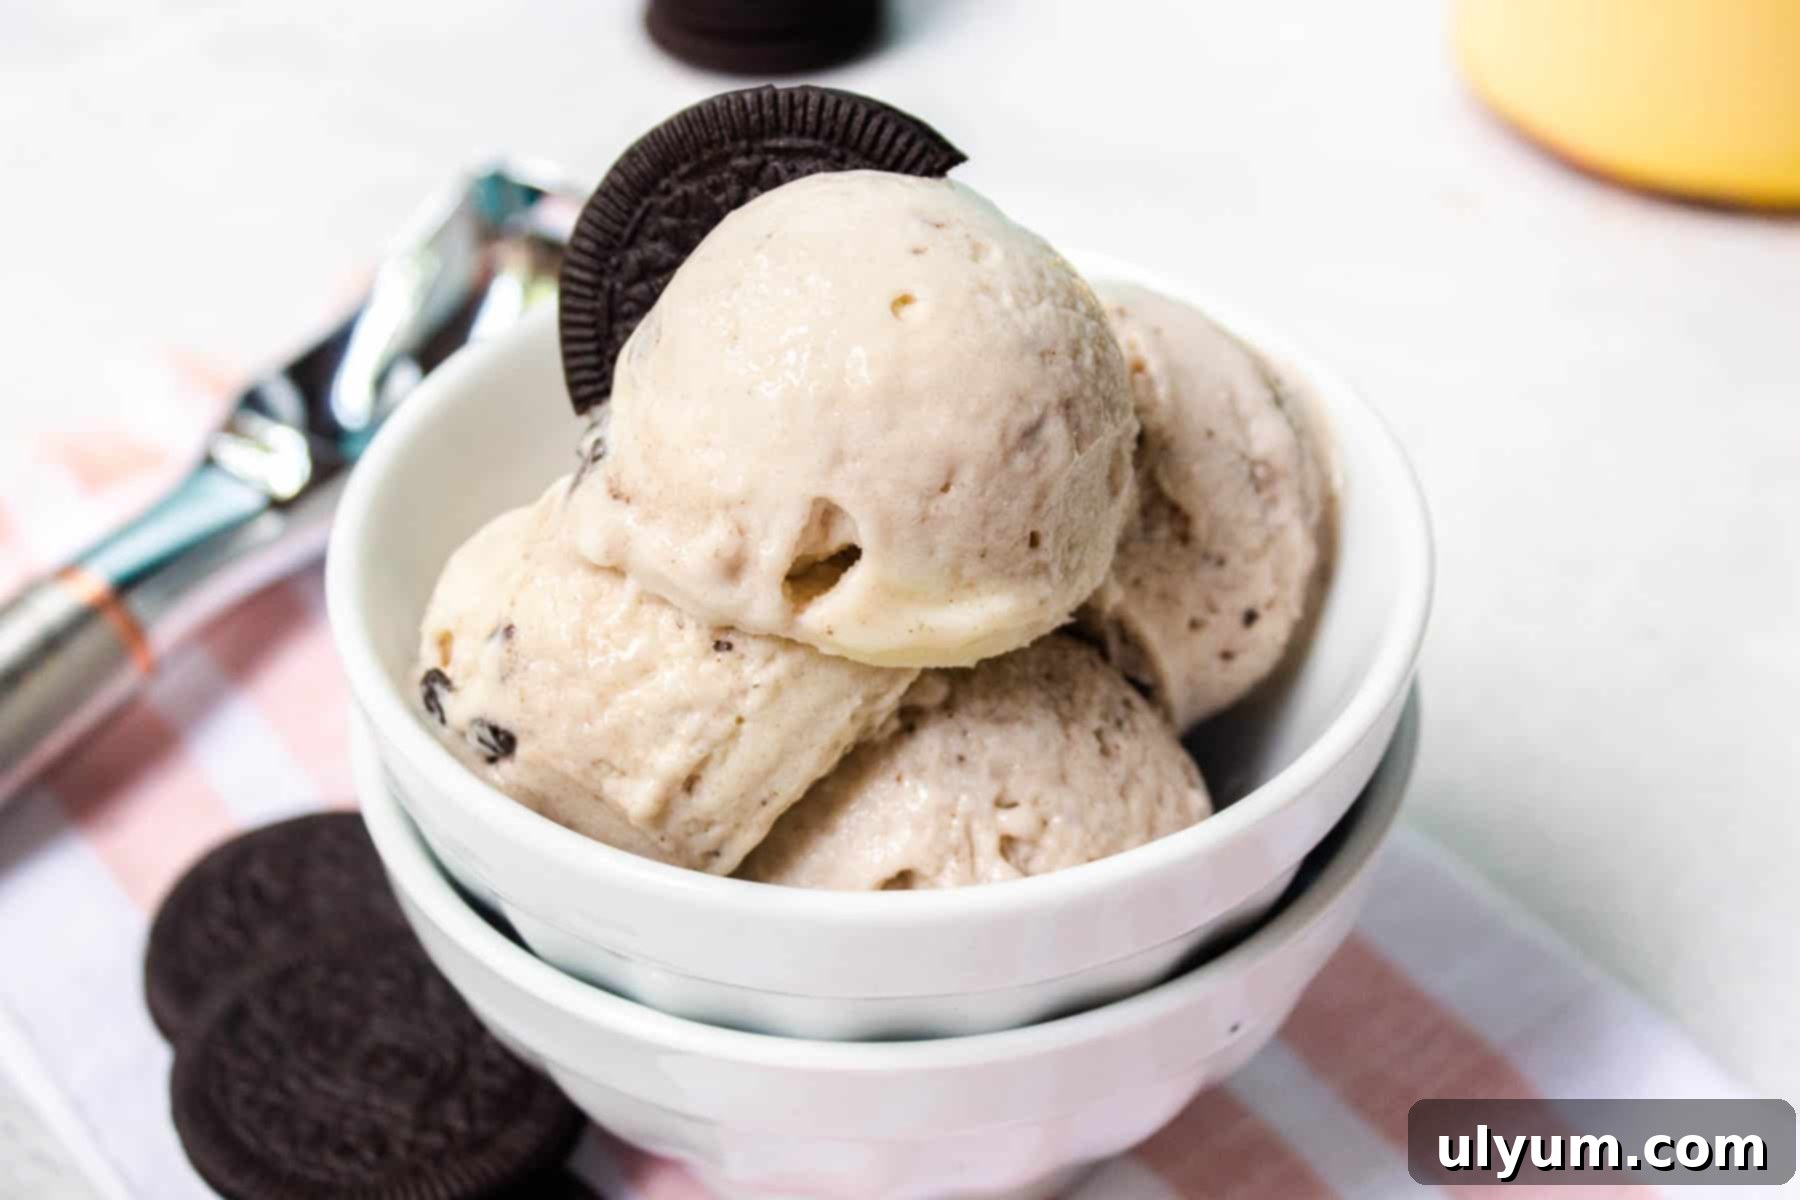
Note on Consistency: It’s important to remember that this high-protein, low-fat ice cream will naturally have a consistency closer to soft serve than a dense, traditional hard-scoop ice cream you might buy from a parlor. While it’s delightful when served immediately, it will inevitably soften more quickly due to its reduced fat and sugar content. For those who prefer a slightly firmer texture, you can return it to the freezer for an additional 10-15 minutes after processing, but for the ideal creamy, soft-serve experience, enjoying it promptly is highly recommended.
Delicious Substitutions for Your Protein Ice Cream
One of the beauties of Ninja Creami recipes is their incredible versatility. If you need to make a swap due to dietary restrictions, ingredient availability, personal preferences, or simply what you have on hand, here are some excellent substitution options for your high-protein Oreo ice cream. Each substitution can subtly alter the flavor, texture, or nutritional profile, so consider your goals when making changes:
- Protein Shake: Any 14-ounce protein shake can work as a suitable base for this recipe. Popular options that work well include other Fairlife shakes (such as chocolate for a different flavor profile), Pure Protein shakes, or Premier Protein shakes. When choosing a substitute, just be mindful that different brands and flavors might vary slightly in their nutritional content and initial thickness. This could subtly alter the final texture and macro breakdown. Ensure you’re still using a shake that’s high in protein to maintain the core benefit of this recipe.
- Sweetener: If stevia isn’t your preferred sugar substitute, or if you simply want to try something different, feel free to experiment with other zero-calorie or low-calorie sweeteners. Popular and effective options include Splenda, Swerve (erythritol-based), monk fruit with erythritol, or allulose. Start with a slightly smaller amount than you would with stevia and adjust to your personal taste, as different sweeteners have varying intensities and sweetness profiles.
- Instant Pudding Mix: The instant pudding mix is a critical ingredient, not just for enhancing flavor but, more importantly, for creating that wonderfully creamy, scoopable texture by acting as a binder and stabilizer.
- Flavor Swaps: While vanilla or French vanilla are classic choices that complement Oreos, a sugar-free cheesecake pudding mix can also offer a delightful, tangy twist to your ice cream base.
- Texture Alternatives: If you choose to omit the pudding mix entirely, be aware that your ice cream may have a more icy rather than creamy texture due to the lack of stabilizing starches. In this scenario, it’s highly recommended to add about ¼ teaspoon of vanilla extract or vanilla bean paste to ensure a robust vanilla flavor in your base.
- Sugar Content: If macro goals aren’t your primary concern, you can use a full-sugar Jell-O brand instant pudding mix instead of the sugar-free version.
- Natural Thickener: For a clean-label alternative or if you prefer to avoid artificial ingredients, ½ teaspoon of guar gum can be used as a natural thickener. However, it might yield a slightly different mouthfeel compared to instant pudding.
- UK Option: For our readers in the United Kingdom, Angel Delight is often cited as a similar product to Jell-O instant pudding, offering a comparable effect on texture and flavor, though personal testing is recommended for best results.
- Oreo Thins: While Oreo Thins are fantastic for their delicate crunch and balanced flavor, you have several other options to customize your cookie experience:
- Regular Oreos: If you prefer a more substantial cookie chunk and a richer flavor, regular Oreos work beautifully and provide a more traditional “cookies and cream” feel.
- Gluten-Free Oreos: For those with gluten sensitivities or celiac disease, gluten-free Oreos are an excellent choice to keep the recipe accessible and enjoyable without compromising on the classic taste.
- Macro-Friendly Cookies: To further enhance the macros and boost protein while keeping calories lower, consider incorporating low-calorie/high-protein sandwich cookies. Options like Highkey sugar-free sandwich cookies or Lenny & Larry’s The Complete Cremes protein cookies can significantly impact the overall calorie and protein count, making your dessert even more functional and aligned with specific dietary goals.
Exciting Variations to Customize Your Ninja Creami Protein Ice Cream
While the Oreo protein ice cream is fantastic on its own, the Ninja Creami opens up a world of possibilities for customization. Don’t hesitate to get creative with these delicious variations, adapting the base or mix-ins to suit your personal cravings and dietary needs:
- Traditional Indulgent Ice Cream: If you’re occasionally looking for a richer, full-fat experience with classic cookies and cream flavor, check out my Ninja Creami Cookies and Cream Ice Cream recipe. This more indulgent version typically incorporates ingredients like cream cheese, granulated sugar, vanilla extract, whole milk, and heavy cream to create a truly classic high-fat vanilla ice cream base that’s incredibly decadent.
- Chocolate Lover’s Dream: For chocolate enthusiasts who want to infuse more cocoa goodness into their treat, easily adapt this recipe or explore dedicated chocolate options:
- Chocolate Base: The simplest way is to substitute the vanilla Fairlife Core Power shake with a chocolate-flavored Fairlife Core Power shake for an instant chocolate protein ice cream base.
- Dedicated Chocolate Recipe: Alternatively, explore my specific Fairlife 2% chocolate milk ice cream recipe, designed to maximize chocolatey goodness while still being mindful of macros.
- Additional Chocolate Mix-Ins: To elevate the chocolate experience, consider adding mini chocolate chips, sugar-free chocolate fudge swirls, or even finely chopped protein brownie pieces during the mix-in stage.
- Protein Powder Customization: If Fairlife protein shakes aren’t readily available in your area, or if you simply prefer to use your own favorite protein powder, you can absolutely create your own protein-packed milk base from scratch.
- Milk Choice: Start with a high-protein, fat-free, or reduced-fat milk. Excellent options include Fairlife milk (the plain kind), Horizon Organic Protein milk, or Kroger CARBmaster milk. These alternatives will help maintain a similar macro profile and creamy texture.
- Protein Powder: Add a scoop of your preferred protein powder. Vanilla, vanilla bean, or French vanilla whey protein are excellent choices to mimic the base flavor. For an extra boost of cookie flavor, consider a cookies and cream whey protein powder or even an Oreo plant-based protein powder for an enhanced flavor experience.
- Dairy-Free Options: While regular milk and non-dairy milks (like unsweetened almond milk, coconut milk, or oat milk) can be used, be aware that they will significantly alter the macro profile (protein, fat, calories) and potentially the texture. These alternatives often lead to a slightly icier consistency if not adjusted with additional thickeners like a bit more pudding mix or guar gum.
- Explore New Mix-Ins: Beyond Oreos, the possibilities are virtually endless for mix-ins! Experiment with your favorite additions to create unique flavor combinations and textures. Always add mix-ins after the initial processing and use the Ninja Creami’s dedicated “Mix-In” program for the best results. Consider:
- Nutty Additions: Chopped peanuts, almonds, walnuts, or pecans for extra crunch and healthy fats.
- Sweet & Chocolatey Bits: Mini chocolate chips, white chocolate chunks, a swirl of sugar-free caramel or chocolate syrup, or even chopped pieces of your favorite sugar-free candy bar.
- Salty-Sweet Combo: Crushed pretzels offer a delightful salty-sweet crunch that perfectly complements the vanilla base.
- Candy & Cereal Fun: M&M’s, chopped candy bars (using mini versions can help keep calories lower), or crushed cereal like Cinnamon Toast Crunch, Fruity Pebbles, or Cheerios for a fun, nostalgic twist.
- Other Cookies: Instead of Oreos, try crushed chocolate chip cookies, shortbread, Biscoff cookies, or graham crackers for different cookie flavors and textures.
- Fruit Burst: Add freeze-dried fruit pieces or a small amount of fresh berries for a refreshing twist (ensure they are small pieces for best mix-in results).
Essential Equipment for Making Ninja Creami Oreo Protein Ice Cream
To successfully create this delicious high-protein Oreo ice cream, you’ll need a few key pieces of equipment. The star of the show, of course, is the Ninja Creami itself, but a couple of basic kitchen tools will also come in handy to ensure a smooth preparation process.
- Ninja Creami Machine (Original, Breeze, or Deluxe): This revolutionary appliance is the non-negotiable item for transforming your frozen liquid base into perfectly creamy ice cream. Whether you own the original Ninja Creami, the more compact Ninja Creami Breeze, or the advanced Ninja Creami Deluxe, any model will work perfectly. Its unique blade and high-speed processing are designed to break down a solidly frozen block into a smooth, creamy consistency, which is absolutely crucial for achieving ideal results with lower-fat protein recipes.
- Ninja Creami Pint Containers: Each Ninja Creami machine typically comes with at least one pint container (or two for the Deluxe model). However, having extras is always a smart idea if you plan to meal prep multiple flavors, want to experiment with different recipes, or simply desire to have a ready-to-process base always on hand. It’s essential to use only official Ninja Creami pint containers as they are specifically designed to fit the machine precisely and ensure safe and effective operation.
- Large Mixing Bowl: A spacious mixing bowl is ideal for combining your protein shake, sweetener, and pudding mix thoroughly before pouring it into the pint. This extra room allows for vigorous whisking, which helps ensure all ingredients are well incorporated and prevents any dry pockets or lumps from forming.
- Whisk: A good quality whisk is an indispensable tool for smoothly blending the liquid ingredients. It efficiently helps dissolve the stevia and integrate the instant pudding mix without leaving powdery pockets, ensuring a uniform and lump-free base that will freeze and process beautifully into creamy ice cream.
Storage Tips for Leftover Ninja Creami Protein Ice Cream
While it’s tempting to devour the entire pint of this delicious high-protein Oreo ice cream in one sitting (and often, that’s exactly what happens!), sometimes you’ll find yourself with leftovers. Proper storage and re-processing techniques are key to ensuring you can enjoy your healthy treat again later without sacrificing quality.
If you have any leftover ice cream, the first step is to gently smooth and flatten the top surface of the ice cream. Use a spoon or a flexible spatula to create an even, level surface. This simple step is important for preventing freezer burn and ensuring that the ice cream freezes uniformly, which is crucial for successful re-processing later. Once the top is flat and smooth, cover the pint securely with its dedicated Ninja Creami storage lid before returning it to the freezer. This airtight seal helps maintain the integrity of the ice cream and protects it from absorbing freezer odors.
It’s important to note that due to its low-fat, high-protein composition, the ice cream will inevitably harden significantly as it re-freezes. This is a normal characteristic of “lite” frozen desserts. When you’re ready to enjoy your stored ice cream again, you absolutely will need to process it a second time in your Ninja Creami. Simply place the hardened frozen pint back into the machine, attach the lid and paddle, and select the “Lite Ice Cream” setting. This re-processing cycle will effectively break down the firm ice cream block, restoring it to its wonderfully creamy, enjoyable texture. Be aware that processing the pint a second time, especially with mix-ins like Oreos, will likely break down the cookie pieces further, resulting in finer crumbs rather than larger chunks. However, the delicious Oreo flavor will remain perfectly infused throughout your creamy protein ice cream!
Pro Tips for the Best Ninja Creami Results
Maximizing the performance of your Ninja Creami and achieving consistently perfect results requires a little insider know-how. Here are some important tips to help you get the most out of your machine, especially when crafting delicious protein ice cream recipes:
- Upright Freezer is Best: For optimal results, use a standard upright freezer for freezing your Ninja Creami pints. Chest freezers, while great for long-term storage, can often get *too* cold. If your Ninja Creami pint container is frozen at an excessively low temperature, the mixture can become rock-hard, potentially leading to a “wall of ice” inside your pint that the Creamerizer Paddle might struggle to process smoothly. This can result in a crumbly texture or, in extreme cases, prevent the machine from working efficiently.
- Freeze on a Flat Surface: Always place your pint in the freezer on a completely level surface. If the liquid mixture freezes at an angle, the resulting ice block inside will be uneven. Processing a pint frozen at an angle could put undue stress and uneven load on the machine’s motor or even damage the Creamerizer Paddle (blade) during operation. A level freeze ensures consistent results and helps protect the longevity of your valuable appliance.
- Adhere to the Max Fill Line: When pouring your liquid base mixture into the pint, never fill it beyond the designated “max fill” line. Overfilling can lead to spills and potential mess during the freezing process as liquids expand. More importantly, it can cause issues during the processing stage, potentially damaging the machine. However, once your base is frozen and has been processed into ice cream, you *can* safely exceed the max fill line when adding mix-ins, as they are incorporated into an already processed and slightly softer volume.
- Utilize “Half the Pint” Feature (Deluxe Model Only): If you own the Ninja Creami Deluxe model, take full advantage of its innovative “Top Half” and “Bottom Half” processing functions. This allows you to process just the top half of a deluxe-sized pint, leaving the bottom half perfectly frozen and ready for later enjoyment. This feature is fantastic for portion control or for creating customized, multi-flavor treats. For instance, you could process the top half with one type of mix-in, scoop it out, and then process the bottom half with a completely different mix-in for a customizable, two-flavor experience all from one pint!
For your safety and to ensure the best performance and longevity of your appliance, always refer to your Ninja Creami user manual and safety instructions thoroughly prior to operating your machine for the first time or if you have any questions or doubts.
Frequently Asked Questions About Ninja Creami Protein Ice Cream
Yes, for “lite” ice cream recipes, which are typically low-fat and low-sugar like this protein Oreo ice cream, you can often freeze the pint for 12 to 24 hours. While a full 24 hours ensures maximum hardness and often yields the creamiest result, 12 hours is usually sufficient for the base to freeze solid enough for proper processing in the Ninja Creami. If you attempt to freeze for less than 12 hours, the base might not be firm enough to be properly churned by the machine, leading to a soupy or inconsistent texture.
It’s completely normal and quite common for protein and low-fat Ninja Creami recipes to appear crumbly, powdery, or slightly icy after the initial spin cycle. This is primarily because there is significantly less fat and sugar compared to traditional ice cream recipes, which typically contribute to a naturally smoother texture. Don’t worry, this is easily fixable! Simply re-insert the pint back into the machine, ensure the lid and paddle are securely attached, and use the “Re-spin” function on your Ninja Creami. You might need to re-spin once or even twice, and sometimes adding a tablespoon of milk (or a little more protein shake) if it’s exceptionally dry can help achieve a perfectly creamy, smooth consistency. This is where the Ninja Creami truly shines!
Fairlife Core Power shakes are highly recommended for Ninja Creami recipes, especially for high-protein ice cream, due to their ultra-filtered nature. This process results in a lactose-free, high-protein, and lower-sugar base that freezes exceptionally well and yields a remarkably creamy texture. Other thick, high-protein shakes like Premier Protein or Pure Protein can also yield great results. The key is to choose a shake with a good protein content and a relatively thick consistency to start with, as this significantly contributes to the final creaminess and mouthfeel of your frozen treat.
Absolutely! This vanilla protein ice cream base is incredibly versatile. You can easily swap the vanilla protein shake for a chocolate one for a chocolate base, or experiment with different sugar-free pudding mix flavors like cheesecake, banana cream, or pistachio. Additionally, you can change the mix-ins entirely – think fresh berries, sugar-free chocolate chips, nuts, or even other crushed low-calorie cookies. The possibilities are endless for creating a variety of healthy, delicious, and customized high-protein ice creams with your Ninja Creami.
Related Recipes to Satisfy Your Cravings
If you’ve loved making and enjoying this high-protein Oreo ice cream, there’s a whole world of Ninja Creami delights waiting for you to explore. Expand your frozen dessert repertoire with these other fantastic and popular recipes:
- For a truly indulgent, full-fat version of the classic cookies and cream flavor, be sure to try my Ninja Creami Cookies and Cream Ice Cream. It’s rich, decadent, and absolutely perfect for those times when you want to treat yourself to a traditional creamy dessert.
- If you’re eager for more healthy, high-protein options, especially if you’re a chocolate fan, my Ninja Creami Chocolate Protein Ice Cream recipe is a must-try. It offers all the deliciousness of chocolate ice cream with the added benefits of protein, keeping your macros in check.
- Or, perhaps you’re interested in mastering the basics of making perfect Ninja Creami creations? Learn how to make a perfectly creamy and adaptable base with my Ninja Creami Vanilla Ice Cream recipe – it’s a foundational starting point for countless variations and customizations.
- Don’t forget to check out a collection of 5 Ninja Creami Protein Ice Cream Recipes for more inspiration and variety in your healthy dessert journey.
Explore the full range of possibilities with your Ninja Creami and let your culinary creativity shine. If you have any other Ninja Creami ice cream recipes you’d love to see or suggestions for new flavor combinations, please don’t hesitate to let me know in the comments below! Happy creami-ng!
- 5 Ninja Creami Protein Ice Cream Recipes
- Ninja Creami Cookies and Cream Ice Cream
- Ninja Creami Vanilla Ice Cream
- Ninja Creami Oreo Protein Ice Cream
📖 Recipe Card
Pin Recipe
Save RecipeSaved!
Email
Print
Ninja Creami Oreo Protein Ice Cream
Equipment
-
Large mixing bowl
-
Whisk
-
Ninja Creami
Ingredients
For a standard pint
- 14 ounces Fairlife Core Power Vanilla Protein Shake
- 1 tablespoons stevia
- 1 tablespoons sugar free instant vanilla pudding mix
- 4 Oreo Thins cookies broken in half
For a deluxe pint
- 21 ounces Fairlife Core Power Vanilla Protein Shake
- 1-½ tablespoons stevia
- 1-½ tablespoons sugar free instant vanilla pudding mix
- 6 Oreo Thins cookies broken in half
Instructions
Part One: Prepare & Freeze the Base
-
In a large mixing bowl, combine the Fairlife Core Power Vanilla Protein Shake, stevia, and sugar-free instant vanilla pudding mix. Whisk thoroughly until the stevia is dissolved and there are no large lumps from the pudding mix. The pudding mix will not fully dissolve into a perfectly clear liquid. Let the mixture sit for about 1 minute to allow any bubbles to settle before pouring.
-
Pour the mixture into a clean Ninja Creami pint, ensuring you do not exceed the max fill line. Cover it securely with a lid and freeze on a level surface in your freezer for a minimum of 12 hours. For the best, creamiest results with lite recipes, freezing for a full 24 hours is often ideal.
Part Two: Process & Serve
-
After freezing, remove the solid pint from the freezer and take off the lid. Place the opened pint into the larger outer bowl of the Ninja Creami machine. Attach the Creamerizer Paddle to the lid, then lock the lid assembly to the outer bowl. Slide the entire bowl assembly into the machine’s motor base, twist it to the right to lock it into place, and select the “Lite Ice Cream” button.
-
Once processing is complete, unlock and remove the bowl assembly from the ice cream maker and remove the lid. It’s common for low-fat recipes to appear icy or crumbly after the first spin. If needed, re-insert the pint and select “Re-spin” once or twice until you achieve a wonderfully creamy and smooth consistency. If the texture is still too dry, you can add 1-2 tablespoons of additional protein shake or milk before re-spinning.
-
With a silicone spatula or spoon, carefully create a small tunnel in the center of the ice cream, reaching down to the bottom of the pint. Add the halved Oreo Thins cookies into this hole. Reassemble the bowl into the machine and process using the “Mix-In” program to evenly distribute the cookie pieces throughout the creamy base.
-
Serve your delicious high-protein Oreo ice cream immediately and enjoy its soft-serve consistency!
