Irresistible No-Bake Strawberry Cheesecake Cups: Your Go-To Easy Summer Dessert
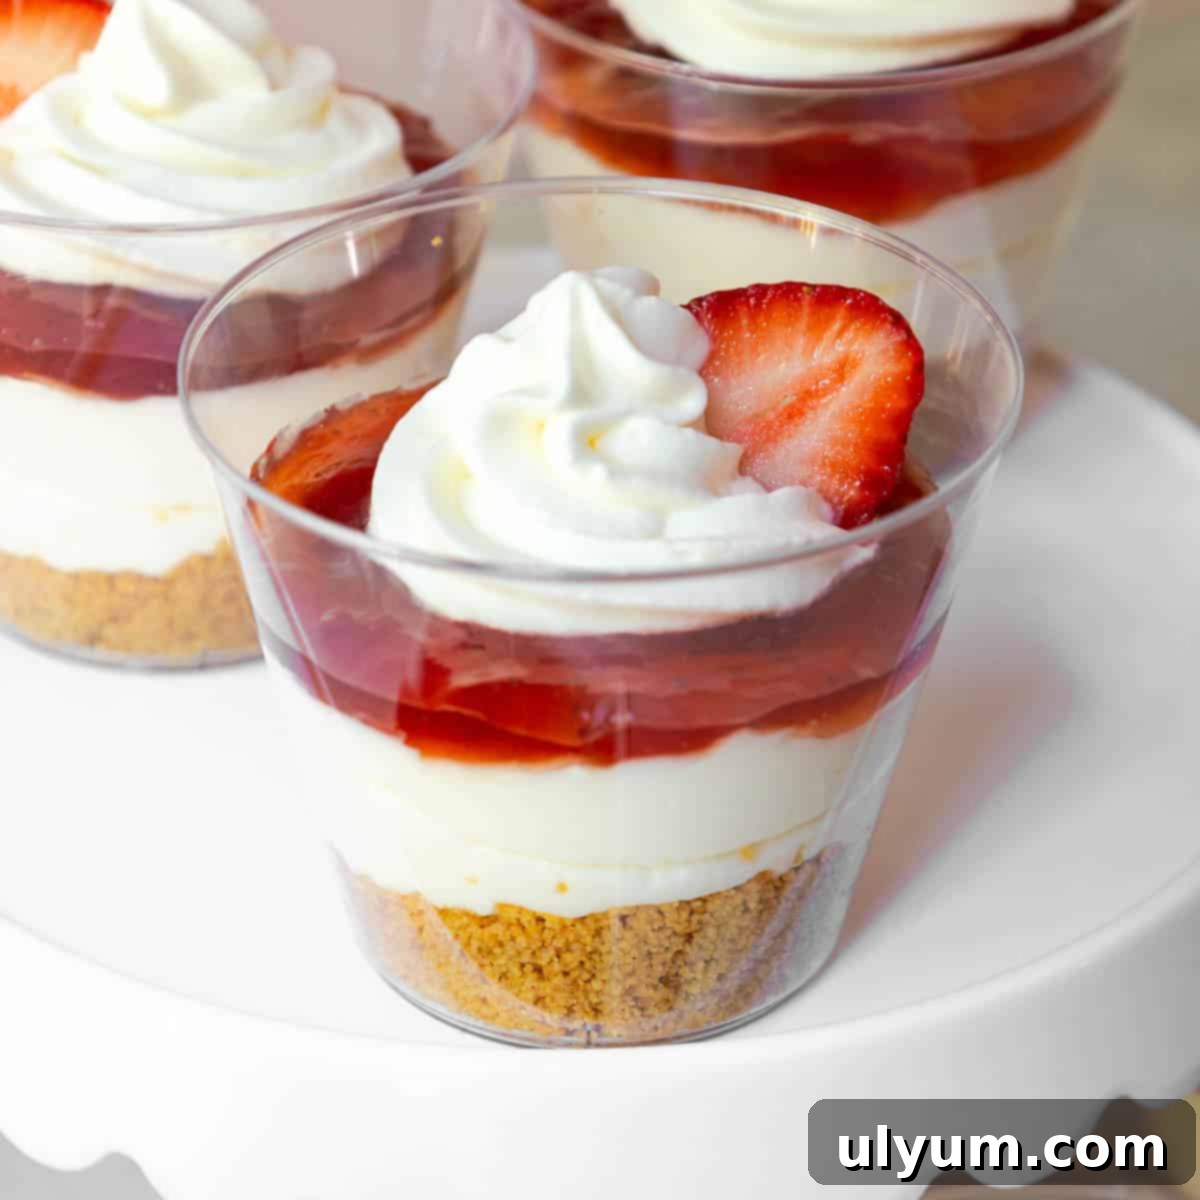
Prepare to fall in love with these delightful no-bake strawberry cheesecake cups. They are the epitome of a perfect summer dessert: rich, incredibly creamy, and beautifully layered with a buttery graham cracker crust, a luscious cheesecake filling, and a vibrant strawberry topping. What makes them truly special is their simplicity – they look stunningly impressive but take less than 30 minutes of active prep time, making them ideal for any occasion when you crave a sweet treat without turning on the oven.
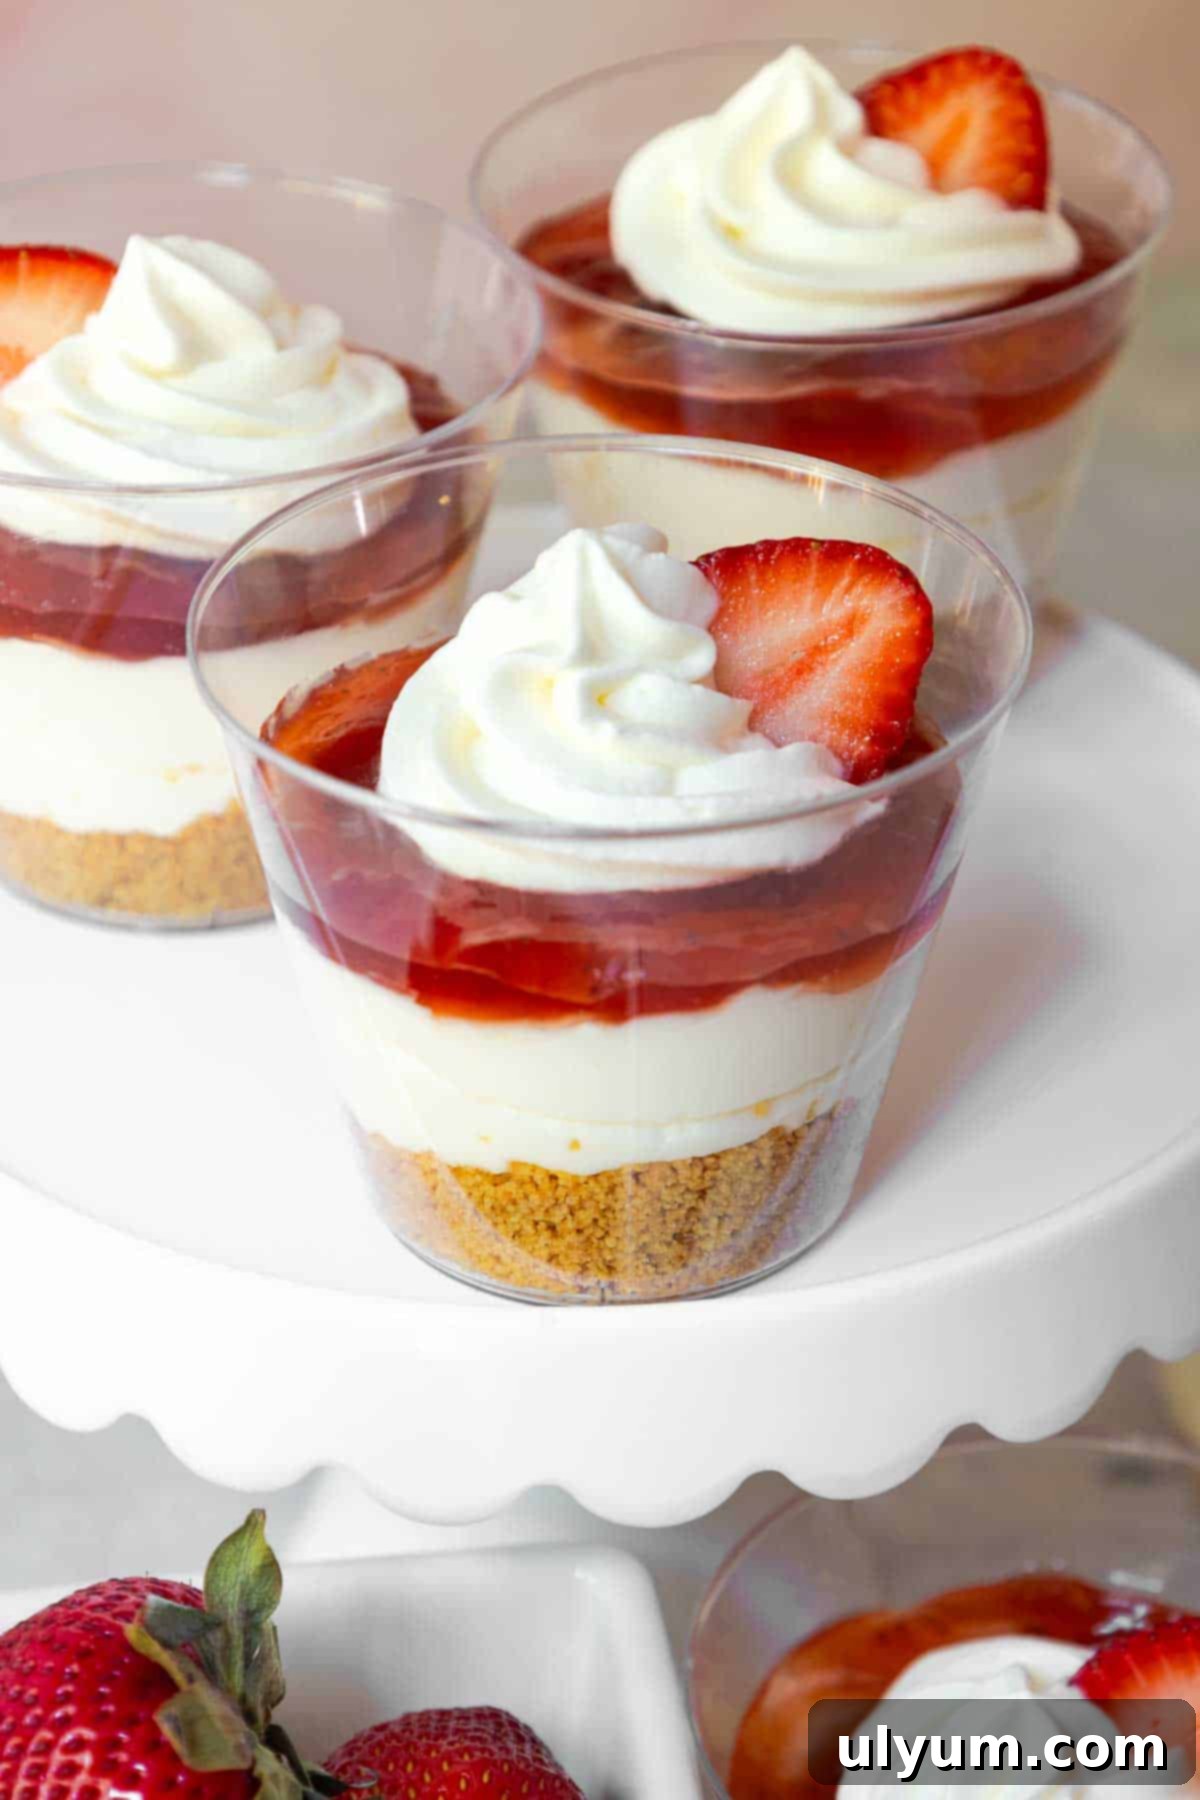
Each cup is a miniature masterpiece, featuring a cloud-like cheesecake filling made from a dreamy blend of whipped cream and softened cream cheese. This combination creates a fluffy yet smooth texture that simply melts in your mouth. Crowned with a generous dollop of luscious strawberry jam (or homemade strawberry sauce!) and an optional fresh strawberry slice, these individual portions deliver a classic cheesecake experience with a delightful berry twist.
If you’re a devoted fan of strawberry recipes, or simply seeking an effortlessly elegant no-bake dessert that everyone will adore, these strawberry cheesecake cups are your answer. They’re perfect for celebrating the peak of strawberry season or brightening any day with a burst of fruity sweetness. Don’t stop here! Be sure to also try my no-bake cheesecake cups with mixed fresh berries and my easy no-bake strawberry gelatin pie for more summery goodness.
Why You’ll Love These No-Bake Strawberry Cheesecake Cups
These cheesecake cups are more than just a dessert; they’re a stress-free ticket to sweet indulgence. Here’s why they’ll become your new favorite:
- Effortlessly No-Bake: Forget preheating ovens and complex baking steps! These strawberry cheesecake cups require absolutely no baking. Simply assemble your layers, chill, and enjoy. This makes them perfect for hot summer days or when you need a quick dessert solution.
- Perfect Individual Servings: Serving dessert has never been easier or more elegant. Each cup offers a perfectly portioned treat, making them ideal for entertaining, family gatherings, potlucks, bake sales, or simply enjoying a single serving without temptation. They’re neat, tidy, and utterly charming.
- Lightning-Fast Preparation: From start to finish, the active preparation time clocks in at under 30 minutes. Most of the “work” is just chilling time, allowing you to focus on other things while your delicious dessert sets up beautifully. Minimal effort, maximum flavor!
- Creamy & Dreamy Texture: The filling is a delightful fusion of whipped cream and cream cheese, resulting in an incredibly light, airy, and smooth texture that perfectly complements the crunchy graham cracker crust and the soft strawberry topping.
- Bursting with Fresh Strawberry Flavor: While the recipe uses strawberry jam for convenience, the option to garnish with fresh strawberry slices brings an authentic, bright, and tangy counterpoint to the sweet, rich cheesecake, especially during strawberry season.
- Visually Appealing: With their distinct layers of golden crust, creamy white filling, and vibrant red strawberry topping, these cups are as beautiful to look at as they are delicious to eat. They add a touch of sophistication to any dessert spread.
Essential Ingredients for Your Strawberry Cheesecake Cups
Crafting these delectable no-bake strawberry cheesecake cups requires just a handful of common ingredients. Each component plays a crucial role in building the layers of flavor and texture that make this dessert so irresistible. Here’s a closer look at what you’ll need and why:
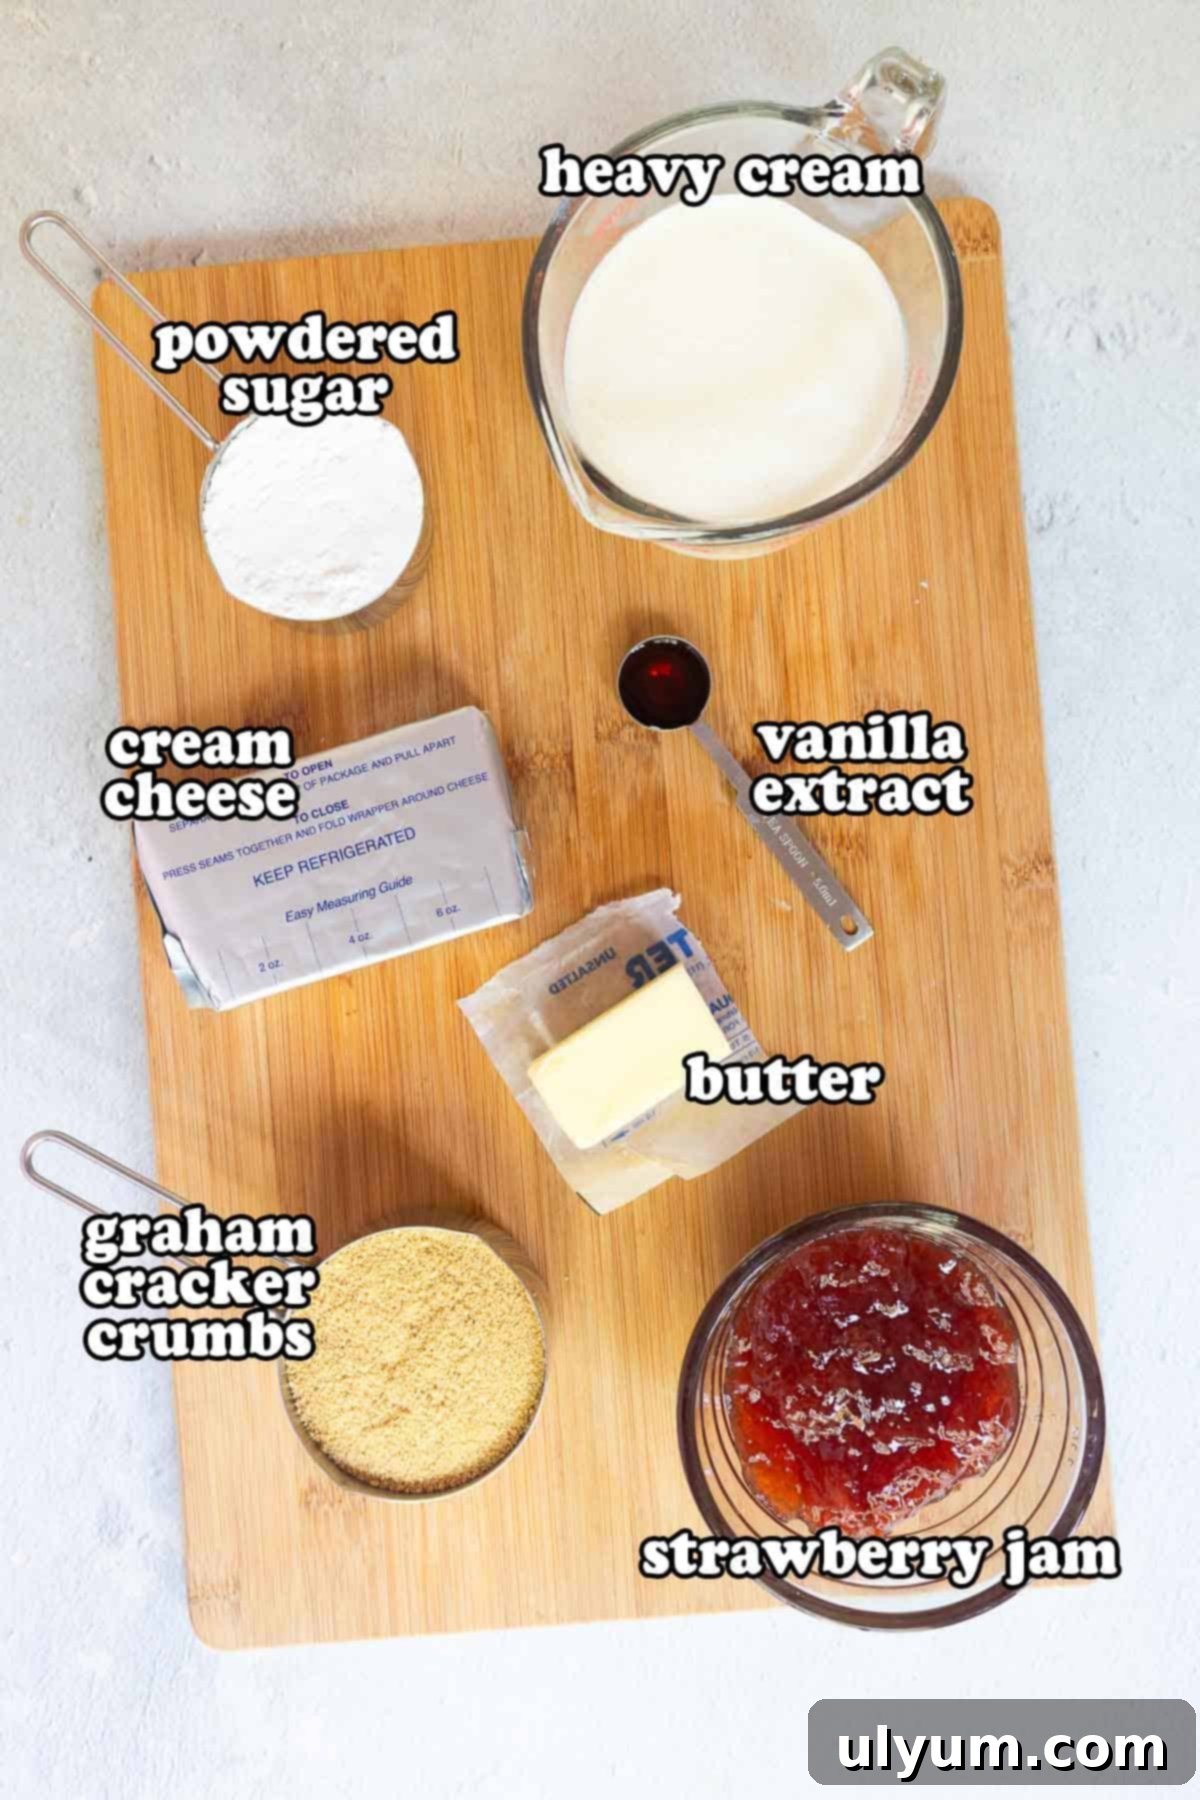
- Heavy Whipping Cream: This is the secret to a light and airy cheesecake filling. We’ll be making fresh, homemade whipped cream, which adds an unparalleled freshness and fluffiness. Don’t worry, it’s surprisingly quick and easy – just about 4 minutes of beating transforms it into soft, pillowy peaks.
- Powdered Sugar (Confectioners’ Sugar): Essential for both the whipped cream and the cheesecake mixture. Its fine texture dissolves easily, ensuring a silky-smooth consistency without any grittiness, providing just the right amount of sweetness.
- Pure Vanilla Extract: A classic flavor enhancer that deepens the taste of both the whipped cream and the cream cheese filling, adding a warm, aromatic note that complements the strawberry beautifully.
- Cream Cheese: The star of any cheesecake! For the creamiest, richest filling, always opt for full-fat cream cheese. It’s crucial to let it soften to room temperature before mixing, as this prevents lumps and ensures a perfectly smooth, luscious texture.
- Graham Cracker Crumbs: These form the delightful, crunchy base of our no-bake crust. You can easily make your own by crushing whole graham crackers in a food processor or a Ziploc bag with a rolling pin until fine, or save time by purchasing pre-made graham cracker crumbs from the baking aisle.
- Unsalted Butter: Melted butter binds the graham cracker crumbs together, creating a firm yet crumbly crust that holds its shape. It also adds a rich, buttery flavor that’s essential for a classic cheesecake base.
- Seedless Strawberry Jam: This provides the vibrant, sweet, and slightly tart strawberry layer, acting as a quick and convenient strawberry sauce. Using seedless jam ensures a smooth texture, but you could also use homemade strawberry sauce if you prefer. Just be sure it’s cooled before layering.
- Fresh Strawberries (optional): For an extra touch of elegance and fresh flavor, thinly sliced fresh strawberries make a perfect garnish. Add them just before serving for the best appearance and texture.
Refer to the recipe card below for precise quantities and detailed instructions.
Step-by-Step Guide: Crafting Your Cheesecake Cups
Making these no-bake strawberry cheesecake cups is a breeze, even for beginner bakers. Follow these simple steps for a truly impressive and delicious dessert:
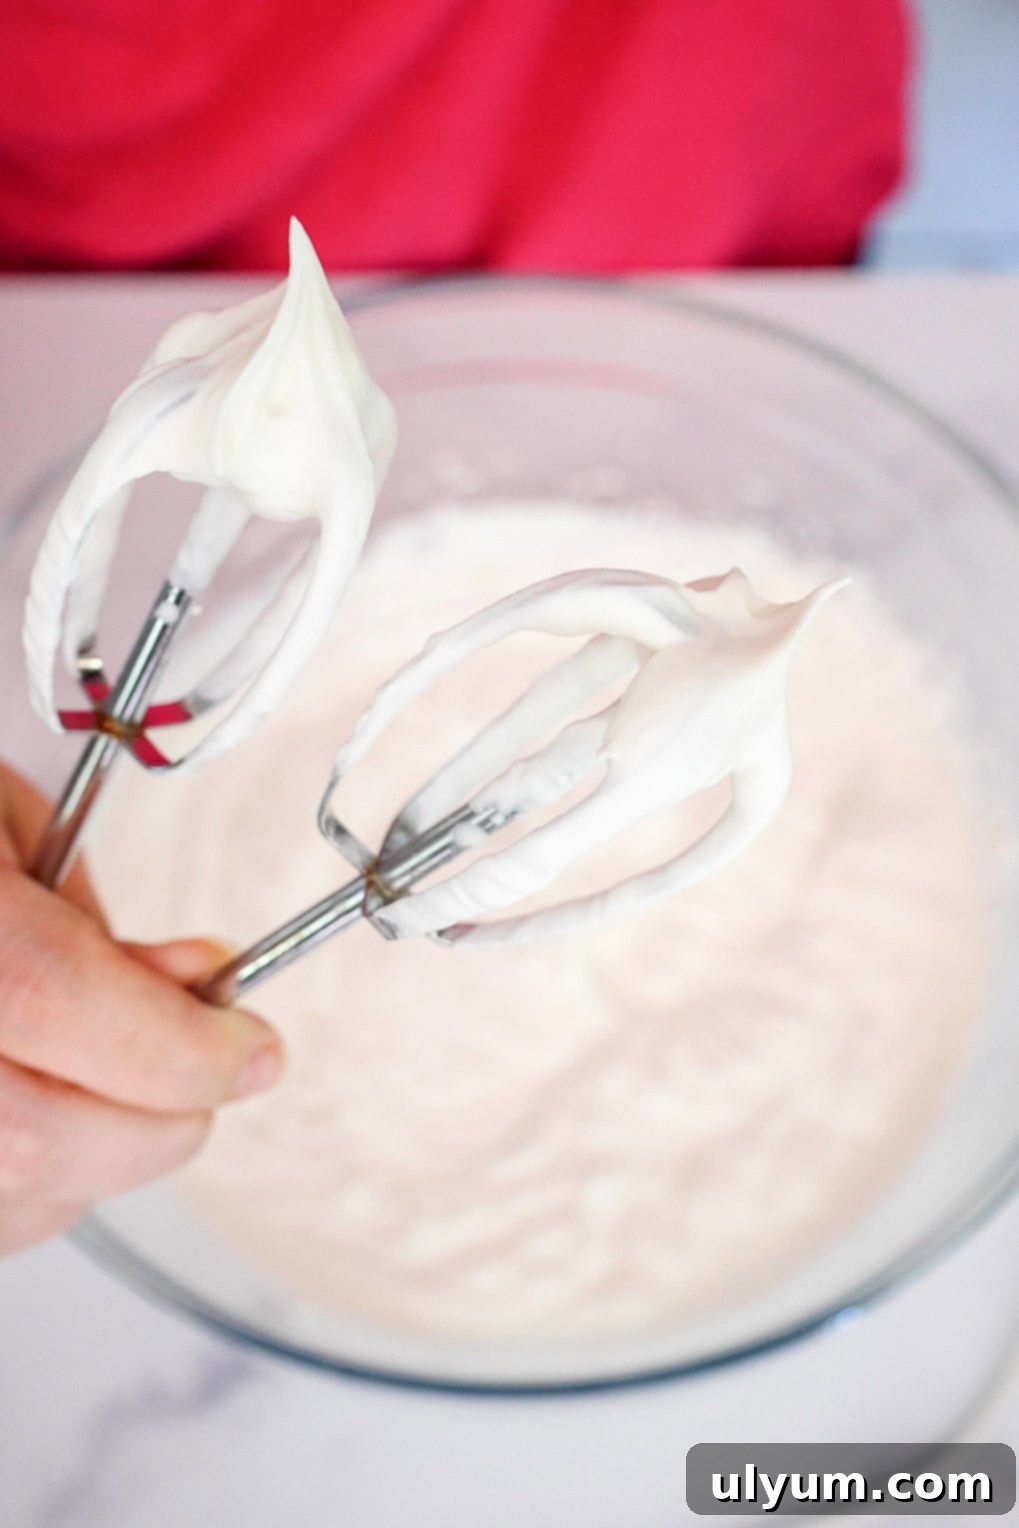
1. Prepare the Whipped Cream: In a large, pre-chilled mixing bowl, combine the heavy whipping cream, ¼ cup of powdered sugar, and the pure vanilla extract. Using an electric mixer (with chilled beaters, if possible!), begin beating the mixture on low speed, gradually increasing to medium-high. Continue beating for approximately 4 minutes, or until stiff peaks form. Be careful not to overbeat, as the cream can quickly turn into butter if beaten for too long.
Tip: A cold bowl and cold beaters are crucial for achieving perfectly whipped cream quickly and easily. Place your bowl and beaters in the freezer for 10-15 minutes before you start for the best results.
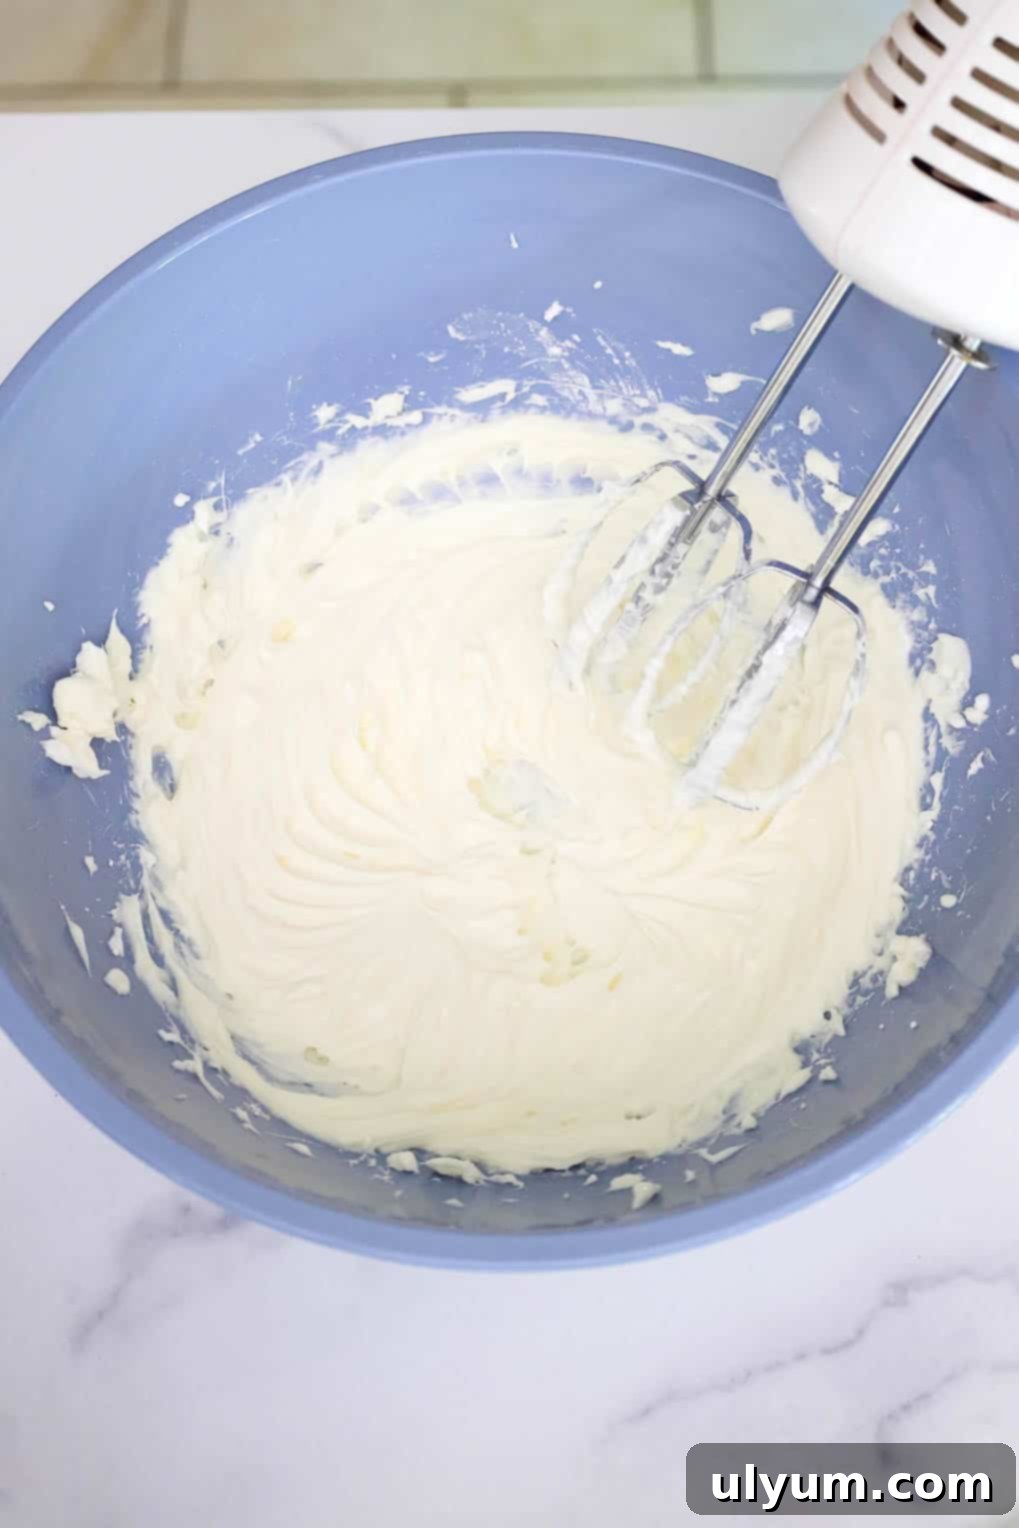
2. Create the Cream Cheese Base: In a separate large mixing bowl, beat the softened cream cheese with the remaining ¼ cup of powdered sugar. Use your electric mixer to beat until the mixture is completely combined, light, and perfectly smooth, with no lumps remaining. Ensure your cream cheese is at room temperature for the best results and an effortlessly smooth consistency.
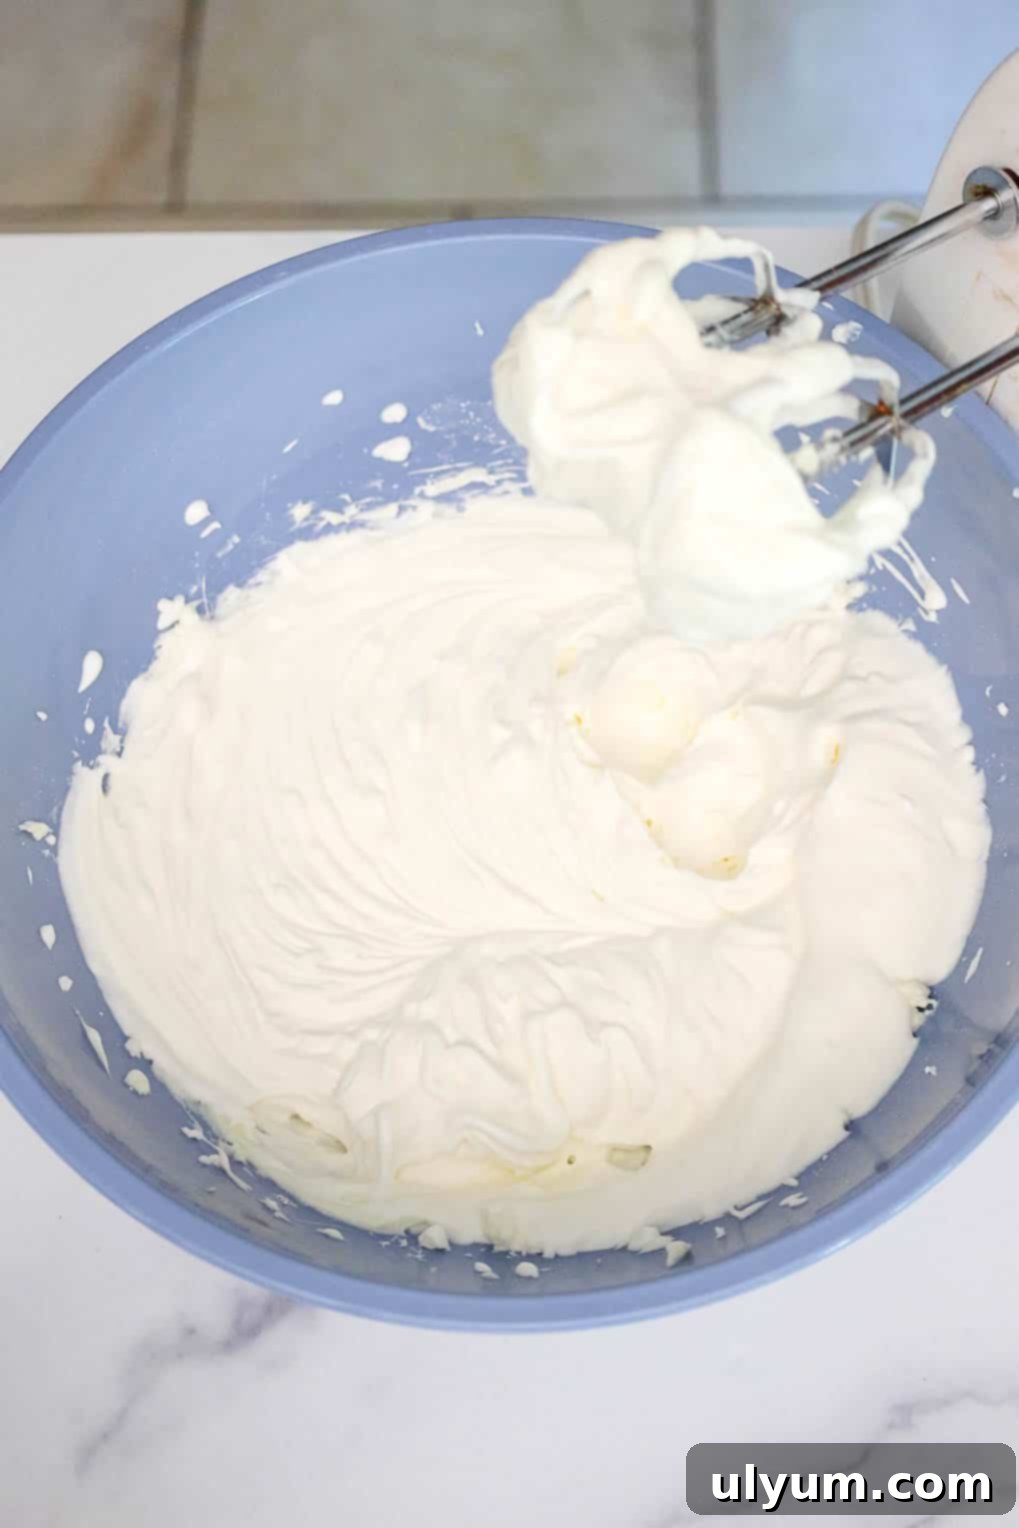
3. Combine for Cheesecake Filling: Carefully reserve one rounded cup of your freshly whipped cream and set it aside; this will be used for topping the cups later. Gently fold or mix the remaining whipped cream into the smooth cream cheese mixture on the lowest speed of your electric mixer until just combined. Be gentle to maintain the airy texture of the whipped cream, ensuring a light and fluffy cheesecake filling.
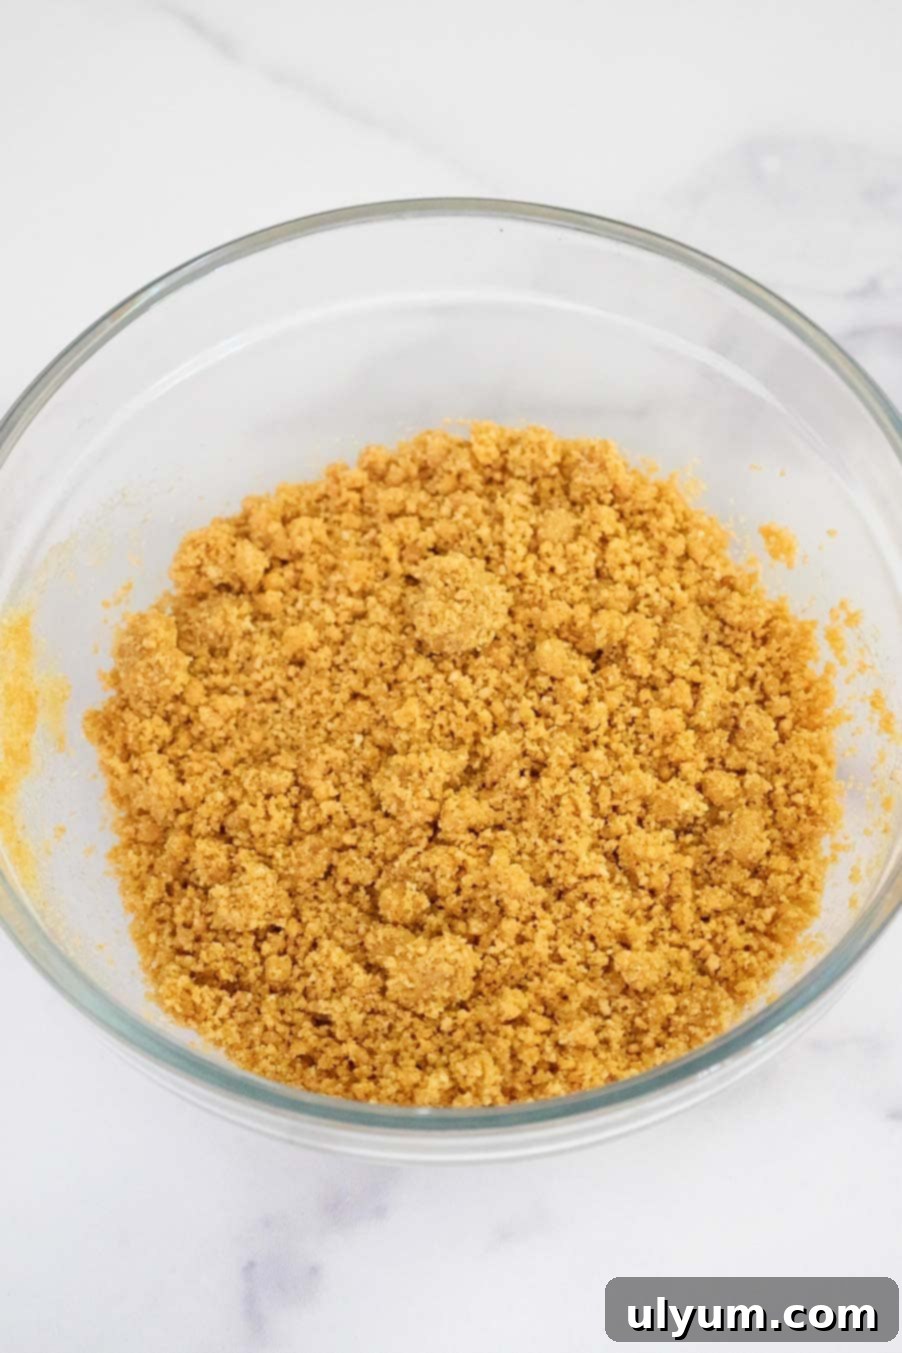
4. Prepare the Graham Cracker Crust: In a small bowl, combine the graham cracker crumbs with the melted butter. Mix thoroughly until all the crumbs are moistened and the mixture resembles wet sand. This creates a beautifully crumbly and flavorful crust that will form the base of your cheesecake cups. Do not pack the crust too firmly, as this can make it hard to scoop later.
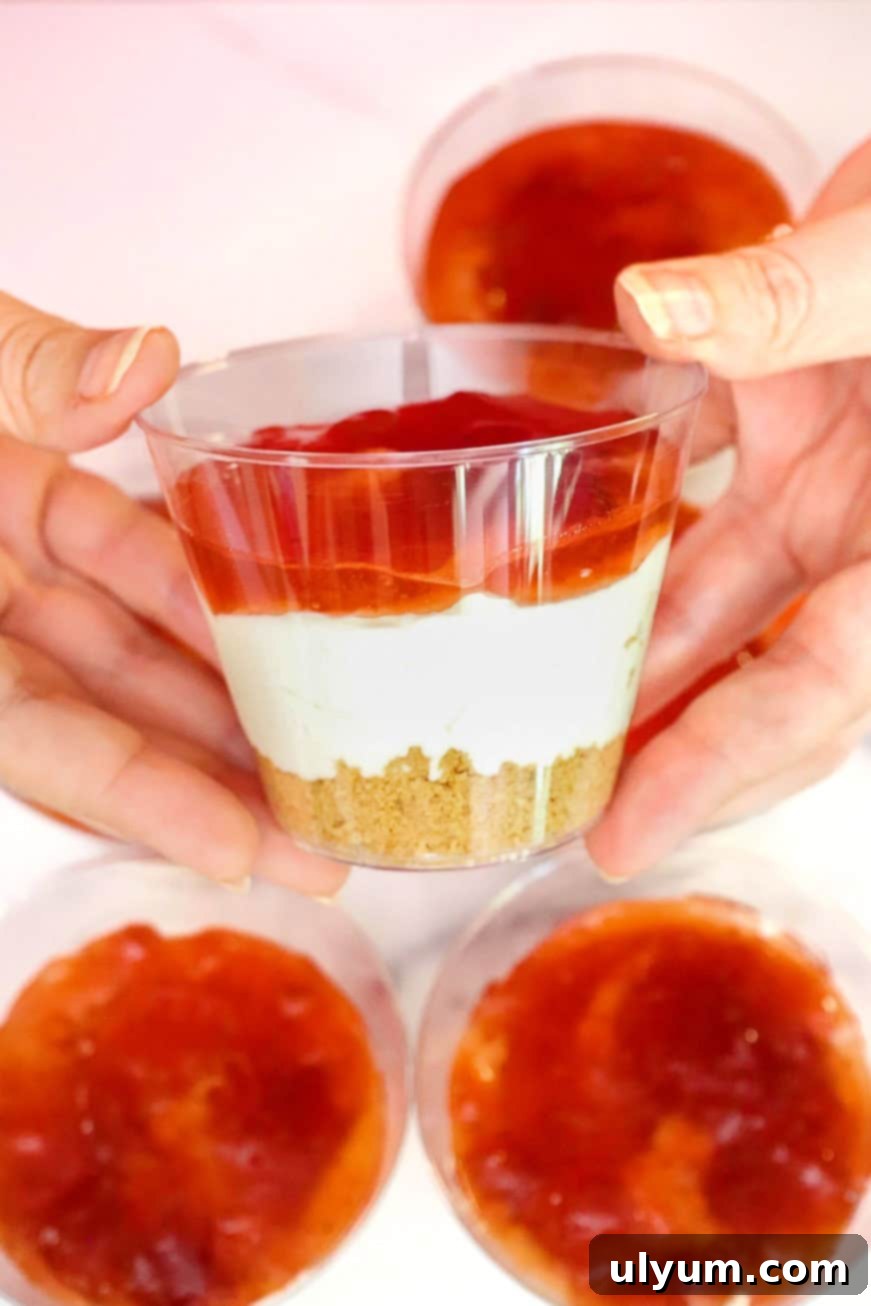
5. Assemble the Cups: Now for the fun part – layering! Evenly divide the graham cracker crust mixture among six 9-ounce dessert cups. Gently press the crust down with the back of a spoon, but remember our tip: do not pack it too firmly. Next, spoon or pipe in the cheesecake filling, followed by a layer of seedless strawberry jam. If your jam is too thick to spread easily, microwave it for 20-30 seconds in a microwave-safe bowl to soften it. Repeat the layers, ensuring you leave some space at the top. Finish each cheesecake cup with a generous swirl of the reserved whipped cream.
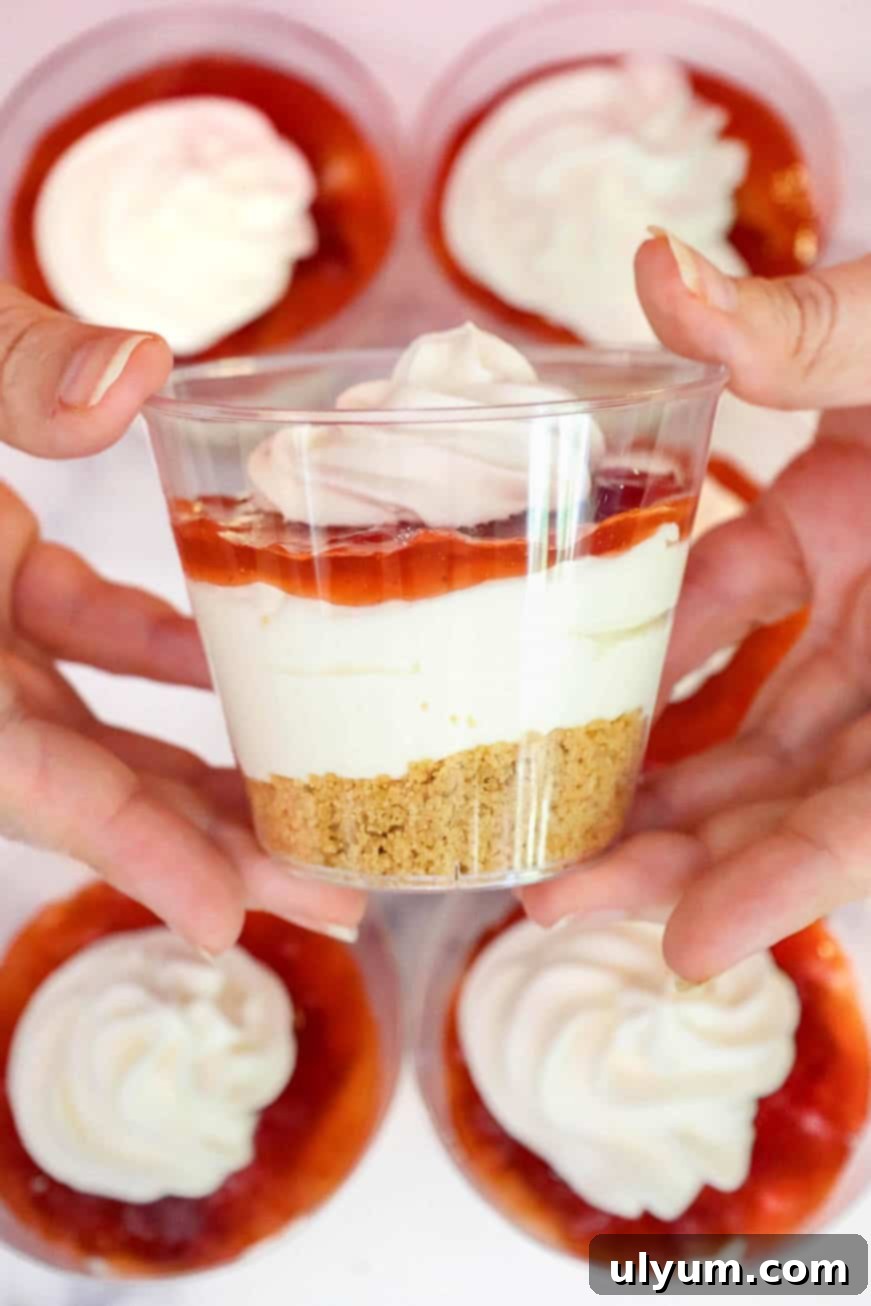
6. Chill and Serve: Once assembled, place the cheesecake cups in the refrigerator to chill for at least 20 minutes. This allows the layers to set and the flavors to meld beautifully. For the best presentation, wait to garnish with fresh strawberry slices until just before you’re ready to serve. Enjoy your perfectly portioned, creamy, and delightful strawberry cheesecake cups!
Pro Tip for Assembly: To ensure uniform portions and a beautiful presentation, build each layer across all six cups as you go, rather than completing one cup entirely before moving to the next. This makes it easier to distribute ingredients evenly.
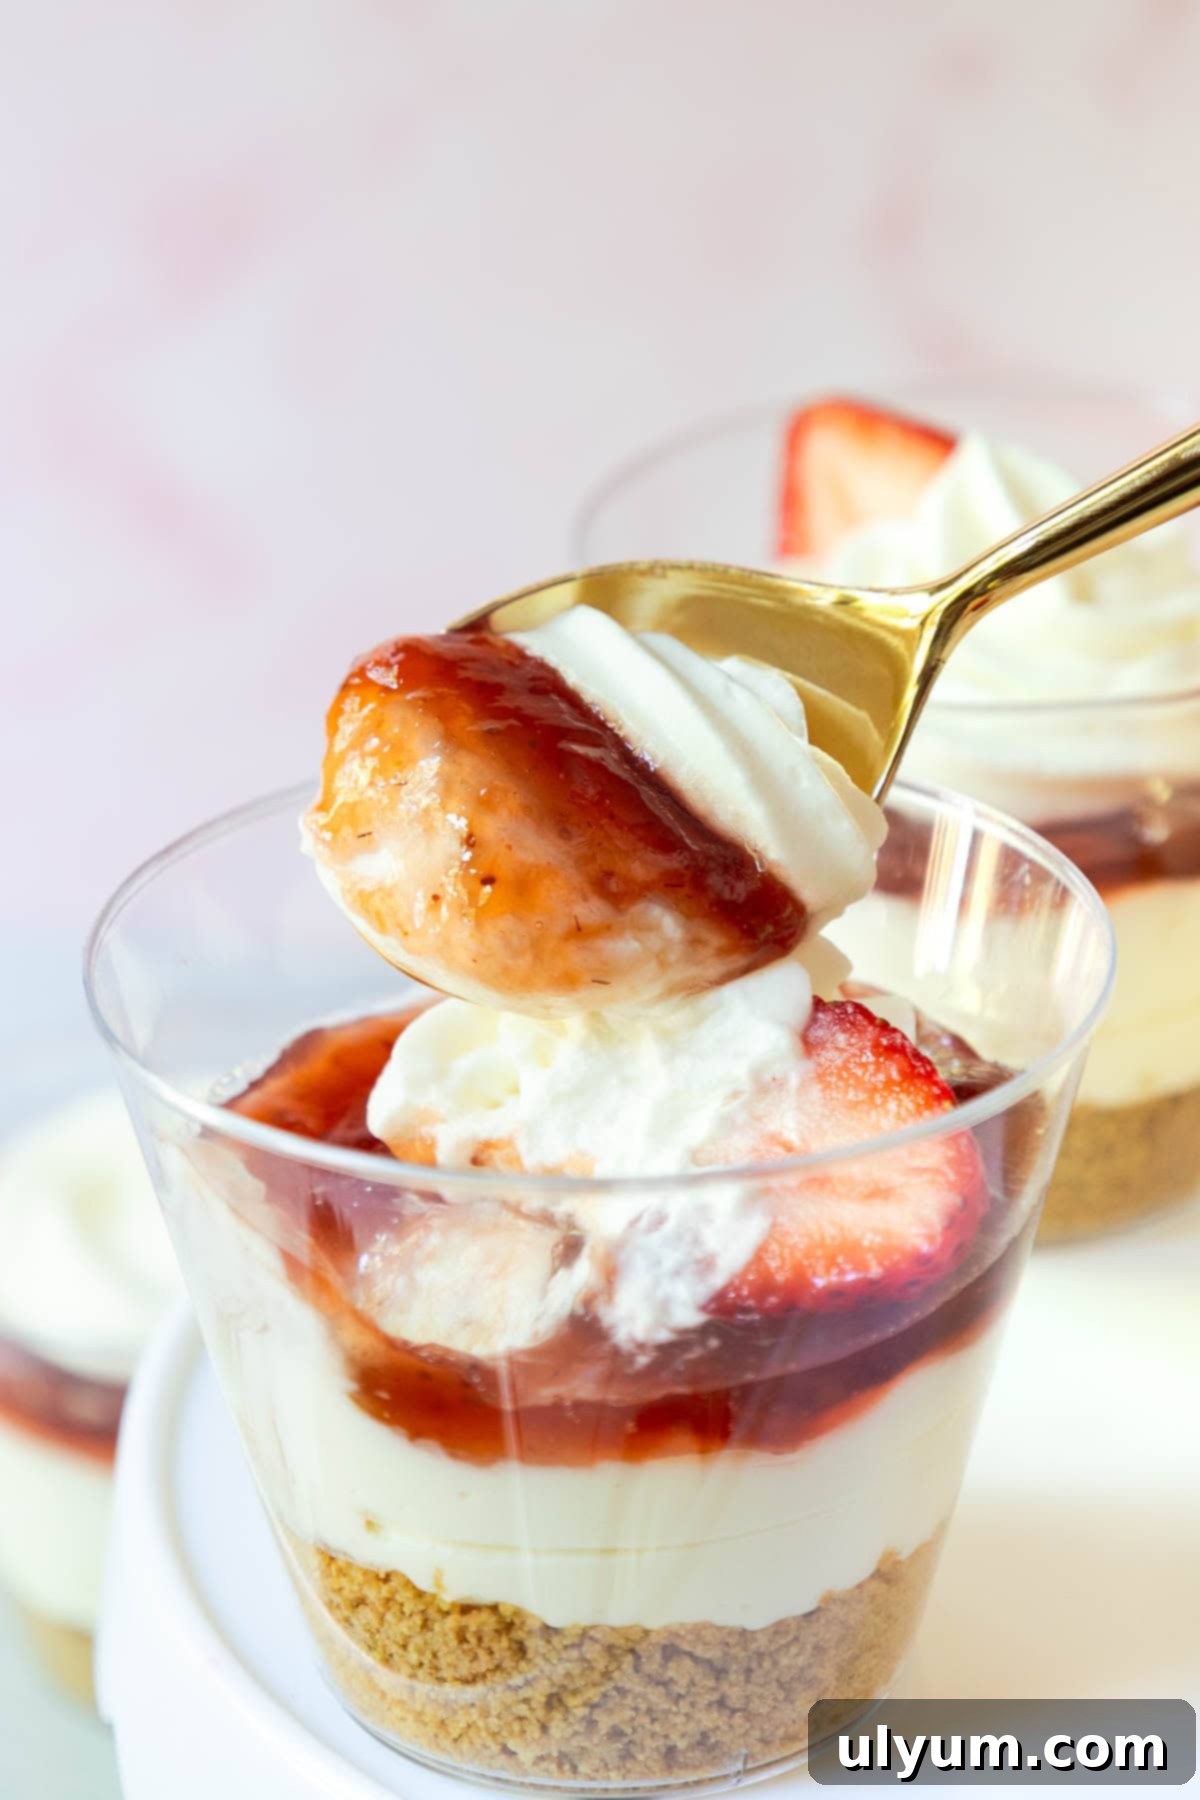
Garnish for Perfection: Just before serving, elevate the visual appeal and add a burst of freshness by garnishing each cheesecake cup with delicate fresh strawberry slices. This final touch makes the dessert truly irresistible. This step is optional but highly recommended!
Creative Substitutions & Delicious Variations
One of the beauties of these no-bake strawberry cheesecake cups is how adaptable they are! Feel free to experiment with these suggestions to make them your own:
- Heavy Whipping Cream Alternatives: If you’re looking for a shortcut or don’t have heavy cream on hand, you can easily substitute it with store-bought whipped topping, such as Cool Whip. Ensure that if you’re using frozen Cool Whip, it’s fully defrosted in the refrigerator for at least 4 hours before incorporating it into the recipe to achieve the right consistency.
- Graham Cracker Crumbs Swap: Not a fan of graham crackers, or simply want to try something different? Crushed vanilla wafers, shortbread cookies, or even digestive biscuits make excellent alternatives for the crust, each lending a slightly different flavor profile. For a chocolate twist, consider using crushed Oreo cookies (cremes removed) for a decadent chocolate-strawberry combo!
- Fruit Topping Variations: While strawberry jam is classic, don’t limit yourself! Try other fruit jams like raspberry, blueberry, or cherry for different flavor experiences. You could also make a quick fresh fruit compote or use a simple berry puree. For a truly fresh experience, make a homemade strawberry sauce using fresh strawberries, sugar, and a touch of lemon juice.
- Adding Fresh Fruit: Beyond the strawberry topping, you can gently fold finely diced fresh strawberries into the cheesecake filling itself for an extra burst of fruit in every bite.
- Citrus Zest: A little lemon or orange zest folded into the cream cheese mixture can brighten the flavors and add a delightful tang that perfectly complements the strawberries.
- Chocolate Drizzle: For chocolate lovers, a light drizzle of melted dark or white chocolate over the finished cups before chilling can add an extra layer of decadence.
- Spice it Up: A pinch of cinnamon or nutmeg in the graham cracker crust can add a warm, comforting note, especially during cooler months.
Essential Equipment for Success
To whip up these amazing no-bake strawberry cheesecake cups with ease, you’ll need a few basic kitchen tools. Most are standard items you likely already have, but here’s a breakdown of what makes the process smoother:
- Mixing Bowls: You’ll need at least two large mixing bowls – one for whipping the cream and another for the cream cheese mixture. Having one extra small bowl for the crust is also helpful. Chilling one of your large bowls beforehand for the whipped cream is a game-changer!
- Electric Mixer (Hand Mixer or Stand Mixer): This is a must for achieving perfectly whipped cream and a smooth cream cheese filling without a lot of arm strain. While you *can* whip heavy cream by hand, it requires significant elbow grease and takes much longer. An electric mixer makes the process quick and effortless.
- Silicone Spatula: Perfect for scraping down the sides of your mixing bowls, ensuring all ingredients are thoroughly incorporated, and gently folding the whipped cream into the cheesecake mixture without deflating it.
- Dessert Cups: For this recipe, I recommend using six 9-ounce clear plastic cups to showcase the beautiful layers. These are perfect for individual portions. Alternatively, you could make smaller mini versions by splitting the dessert into twelve 4-ounce cups or even charming Mason jars for a rustic touch.
- Measuring Cups & Spoons: Essential for accurate ingredient measurements, ensuring the perfect balance of flavors and textures.
- Food Processor (optional): If you’re crushing whole graham crackers, a food processor makes quick work of turning them into fine crumbs. If you don’t have one, a sturdy plastic bag and a rolling pin will do the job just fine!
Expert Tips for No-Bake Cheesecake Perfection
I absolutely adore creating easy no-bake recipes, especially for those warmer spring and summer gatherings when the thought of turning on the oven is simply unbearable. These effortless strawberry cheesecake cups have become a huge hit with my family and friends, always bringing smiles and satisfied sighs.
Over time, I’ve gathered a few key insights to ensure your no-bake cheesecake cups turn out perfectly every single time:
- Do NOT Pack the Crust: This is my top, most crucial tip! While it might be tempting to firmly press down the graham cracker crumbs, resist the urge. A hard-packed crust becomes incredibly difficult to scoop once it’s chilled and the butter solidifies. A gently pressed, slightly looser crust provides a much better eating experience.
- Add Strawberries (and other fresh fruit) Last: If you’re garnishing with fresh fruit slices, always add them just before serving. Fresh strawberries have a tendency to “weep” or release their juices over time, which can make your beautifully layered dessert soggy and affect the texture of the whipped cream.
- Chill Your Bowl and Beaters: For the quickest and most stable whipped cream, place your mixing bowl and electric mixer beaters in the freezer for 10-15 minutes before you start. Cold equipment helps the cream whip up faster and hold its stiff peaks longer.
- Room Temperature Cream Cheese is Key: Don’t rush this step! Softened cream cheese blends smoothly with powdered sugar, preventing lumps and ensuring a velvety cheesecake filling. If your cream cheese is cold, it will result in a lumpy texture, no matter how long you beat it.
- Gentle Folding for Lightness: When combining the whipped cream with the cream cheese mixture, use a silicone spatula and fold gently. Overmixing will deflate the air you’ve worked so hard to incorporate into the whipped cream, leading to a denser filling.
- Even Layers Matter: As you assemble, try to divide the crust, filling, and jam evenly among all your cups. This creates a visually appealing dessert and ensures each bite offers a balanced flavor profile.
- Warm Thick Jam Slightly: If your strawberry jam is particularly thick, a quick 20-30 second zap in the microwave will loosen it up, making it much easier to spoon and spread smoothly over your cheesecake layer.
Storage and Make-Ahead Instructions
These individual no-bake strawberry cheesecake cups are wonderfully convenient, especially when planning ahead. Here’s how to store them for optimal freshness and how to prepare them in advance:
- Short-Term Storage (Assembled): Once assembled with all layers (crust, filling, jam, and whipped cream), I recommend consuming these cheesecake cups within 24 hours for the absolute best texture. While they can be stored in the refrigerator for up to 3-4 days, you might notice that the strawberry jam layer will gradually start to seep into the cheesecake mixture over time, affecting the crispness of the layers. Always cover them tightly with plastic wrap to prevent them from absorbing refrigerator odors and to keep them fresh.
- Make-Ahead Strategy (Unassembled): If you want to prepare these further in advance, it’s best to make the components separately and assemble them closer to serving time.
- Graham Cracker Crust: Prepare the graham cracker and butter mixture and store it in an airtight container at room temperature for up to 2 days, or in the refrigerator for up to 4 days.
- Cheesecake Filling: Prepare the cream cheese and whipped cream filling (steps 1, 2, and 3) and store it in an airtight container in the refrigerator for up to 2 days. Give it a gentle whisk before assembling if it appears a bit stiff.
- Strawberry Jam: Store the strawberry jam in its original container or an airtight jar at room temperature or in the refrigerator according to package directions.
- Assembly: Assemble the cups (crust, filling, jam layers) no more than 24 hours before serving. Wait to add the final swirl of reserved whipped cream and any fresh strawberry garnishes until just an hour or two before you plan to serve them. This will keep the whipped cream looking fresh and prevent the fresh strawberries from weeping.
- Freezing: I do not recommend freezing these cheesecake cups once assembled. The texture of the whipped cream and cream cheese filling can become grainy after thawing, and the graham cracker crust can become soggy. These are definitely best enjoyed fresh and chilled from the refrigerator.
Did you make this recipe? I’d love to hear what you think! Please take a moment to leave a rating and review—it helps me create high-quality recipes and lets others know what to expect.
Frequently Asked Questions About No-Bake Strawberry Cheesecake Cups
For standard individual servings, I recommend using six 9-ounce clear plastic cups. If you prefer smaller, mini versions perfect for a tasting party or children, you can use twelve 4-ounce plastic cups or charming small Mason jars for a rustic touch.
Absolutely! Homemade strawberry sauce will elevate the fresh berry flavor even further. Just ensure the sauce is completely cooled before you add it as a layer to your cheesecake cups. A warm sauce can melt the cream cheese filling, ruining the beautiful layers and texture.
Yes, you can use low-fat cream cheese as a substitute. However, please note that the texture of your cheesecake filling will be less rich, and potentially a bit less firm, compared to using full-fat cream cheese. Full-fat cream cheese provides the optimal creamy consistency and decadent flavor for this recipe.
The key is not to pack the graham cracker crust too firmly into the cups. A gentle press is all that’s needed. If the crust is too dense, the butter solidifies in the refrigerator, making it very hard to get a spoon through when serving.
Ensure your heavy cream is very cold, directly from the refrigerator. Also, chilling your mixing bowl and beaters in the freezer for 10-15 minutes beforehand can significantly help. Humidity can also affect whipping cream, so try to whip it in a cooler environment if possible. If all else fails, a teaspoon of cream of tartar can act as a stabilizer.
Definitely! This recipe is incredibly versatile. You can easily swap out the strawberry jam for raspberry, blueberry, or cherry jam. For fresh garnishes, consider blueberries, raspberries, or sliced peaches depending on the season and your preference. Just be mindful that some fruits may release more liquid.
📖 Recipe: No-Bake Strawberry Cheesecake Cups
Pin Recipe
Save RecipeSaved!
Email
Print
No-Bake Strawberry Cheesecake Dessert Cups
Equipment
-
Mixing bowls
-
Hand mixer
-
Silicone spatula
-
9 oz Clear Plastic Cups
Ingredients
- 1-½ cups heavy whipping cream
- ½ cup powdered sugar divided
- 1 teaspoon pure vanilla extract
- 8 oz cream cheese softened to room temperature
- 1 cup graham cracker crumbs
- ¼ cup unsalted butter melted
- ¾ cup seedless strawberry jam
- sliced fresh strawberries optional for garnish
Instructions
-
1. WHIPPED CREAM: Add the heavy whipping cream, ¼ cup powdered sugar, and vanilla extract to a chilled large mixing bowl. Using an electric mixer with chilled beaters, beat the heavy cream mixture for about 4 minutes or until stiff peaks form, gradually increasing the speed from low to medium-high. Be careful not to overbeat, as the cream can turn into butter.
-
2. CREAM CHEESE: In a second large mixing bowl, beat the softened cream cheese and ¼ cup powdered sugar with the electric mixer until it is completely combined and smooth, with no lumps.
-
3. COMBINE: Reserve one rounded cup of whipped cream for topping, setting it aside. Gently mix the remaining whipped cream into the cream cheese mixture on low speed with the electric mixer or fold with a spatula until just combined, being careful not to deflate the cream.
-
4. CRUST: In a small bowl, mix the graham cracker crumbs and melted butter until well combined and the mixture has a crumbly, sand-like texture.
-
5. ASSEMBLE: Evenly divide the graham cracker crust among six 9-ounce dessert cups, pressing gently (do not pack firmly). Next, layer with the cheesecake filling, then the strawberry jam. If the jam is thick, warm it for 20-30 seconds in the microwave to make it easier to spread. Repeat layers if desired, and top each cheesecake cup with a large swirl of the reserved whipped cream.
-
6. CHILL: Chill for at least 20 minutes, or until ready to serve. Just before serving, garnish with fresh strawberry slices (optional).
Video
Notes
Nutrition
More Delicious No-Bake Desserts You’ll Love
If you enjoyed the simplicity and deliciousness of these no-bake strawberry cheesecake cups, you’re in for a treat! Here are some other fantastic no-bake recipes that are perfect for any occasion, especially when you want a delightful dessert without the oven:
- Strawberry Cheesecake Dip with Cool Whip
- Cool Whip Marshmallow Fruit Dip
- Strawberry Cheesecake Dessert Cups (This recipe!)
- Peach Jello Pie with Canned Peaches
